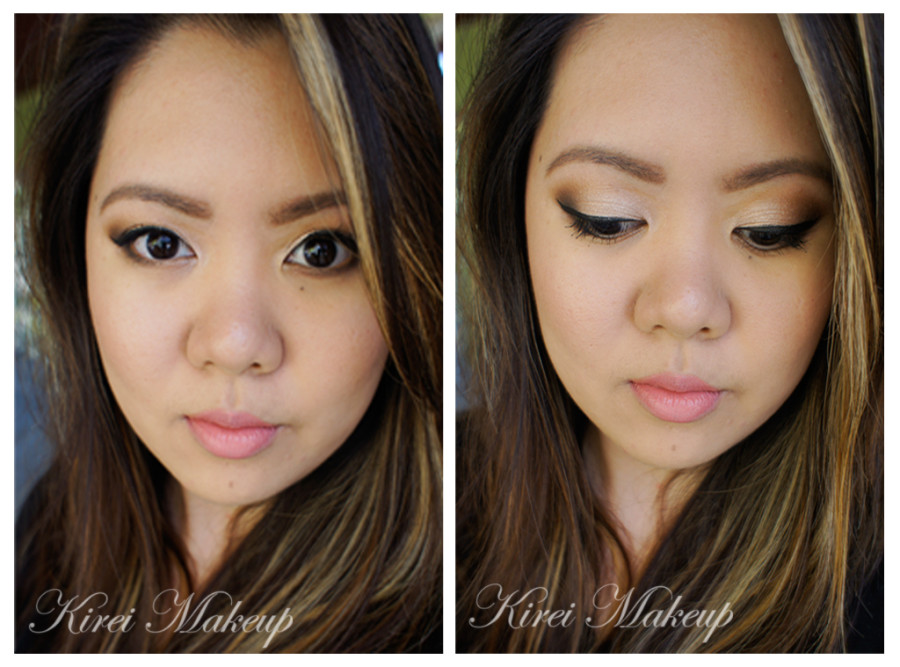
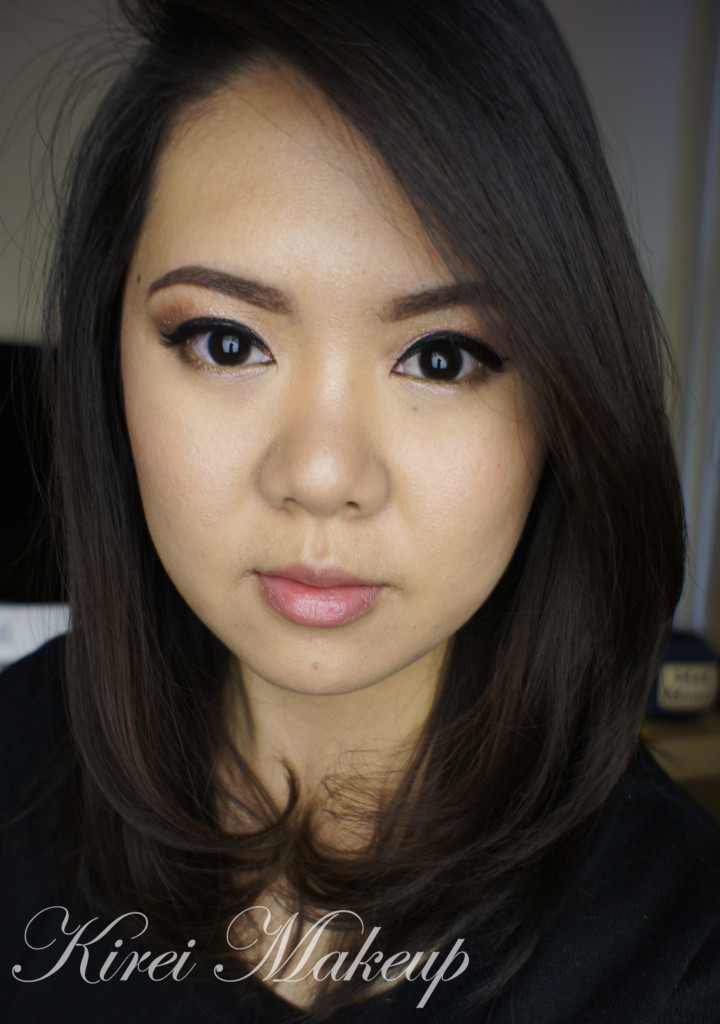
Today I want to share my No-makeup Makeup tutorial, since I feel like lately everyone is doing such heavy full on makeup. This no-makeup makeup look focuses more on creating beautiful skin and keeping everything else in the down low. The purpose of this tutorial is to show you guys that you can achieve a beautiful look without going overboard with extreme contouring/overlining and everything else. Read more below to find out more about this tutorial.
Tag: natural makeup
Korean Inspired Makeup for Everyday
Lately I’ve been into Korean makeup, which focuses more in creating a watery moist complexion. This look is all about looking youthful without going overboard. Nothing cakey, no over-contouring or dramatic brows at all. If you want to find out how I achieve this look, please watch my videos or read more below.
Simple Makeup using Smashbox Full Exposure Palette
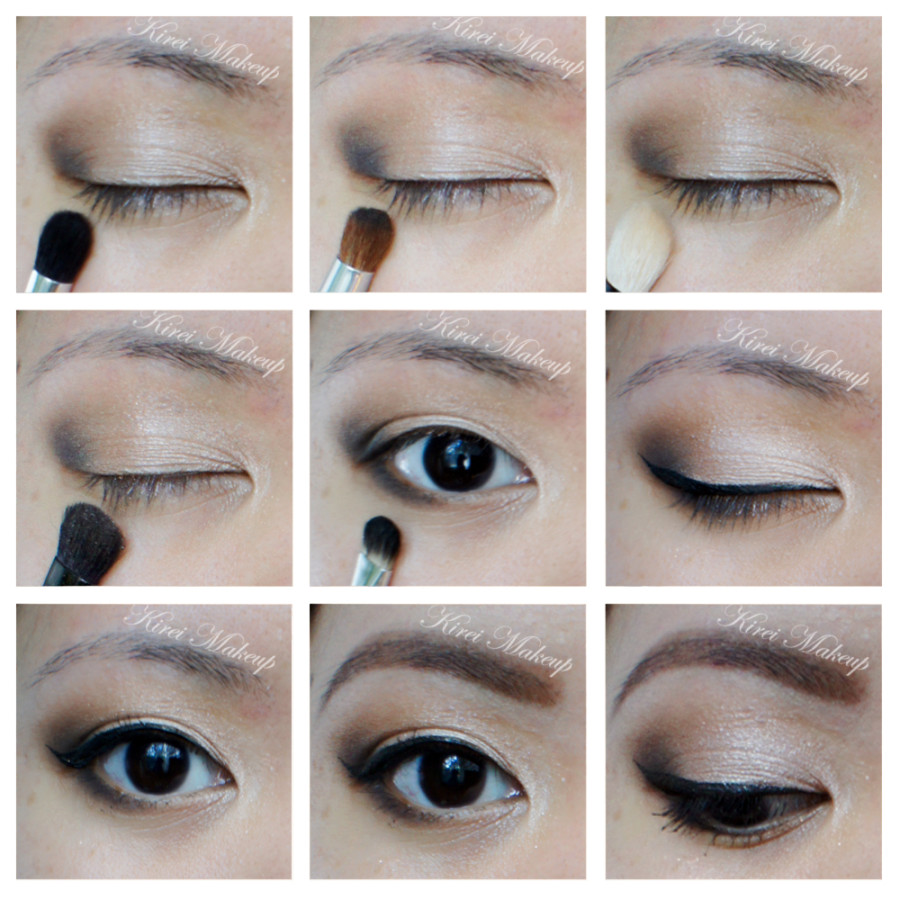
Today I wanted to share this oh-so simple makeup look. This is the look that I wore last night for a friend’s birthday dinner (check my instagram), and seemed to be wearing it almost quite often lately. The makeup itself is very easy, perfect for beginners if you want to do something different with your look. I think the only tricky part of this look is the eyeliner, but you can skip the winged eyeliner if you prefer. This is a very basic eyeshadow application technique, and you can obviously change the colors of the eyeshadow to whatever you like.
I’ve done something very similar to this look in my other Smashbox Full Exposure tutorial, but that one is more dramatic (with falsies and more liner, and slightly more smoky). If you prefer a smokier look, I’ve done 2 tutorials using this palette right here and here. I’ve also done swatches and a Smashbox Full Exposure palette review.
Scroll all the way down for complete product list.
How-to:
1. I prepped my lid using Urban Decay Primer Potion in Sin.
2. Using a Sephora bullet crease brush, I applied M1 on the outer V of my eyelid, blending the color to my crease.
3. Using a clean bullet crease brush, I applied M7 on just the outer part of the eye.
4. Using a clean Smashbox fluffy blending brush (from the palette itself), I applied a mixture of M2 and M3 on the crease (the picture doesn’t seem to catch those colors since it’s very close to my skin color).
5. Using the flat-end of the Smashbox brush, I applied S3 on my eyelid.
6. Using a small shader brush, I applied M7 on the outer half of my lower lid.
7. I created a winged eyeliner using Kanebo Kate Super Sharp eyeliner.
8. I curled my lashes and applied Cover Girl Lash Blast mascara.
9. I filled my brows using Anastasia Duo Brow Powder in Brunette.
10. For my face, I applied Urban Decay Naked Skin foundation using a damped sponge.
11. I applied Smashbox contour powder (from the contour/highlight trio kit) under my cheeks.
12. I applied MAC Dainty on my cheeks.
13. For the lips, I applied MAC Please Me lipstick and a little bit of lip balm.
Product used
Eyes – Urban Decay Primer Potion Sin; Smashbox Full Exposure palette; Kanebo Kate Super Sharp eyeliner; Cover Girl lash blast mascara; Anastasia Duo Brow Powder
Face – Urban Decay Naked Skin foundation; Smashbox trio contour kit; MAC Dainty blush
Lips – MAC Please Me lipstick; L’occitane lip balm
Rose Gold Holiday Makeup
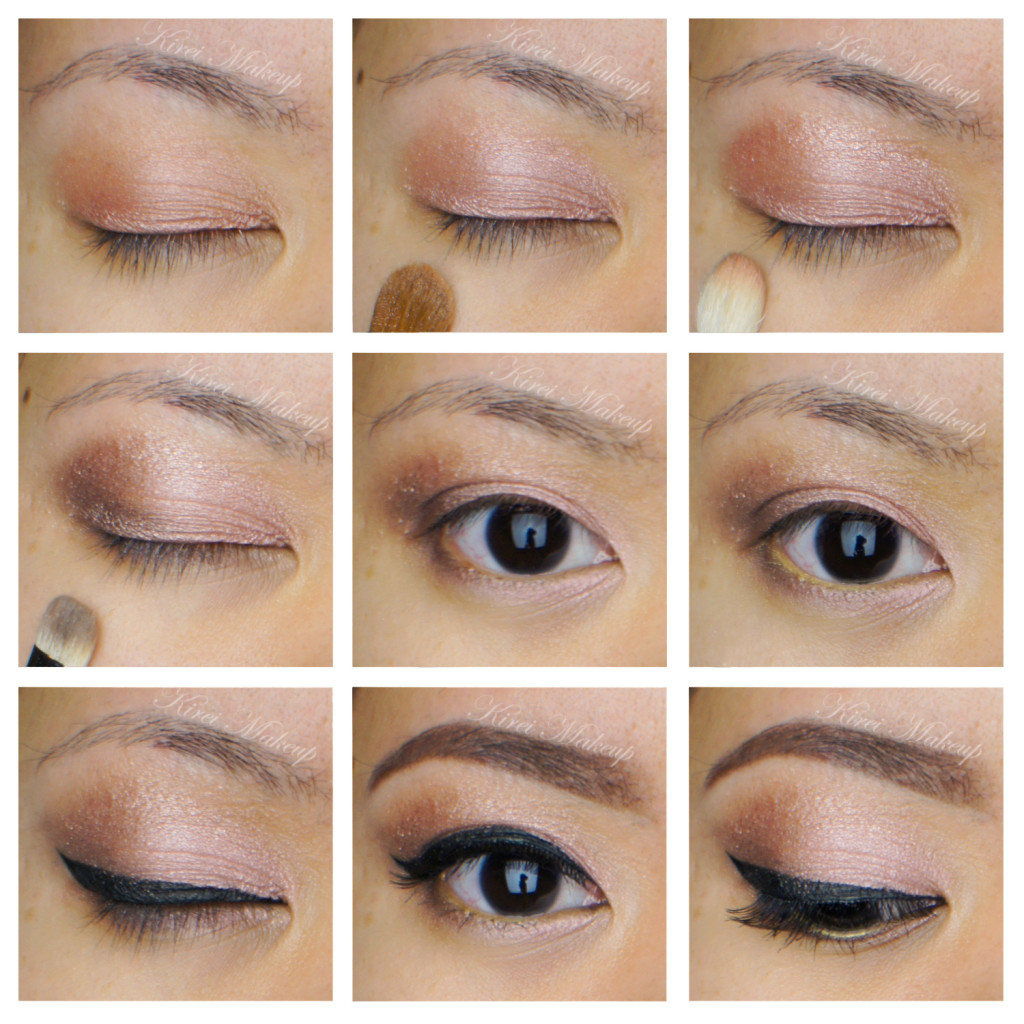
I’ve done gold/brown makeup, a silver smoky eyes makeup, natural looking makeup, as well as bold lips holiday makeup. Today, I wanted to do another more wearable, soft and easy holiday makeup. I used Rose Gold since I think it’s fun and feminine. This tutorial is for those of you who are girly, and want to look more on the natural low-key for the holiday. I also feel that this look will be good for those with deep set eyes.
The idea is similar to the Fresh Dewy makeup tutorial post couple days a go. The eyes are simple and high in shimmer, the face is semi-matte and natural finish. This look suits those who don’t like to wear heavy makeup. Everything is very simple and light. You can skip the eyeliner altogether, and just wear mascara. I just like the look of a cat/winged eyeliner to frame my eyes. 
How-to:
1. I applied Bobbi Brown Rose Gold long wearing cream eyeshadow on my eyelid using my ring finger.
2. Using a flat eyeshadow, I applied the middle color from the Bobbi Brown Shimmer Brick in Rose Gold on my eyelid to add extra shimmer.
3. Using a fluffy blending brush, I applied the darkest rose gold shimmer from the Bobbi Brown Shimmer Brick in Rose Gold on the crease.
4. Using a small shader brush, I applied L’oreal Infallible eyeshadow in Bronzed Taupe on the outer V.
5. I applied the same rose color on step no. 2 on the lower lid, and then L’oreal Bronzed Taupe on the outer half of the lower lid.
6. Using MUFE aqua cream shadow no. 11 on the waterline just to add the extra gold in it. Of course you do not have to use gold for this. You can use black, beige, white, or anything you want!
7. I created a winged eyeliner using Kanebo Kate Super Sharp eyeliner on the upper lash line.
8. I filled my brows using Anastasia brow wiz in Brunette.
9. I curled my lashes and applied mascara, as well as Ardell no. 109 false eyelashes on the upper lashes. I also applied mascara on the lower lashes.
10. For the face, I applied L’oreal Lumi Magique foundation in W4 all over my face using CoverFX foundation brush.
11. Under my eyes, I applied concealer in MAC Pro Conceal/Correct palette in Medium.
12. I powdered under my eyes using CoverFX translucent loose powder.
13. I applied MAC Dainty mineralized blush on my cheeks.
14. I also applied Diorskin Shimmer Star Amber Diamond on the bridge of my nose and on my cheekbones.
15. On the lips, I applied Revlon Colorstay Ultimate Suede in Socialite, and added a little bit of L’occitane Lip Balm (the one with olive in it).

