Copper Eyes & Dark Red Lips ft. Pat Mcgrath Metamorphosis 005

I’m on a roll these past 2 weeks! 2 tutorials a week, whaaat?! Anyways, today I’m doing another Holiday Makeup for those of you who are not afraid to go bold with your makeup wardrobe. Today, I’m using the amazing Pat Mcgrath Metamorphosis 005 kit in Copper as well as her Dual-ended black marker. This is a very exaggerated winged liner look, and I paired it with Bite Beauty Amuse Bouche in Nori. Watch the tutorial or read more below!

note: I kept saying “metamorphosis” instead of “metalmorphosis”, and it was my mistake. I thought it was Metamorphosis kit, but turned out it was Metalmorphosis. Ooops!

*Pat McGrath Lust 004 tutorial*

https://youtu.be/8bqbTB6qz-c

Read More

Classic Red Lips Makeup

Hello, everyone! How are you guys doing? I am back! Super busy at work, haven’t have the time to take a breather yet. Anyways, I’ve been trying to post 2 tutorials/review up every week, so since this Classic Red Lips makeup would be the first one for this week, hopefully I can squeeze another tutorial (perhaps a Halloween tutorial), or a product review by Sunday. I do have a few products lined up to be reviewed, and also a few more Halloween looks before the 31st.

Anyways, for this tutorial, I actually wore this look out for my friend’s wedding on Sunday. I’m sure you’ve seen what I wore with this makeup over on Instagram! Anyways, I used mostly newly bought products – The Balm Meet Matt(e) Nudes & Mary-Lou highlighter, Too Faced Chocolate Bar palette (smells heavenly), along with Shu Uemura Calligraphy Ink eyeliner & Shu Uemura Dear Matte Rouge Unlimited Diva Red lipstick.

If you are of an Asian descent and looking for the perfect red lipstick, you might want to check out Shu Uemura Dear Matte Rouge Unlimited lipstick in Diva Red. It’s a really pretty red lipstick with a warm (orange) undertone, which will compliments nicely the yellow undertone in our skin. If you prefer a cooler (blue) undertone red lipstick, check out MAC Russian Red.

Anyways, let’s get on the tutorial!

How-to:

1. I prepped my eyelid using Urban Decay Primer Potion. Then, I applied Matt Singh from The Balm Meet Matt(e) Nude palette on my crease blending it upwards towards the brow bone.

2. I layered in Matt Rossen, again from The Balm Meet Matt(e) Nude palette, on top of Matt Singh. This time, I focused most of the color on the outer part of the crease, blending the color inwards.

3. To add an extra depth, I applied Matt Wood right on the crease. The color was concentrated on the outer part of the crease, and blended inwards.

4. I applied MAC Carbon just on the outer V of the eyelid.

5. Using a flat eyeshadow brush, I applied Marzipan from Too Faced Chocolate Bar Eye palette on my eyelid.

6. I lightly applied MAC Carbon on my lower lash line and blended it out using a pencil brush.

7. I lined my waterline using L’oreal Voluminous Smoldering eyeliner, and applied a thick winged liner using Shu Uemura Calligraphy Ink eyeliner.

8. I filled my brows using Anastasia Brow Wiz in Taupe.

9. I applied Lavie Lash false eyelashes in Bluebell.

Thick winged eyeliner

10. On my face, I applied MUFE HD Foundation.

11. I also applied MUFE HD concealer under my eyes.

12. I set my base using Cover FX translucent powder.

13. I very lightly applied The Balm Mary Lou highlighter on the bridge of my nose, cupid’s bow and cheek bones.

14. I lightly contoured my face using Smashbox Contour Kit – sides of my nose, temples, jawline and hollows of the cheeks.

15. For the cheeks, I applied Smashbox Halo blush in In Bloom.

16. On my lips, I applied Shu Uemura Dear Matte Rouge Unlimited lipstick in Diva Red straight from the tube. I did this because I was pressed for time, and I have the lipstick on my clutch for the night, so I can easily touch it up. However, if you want a long lasting lipstick with very little need to touch up, please check out my How-to apply Red lipstick tutorial!
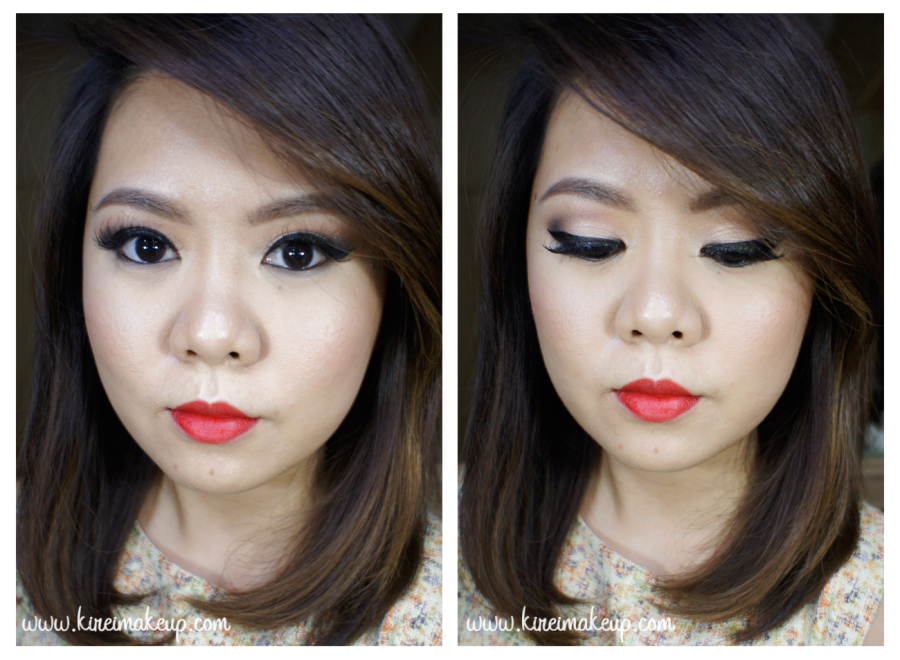
Classic hollywood glam makeup

Products used:

Eyes – Urban Decay Primer Potion (original); The Balm Meet Matt(e) Nude (crease: Matt Singh, Matt Rosen, Matte Wood); MAC Carbon (outer v); Too Faced Chocolate Bar Eye palette (eyelid: Marzipan); Shu Uemura Calligraphy Ink eyeliner; L’oreal Voluminous Smoldering eyeliner; Anastasia Brow Wiz (Taupe); Lavie Lash (Bluebell).

Face – MUFE HD foundation; MUFE HD concealer; The Balm Mary-Lou highlighter; Smashbox contour kit; Smashbox In Bloom blush; Cover FX translucent powder.

Lips – Shu Uemura Dear Matte Rouge Unlimited lipstick in Diva Red.

Sugar and Spice

Halloween is almost here! As much as I’d like to do a zombie tutorial, I’ve yet to find a large amount of liquid latex here. I’ve done a small one, and I posted the photo on my instagram and twitter! Please follow me on instagram (handle: KireiMakeup)/twitter if you haven’t already done so.

I’ve decided to do 2 looks in this tutorial. One look is more on the pretty and wearable, the other look is more vampy and goth. I wanted to re-do the eye makeup from my published work at Coco magazine (here) on myself since I fell madly in love with a super thick black cat eyeliner. The cat eyeliner made me reached for my contact lenses and I decided to put it on just for fun. Oh also, this extreme winged/cat-eye liner has been seen on Rihanna too!

For this tutorial, I used a pink eyeshadow on the eyes and cheeks called Sweet Strawberry from L’oreal Infallible eyeshadow collection to show my support for Breast Cancer Awareness month! I believe I’ve received a very “pink” package from L’oreal Canada but I’ve yet to open it since I’m not in Canada at the moment, but since I have this shadow, I decided to use it first.

Also, this tutorial will show you how easy it is to get the perfect winged/cat-eye liner in this tutorial. For the winged/cat-eye liner you’ll need: 1) tape (or in my case, I used a labeling sticker), 2) small angled brush (I used MAC 263) and 3) Gel liner (I used MUFE Aqua Black).

Let’s get this rolling!

How-to:

1. Stick the tape to your hand and release it. Repeat this step several times until the tape isn’t too sticky. If it is too sticky, it might pull your skin.

2. Find an imaginary line from the outer corner of your eye to the tip of the brow. Place the tape and try to match the angle of the tape on the other eye.

3. Once you’re satisfied with the angle of the tape, prep your eyes with primer if needed.

4. I applied MAC Pearl cream base all over my eyelid all the way up to the brow bone.

5. Using a flat eyeshadow brush, I applied MAC Hush eyeshadow on the inner half of the eyelid.

6. Using the same eyeshadow brush, I applied L‘oreal Infallible eyeshadow in Sweet Strawberry on the outer half of the eye up to the crease.

7. Now, for the fun part:

  • Using the angled eyeliner brush and gel liner, apply eyeliner on the upper lashline as you’d usually do with a pencil liner.
  • Once you are satisfied with the line, flip your brush and make sure the LONGER side is facing up. Your brush should be parallel to the tape.
  • Place your brush right against the tape and pull it to the middle of the lid. You should end up with a triangle.
  • Fill the triangle up and re-do the liner according to the thickness to your liking.
  • Pull the tape off your face and you’ll end up with a perfect straight line!
  • confusing? may be I should do a video tutorial? (leave comments below)

8. Once the upper liner is completed, I used Urban Decay Perversion eyeliner on the tightline and waterline.

9. Using the same angled brush, I used whatever is left on the brush and created a thick liner on the lower lash-line. I connected this lower liner to the “wing”.

10. I curled my lashes and applied mascara on top and bottom lashes. Also filled in my brows using a clean angled brush and mixture of MAC Omega and MAC Brun eyehadows.

11. For the goth/vampy look, I applied fake lashes on both top and bottom lashes.

extreme cat eyeliner

12. For the face, I applied L’oreal Magic Lumi Foundation all over my face using Sigma Round Kabuki brush.

13. Using a MAC 129 brush, I applied L’oreal Sweet Strawberry shadow on my cheeks.

14. Using MAC 109 brush, I applied MAC Blunt contour shadow on the hollows of the cheeks, jawline and the side of my nose.

15. For the wearable/pretty look, I applied whatever is left on the foundation brush on my lips and applied a clear lipgloss. If you want this to be on the “prettier” side, you can apply a pink/peach/mauve/rose lipstick instead of going nude lips.

high fashion cat eyeliner

16. For the vampy/goth look, I lined my lips using a red lipliner from Complections (that’s my old makeup school).

17. Then I applied a red lipstick by Revlon called Ravish Me Red all over the lips.

18. To make the center of the lips darker, I applied a black lipstick from MAC. I don’t know what it’s called since I put this on a lip palette and I didn’t put the name on it. If you do not have a black lipstick, apply a black pencil liner in the center of the lips and blend it with the red lipstick.

19. Then I applied a clear lipgloss over the lips to complete the look.

20. If you’re oily, apply powder to set the face.

dark glossy red lips