I bought this Balmsai palette back when I was in Jakarta, but I didn’t get a chance to play with it because I thought the palette was too pretty, and I don’t have the heart to touch it! However, all good things must come to an end, and I finally decided it’s time I used this palette. This The Balm Balmsai makeup tutorial is a really fun and summery look. I think a touch of color along the lash line really perk up this whole look. Feel free to omit the falsies, I used it just to make my eyelashes look longer, and open up my eyes a bit more.
Most of the products used for this tutorial are all by The Balm, mostly of the eyes and cheeks. Even though I know The Balm Indonesia’s brand manager, I am in not paid, nor sponsored to do this post.
I actually had a full face picture for this tutorial, but I realized the foundation I was using was too light for my face, and created a white cast, so I decided to remove the portrait. I didn’t realized I’ve gotten darker since I had to work on an outdoor shoot for the past couple days.
Products used
Eyes
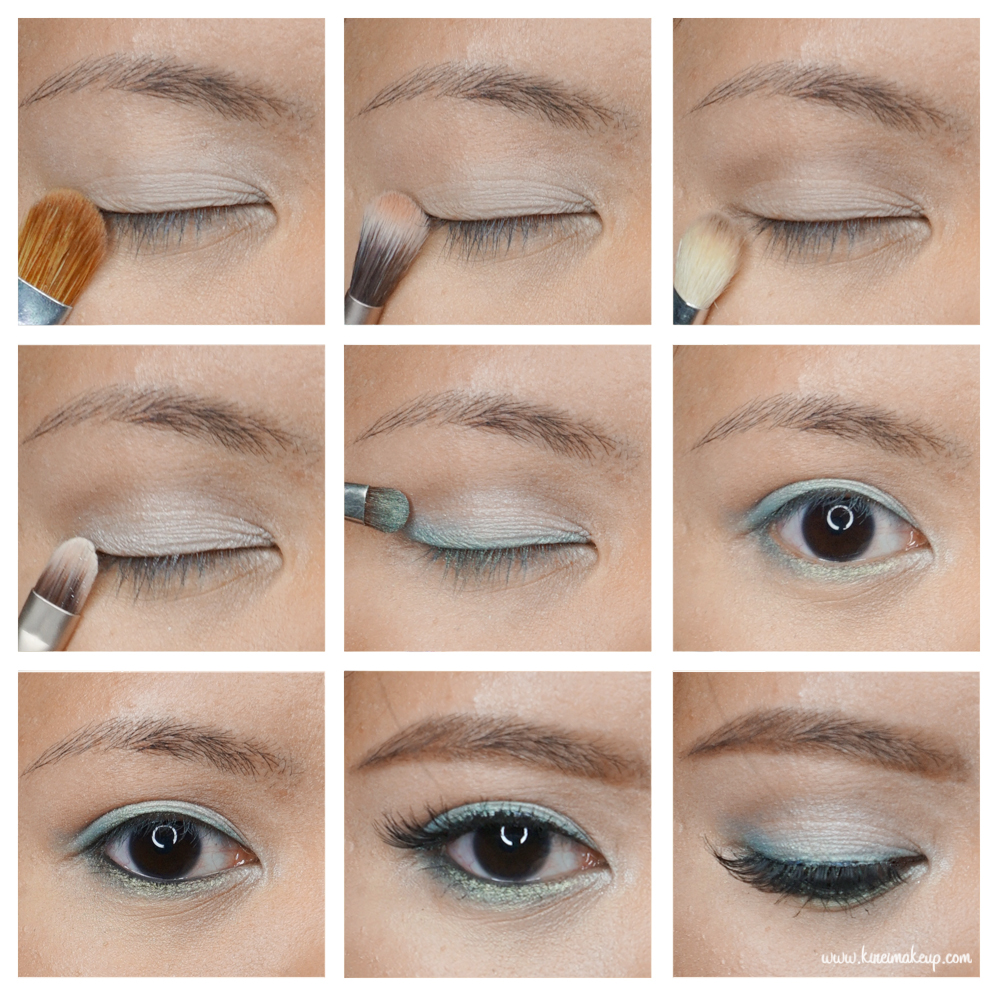
- Primer – Urban Decay Primer Potion “Original”
- Base – The Balm Meet Matt(e) Nude “Matt Maloy”
- Transition – The Balm Meet Matt(e) Nude “Matt Singh”
- Crease – The Balm Balmsai “Woodie”
- Lid and Inner Corner – The Balm Balmsai “High Tide”
- Upper and Lower Lashline – The Balm Balmsai “Big Kahuna”
- Waterline – L’oreal Paris Voluminous Smoldering eyeliner
- Brows – The Balm Balmsai “Score”+ “Dig It” + “Woodie”
- Falsies – Ardell “Demi Wispies”