Prom season is here! Today I’m creating a pretty Prom Makeup 2016 tutorial using the Sephora x Minnie Mouse eyeshadow palette. This look is a little bit smoky, but not too much. If you’d like to find out how to create this look, watch my video below or read more to see more pictures and step-by-step tutorial.
Tag: prom makeup
UD Naked 3 Prom Makeup Look
If you have this UD Naked 3 palette lying around, you could create this UD Naked 3 Prom Makeup Look! Instead of buying new palettes, or eyeshadows, you could always use what you already have. I have done other UD Naked 3 tutorials, which you can find HERE. However, one of my most repinned UD Naked 3 tutorial is the Valentine’s Day makeup post, which is perfect if you prefer a softer look.
If you are looking for a makeup artist in Toronto or makeup artist in Hamilton for Prom, feel free to contact me at jilly@kireimakeup.com! I’m also taking bookings for eyelash extension in Hamilton.
Products used
Eyes
- Primer – MAC Paint Pot “Perky”
- Crease – Urban Decay Naked 3 “Nooner”
- Eyelid – Urban Decay Naked 3 “Burnout”
- Outer V/lower lash line – Urban Decay Naked 3 “Factory”
- Winged liner – Kate Kanebo Super Sharp liner
- Waterline – L’oreal Voluminous Smoldering eyeliner
- Falsies – Gwiyomi Boutique falsies #3
- Brows – Anastasia Brow Wiz in Medium Brown
Face/Cheeks
- Foundation – Make Up For Ever HD Foundation “120”
- Concealer – MAC Pro Longwear concealer “NC25”
- Setting Powder – CoverFX Translucent powder
- Blush – MAC blush powder “Fleur Power”
Lips
- Lip Pencil – Urban Decay lip pencil “Naked 2”
- Lip balm – L’oreal Colour Riche Extraordinaire “Blushing Harmony”
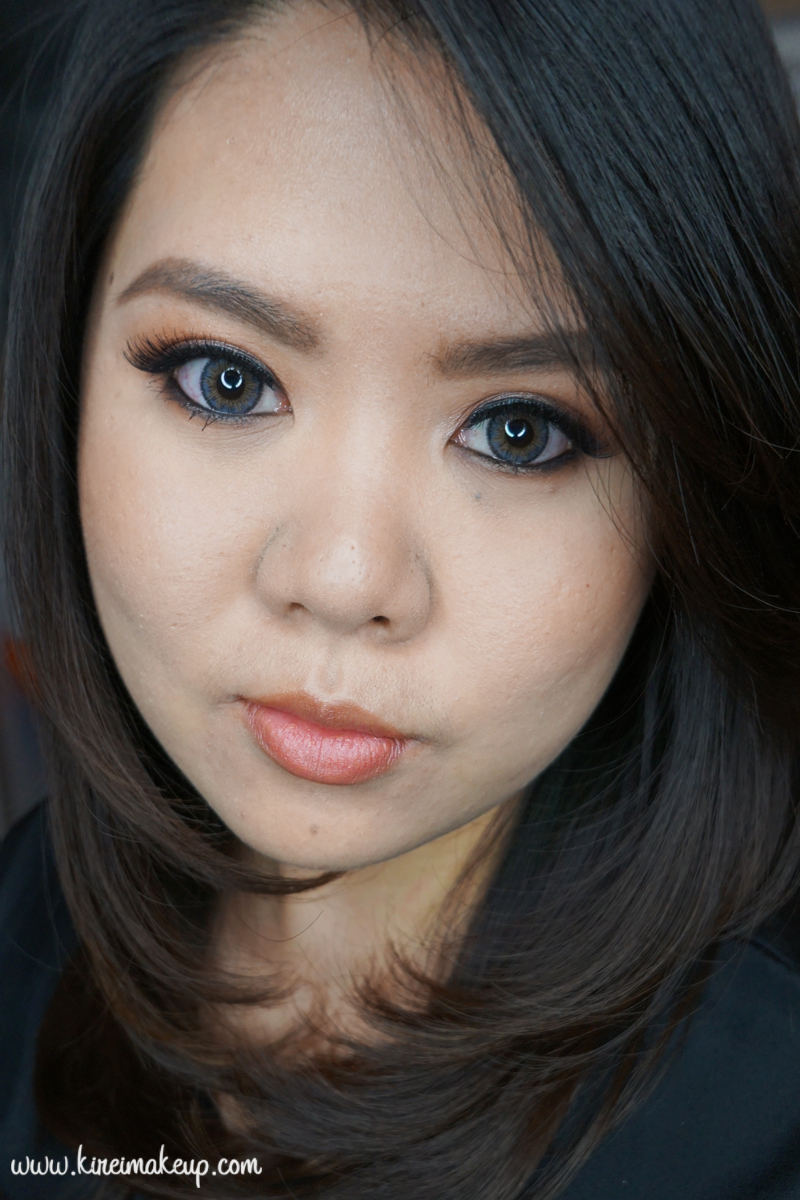
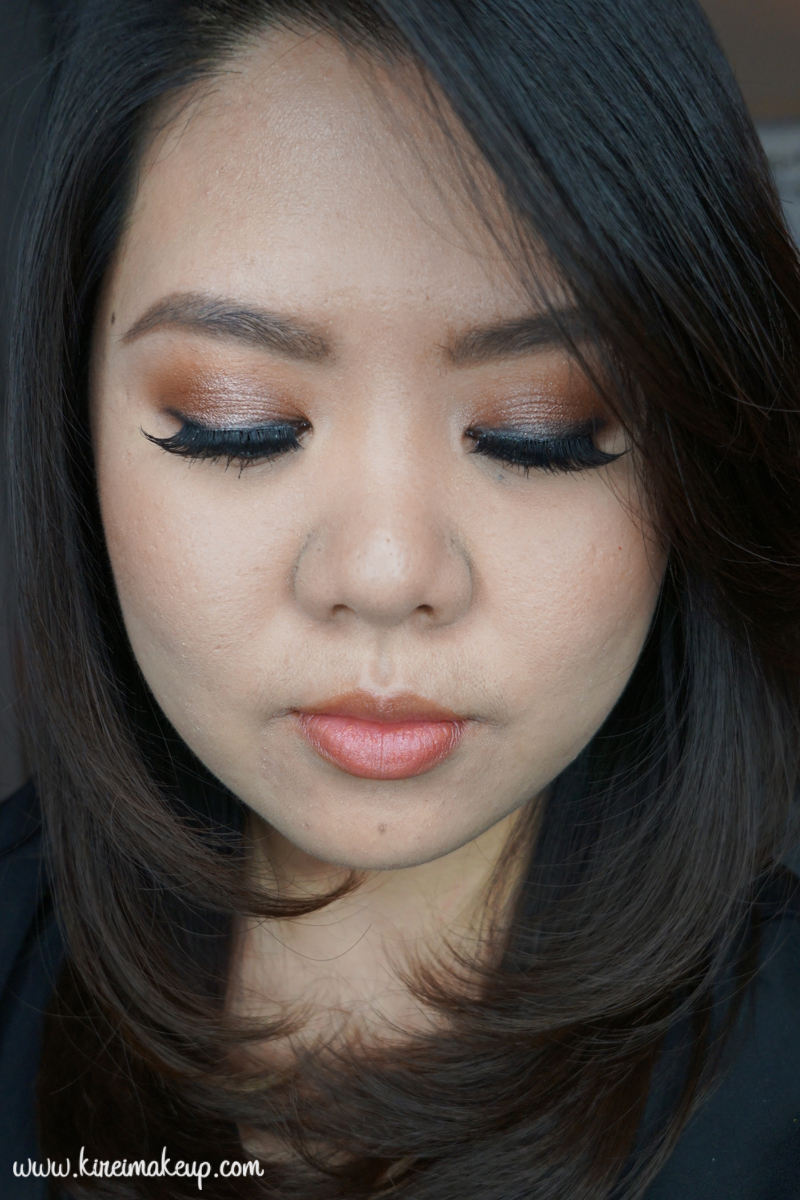
Brown Smokey Eye Makeup Tutorial
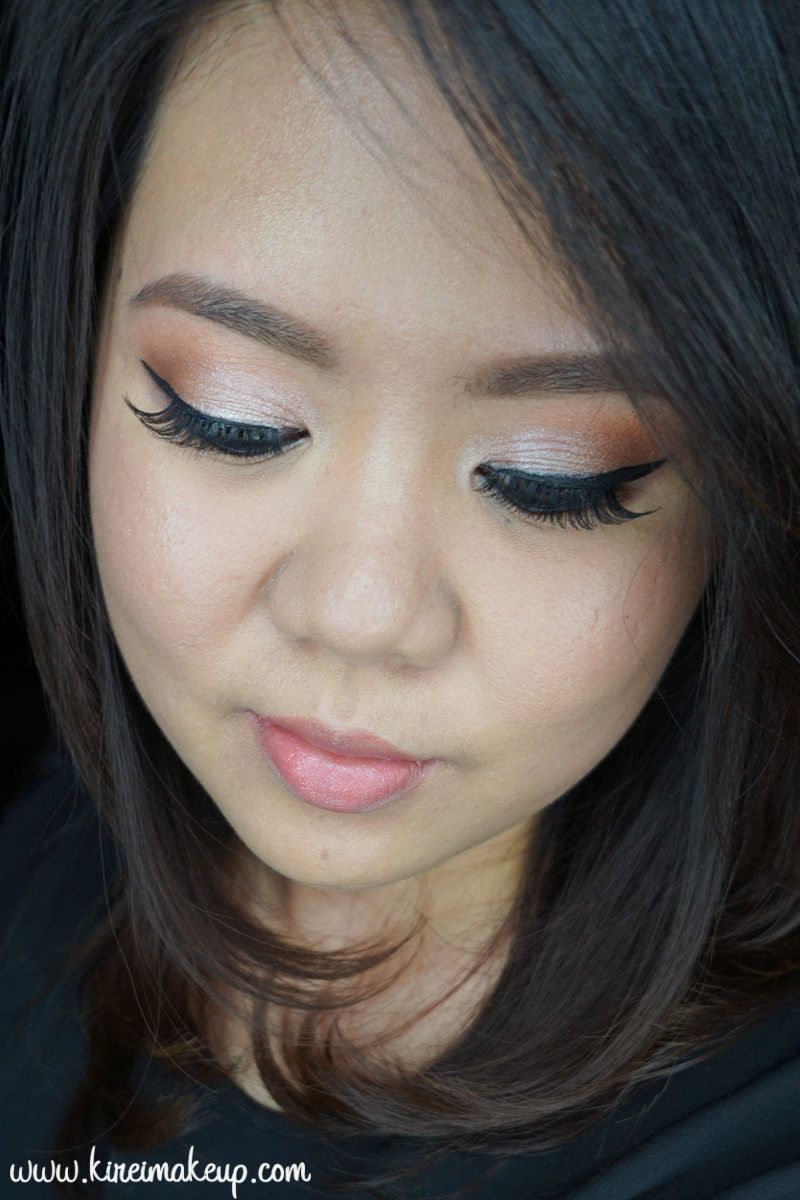
Hello everyone! Sorry for not posting anything much last week here and on my social media sites. I’ve just recently moved to a new house, so I’ve been busy with the move. Anyways, I wanted to continue with a prom look, so I created this Brown Smokey Eye makeup tutorial for those who prefer a smokier look.
This look will be great for everyone, but especially for those with blue eyes. The warm undertone in the eyeshadows I used will bring out the blue in the eyes even more. I try to keep the “smokiness” within the rims of my eyes (waterline, and tightline). If you prefer it much more darker, feel free to add black eyeshadow on the crease. I prefer it this way – black on the lashline and smoked out to brown.
If you prefer a more understated low-key eye makeup, please check my previous tutorial “2015 Prom Makeup Look”
If you are looking for a makeup artist in Toronto (GTA), as well as Hamilton and surrounding area, please feel free to contact me! I’m taking bookings for Prom Makeup 2015.
Products used
Eyes
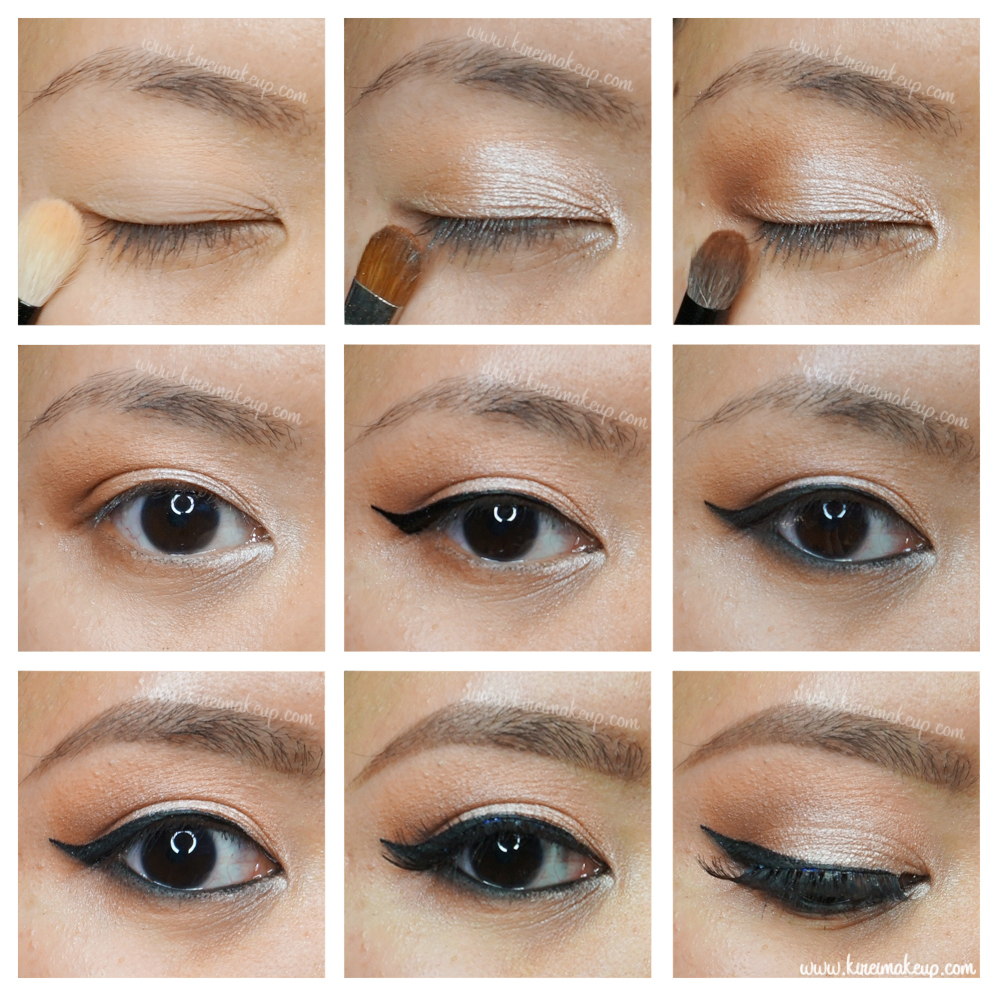
- Base – MAC Groundwork paint pot
- Eyelid/lower lid – Makeup Geek eyeshadow “Cocoa Bear”
- Center of lid – Makeup Geek foiled eyeshadow “Grandstand”
- Inner corner – Makeup Geek eyeshadow “Shimma Shimma”
- Tightline/Waterline – L’oreal Paris “Voluminous Smoldering eyeliner”; Kat Von D eyeshadow “Deadhead” (to set and smudge)
- Mascara – Clinique High Impact mascara
- Falsies – Gwiyomi boutique “#3” and “Gillian” (stacked)
- Brows – Anastasia Beverly Hill Brow Wiz in “Taupe and Medium Brown”
Face/Cheeks
- Foundation – Giorgio Armani Maestro foundation
- Cheeks – MAC blush powder “Peaches”
Lips
- Lipstick – Revlon Colorstay Ultimate Suede Lipstick “Flashing Light”
- Lip Balm – Kiehl’s Scented Lip Balm “Mango”
2015 Prom Makeup Look
Happy Monday, everyone! Today I wanted to create a tutorial for 2015 Prom Makeup, and this look works for every eye colors, and dress colors! I think this color would look especially great for those with blue eyes. The warmth from Makeup Geek Cocoa Bear will bring out the blue even more.
This look would be great for any dress colors since I used neutral shades. Also, you can change this makeup according to what you like – if you prefer to make it less smoky, skip the eyeliner. If you want to wear it with a red lipstick, by all means pair it with a red lipstick. If you can’t create a winged liner yet, check out my winged liner tutorial, or skip it altogether and just create a basic eyeliner! Customize it according to what you prefer.
If you are in need of a makeup artist in Toronto or in Hamilton to do your prom makeup, I’m available! Please feel free to message me by filling out the contact form or email me at jilly@kireimakeup.com, or DM me on my Instagram page.
Product used
Eyes
- Primer – Urban Decay Primer Potion “Original”
- Transition – Makeup Geek “Peach Smoothie”
- Eyelid/Inner corner – Makeup Geek foiled eyeshadow “In the Spotlight”
- Outer V/Lower lashline – Makeup Geek “Cocoa Bear”
- Eyeliner – Kat Von D Tattoo eyeliner “Trooper”
- Waterline – L’oreal Voluminous Smoldering eyeliner
- Brows – Anastasia Beverly Hills Brow Wiz “Medium Brown”
- False lashes – Gwiyomi Boutique #3
Face/cheeks
- Primer – Kat Von D foundation primer
- Foundation – Kat Von D Lock-it Tattoo foundation
- Concealer – MAC Pro Longwear concealer “NC25”
- Blush – L’oreal Visible Lift Blur bush “Soft Pink”
- Setting powder – CoverFX translucent loose powder
- Highlighter – The Balm “Mary-Lou Manizer”
Lips
- Lip pencil – Urban Decay lip pencil “Naked 2”
- Lip gloss – L’oreal Color Riche Extraordinaire “Blushing Harmony”

Prom Makeup Tutorial
It seems that Prom season is around the corner, and I wanted to create a prom makeup tutorial for this post. Recently, I just purchased my first ELF product, which is the baked eyeshadow palette in NYC, and I’m pretty impressed with this palette. This palette cost around $15 at Winners in Canada (USD$10 on their website), so it’s pretty affordable for (graduating) students. The pigment pay-off is so-so when applied dry, but applied wet, the eyeshadows are quite pretty. The champagne shade in this palette is applied wet, and it has a beautiful shimmer.
Anyways, I didn’t have a full face picture from my camera since the battery went died, but I did take a picture using the iphone, which I posted on Instagram. The eyes are very shimmery and defined, but not too dark. I think it’s a very pretty look for prom!
Products used
Eyes
- Primer – Urban Decay Primer Potion “Original”
- Transition shade – MAC “Orange” + Makeup Geek “Peach Smoothie”
- Outer V (or C) – brown shade in ELF Baked Eyeshadow Studio palette “NYC” (applied dry)
- Eyelid/Inner corner – champagne shade in ELF Baked Eyeshadow Studio palette “NYC” (applied wet)
- Upper/lower lash line – black shade in ELF Baked Eyeshadow Studio palette “NYC” (appied dry)
- Brows – Anastasia Beverly Hills Brow Wiz “Taupe” and “Brunette”
- Falsies – Gwiyomi falsies #3
Face/Cheeks
- Base – Kat Von D foundation primer
- Foundation – Kat Von D Lock-it Tattoo foundation
- Blush – MAC blush powder “Apricot”
- Highlighter – Becca Shimmering Perfector in “Moonstone” and The Balm “Mary-Lou Manizer”
- Powder – CoverFX translucent setting powder
Lips
- Lip color – YSL Glossy Stain in Pêche Cerra-Cola
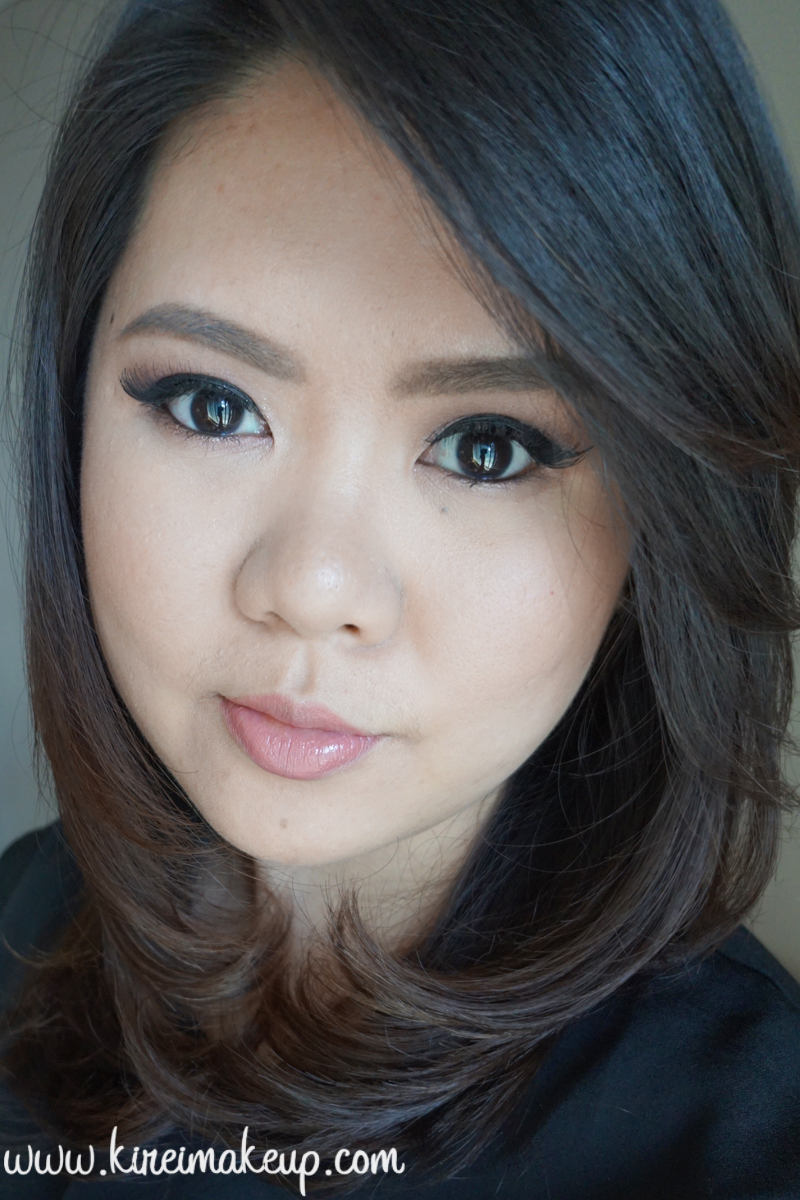
Fresh Dewy Makeup Look
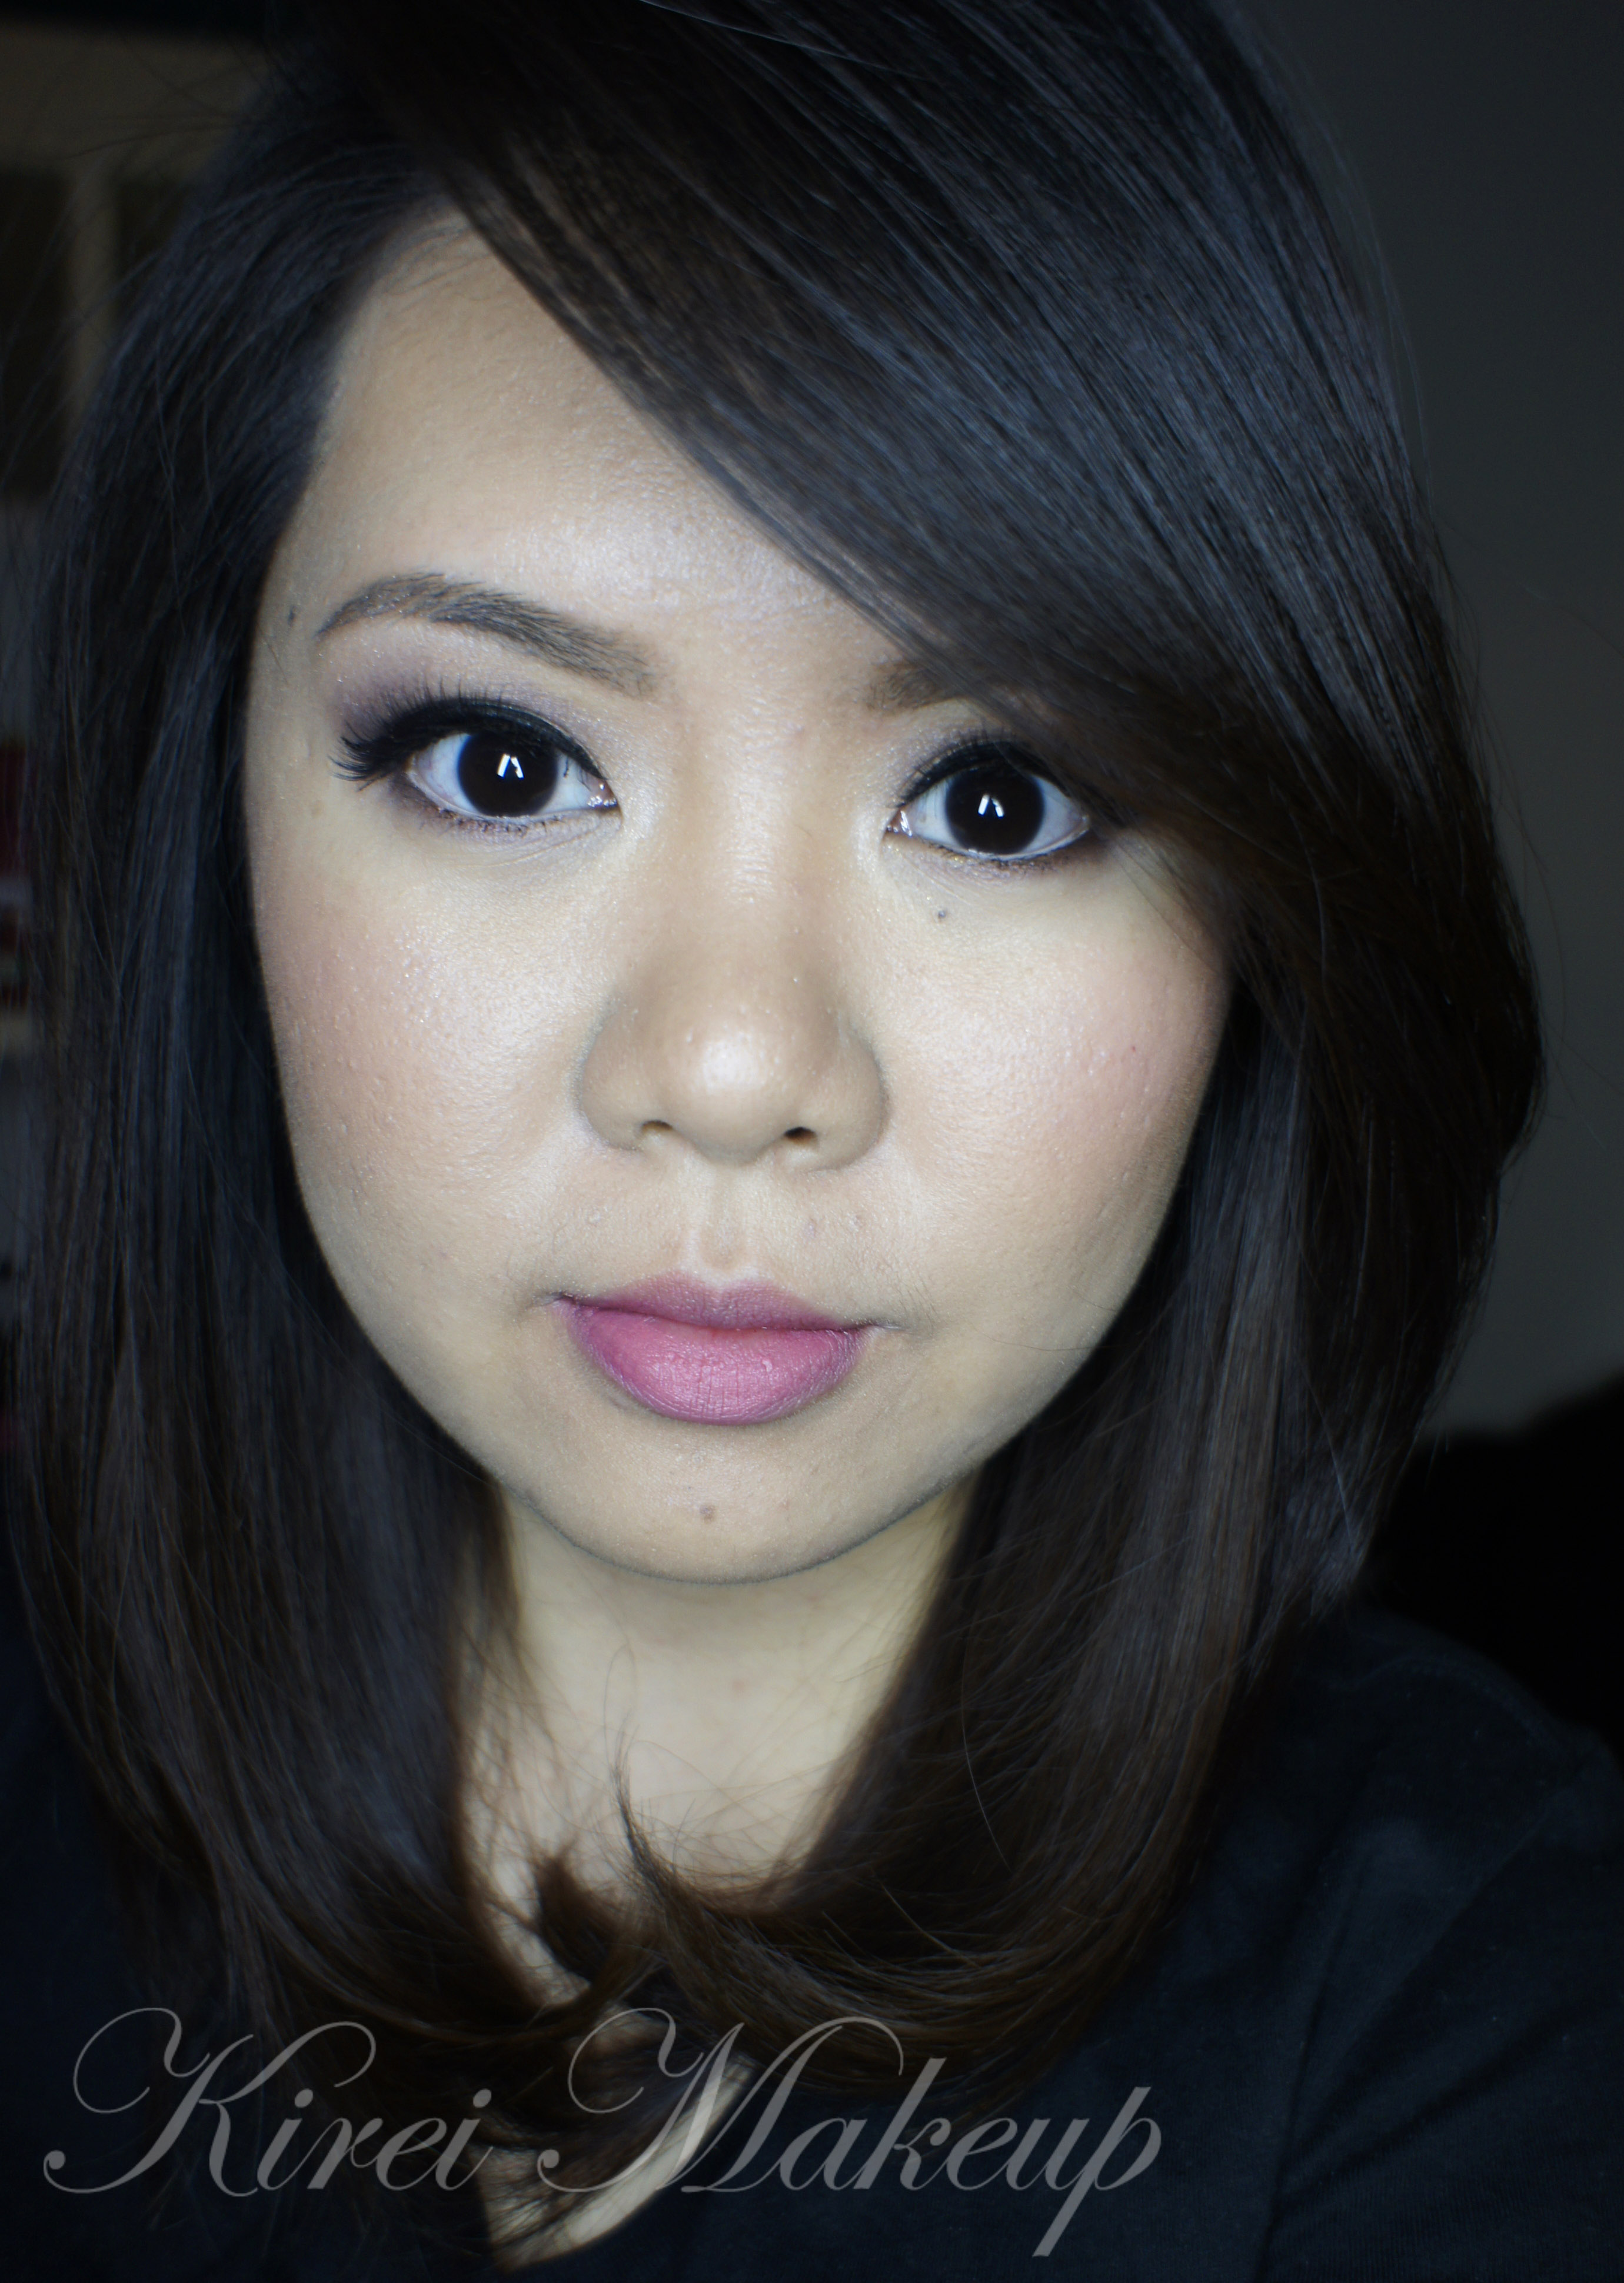
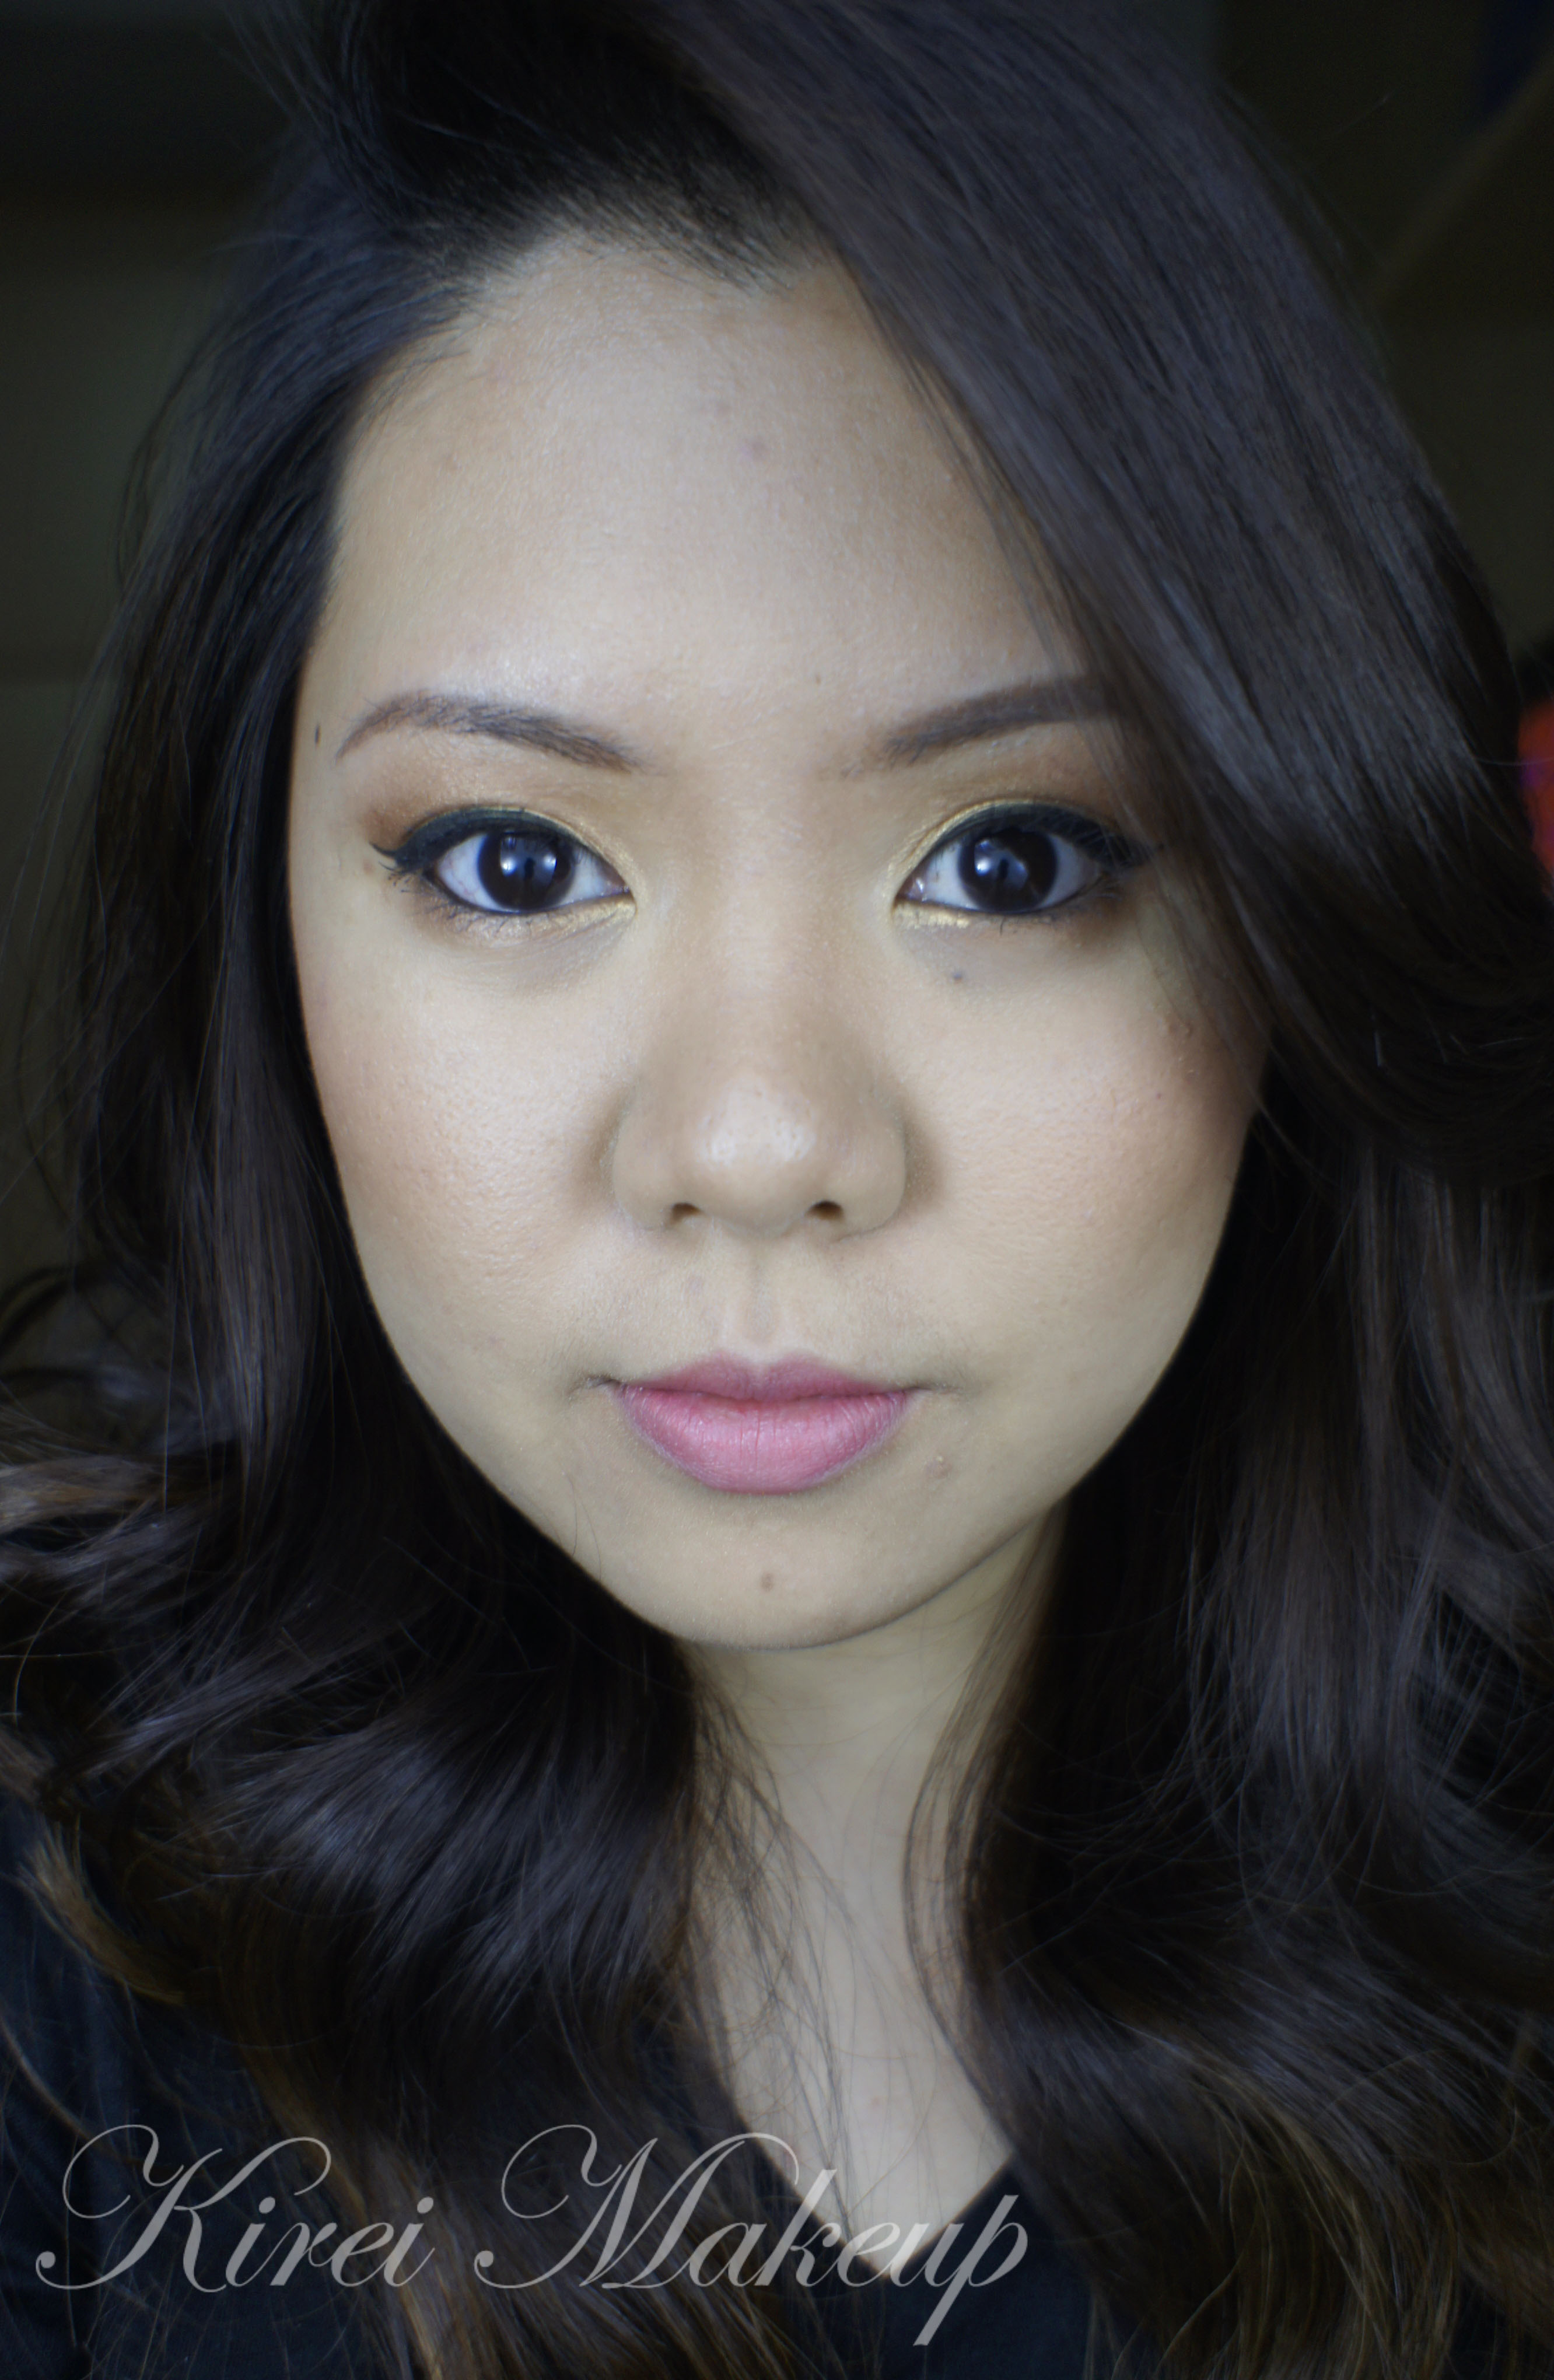
Having a bold makeup is always nice, but I usually wear this type of makeup on my daily life. I barely wear makeup on a day-to-day basis, because I used to have a really bad case of acne and I just get used to not wear makeup at all. However, when I do feel like wearing makeup, I usually go for the easiest look. I used to wear this look a lot when I was younger, and I don’t even know why I stopped wearing it. It’s so easy, and the only thing that take time is the eyeliner. However, once you master the winged liner, it’s so fast and simple.
This look is really good for beginners who want to practice blending and creating the cat-eyeliner (or also called winged liner). The gold eyeshadow in this tutorial can be replaced with any eyeshadow color. I chose NARS Etrusque because I just love the color, and it has just enough shimmers to brighten up your eyes.
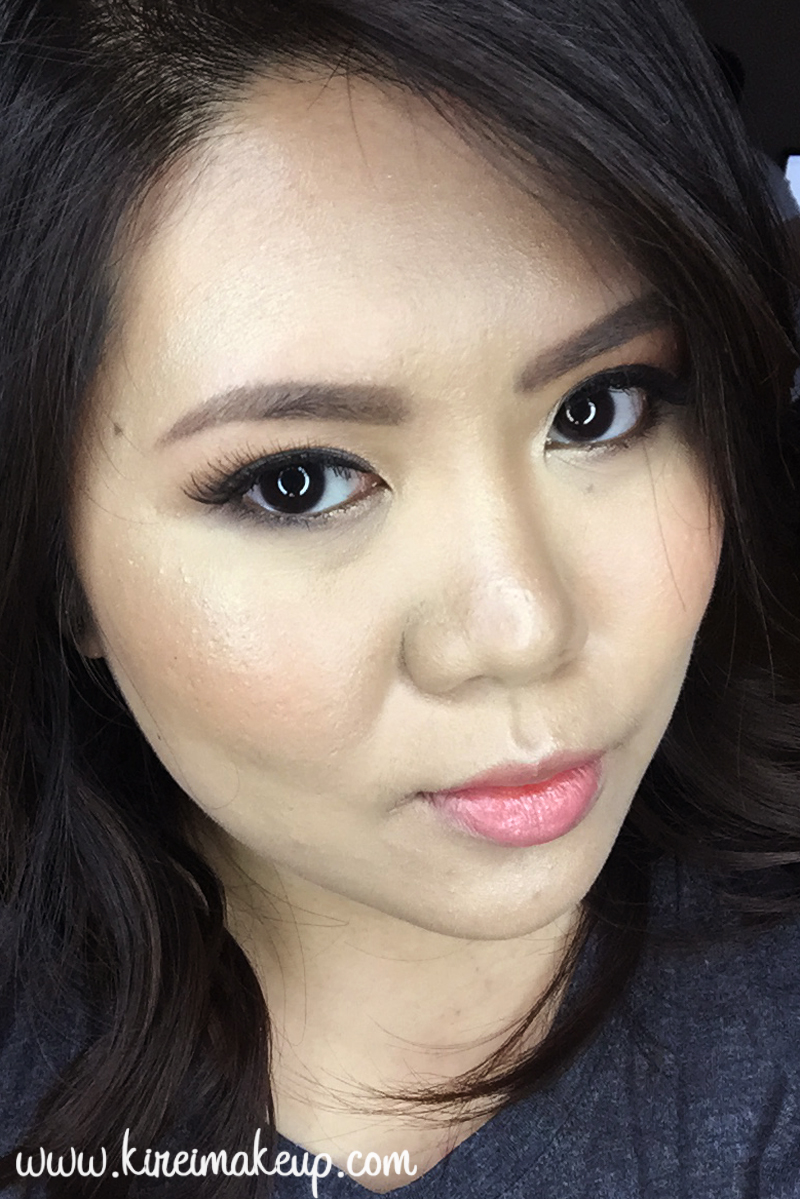
The rest of the face is kept very fresh and dewy, afterall it is called Fresh Dewy Makeup look! This face is super simple, the keys are to use cream products, and to lightly powder the oily areas only. For me, I powdered under my eyes to set my concealer only for this tutorial. Why, you ask? That’s because my skin in the winter is quite dry and doesn’t actually get oily at all. If you are oily, just powder the oily areas (usually T-zone or just the cheeks). If you’re oily everywhere, feel free to powder your face, and use a powder highlighter to create the dewy look.
I just feel so young and fresh! I also love the blush I used for this tutorial. I added a touch more than I usually does, just to make my cheeks look like it’s flushing from the inside. I think the blush helps with the whole youthful appearance. This look is so appropriate for everything, from day makeup to party makeup! If you’re planning to wear it during the day, you can create a thinner line or even skip in altogether. If you like it smokier, add black eyeliner on the tightline. It’s so versatile!
Ok, enough of my rambling, let’s get on it!
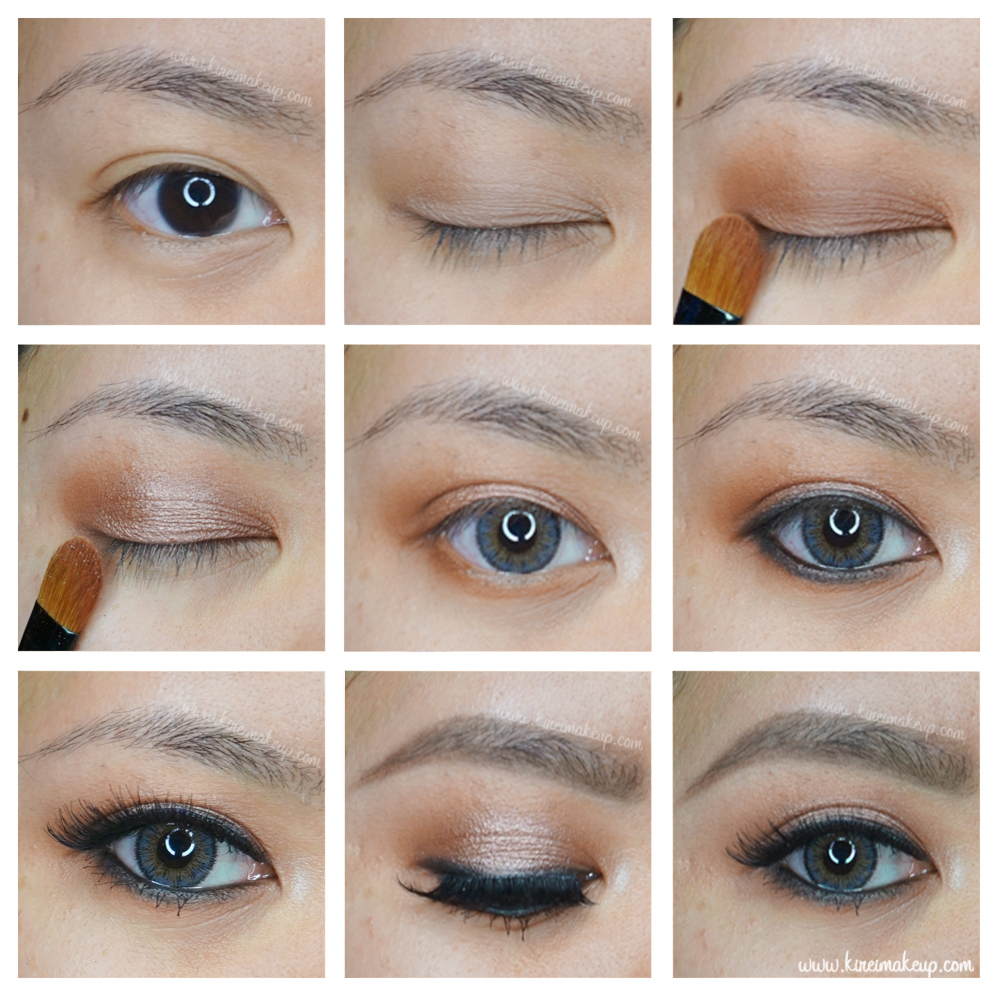
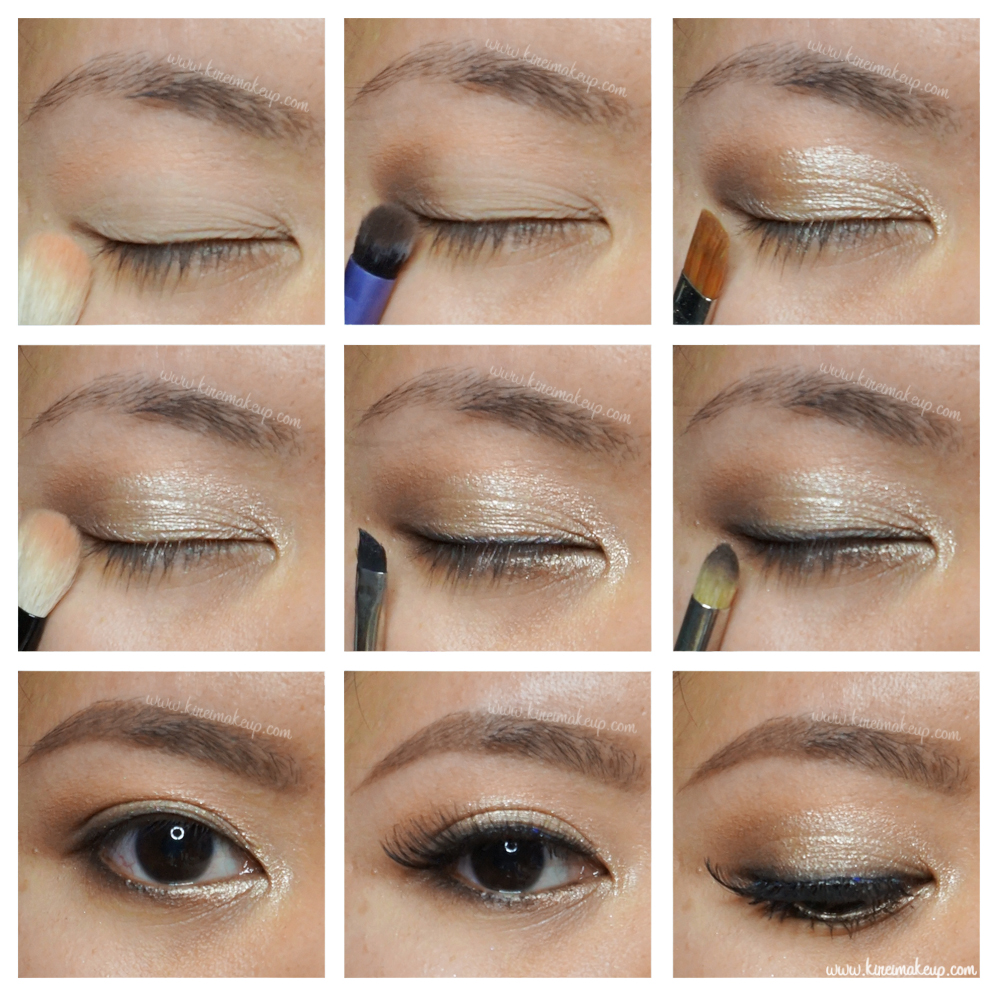
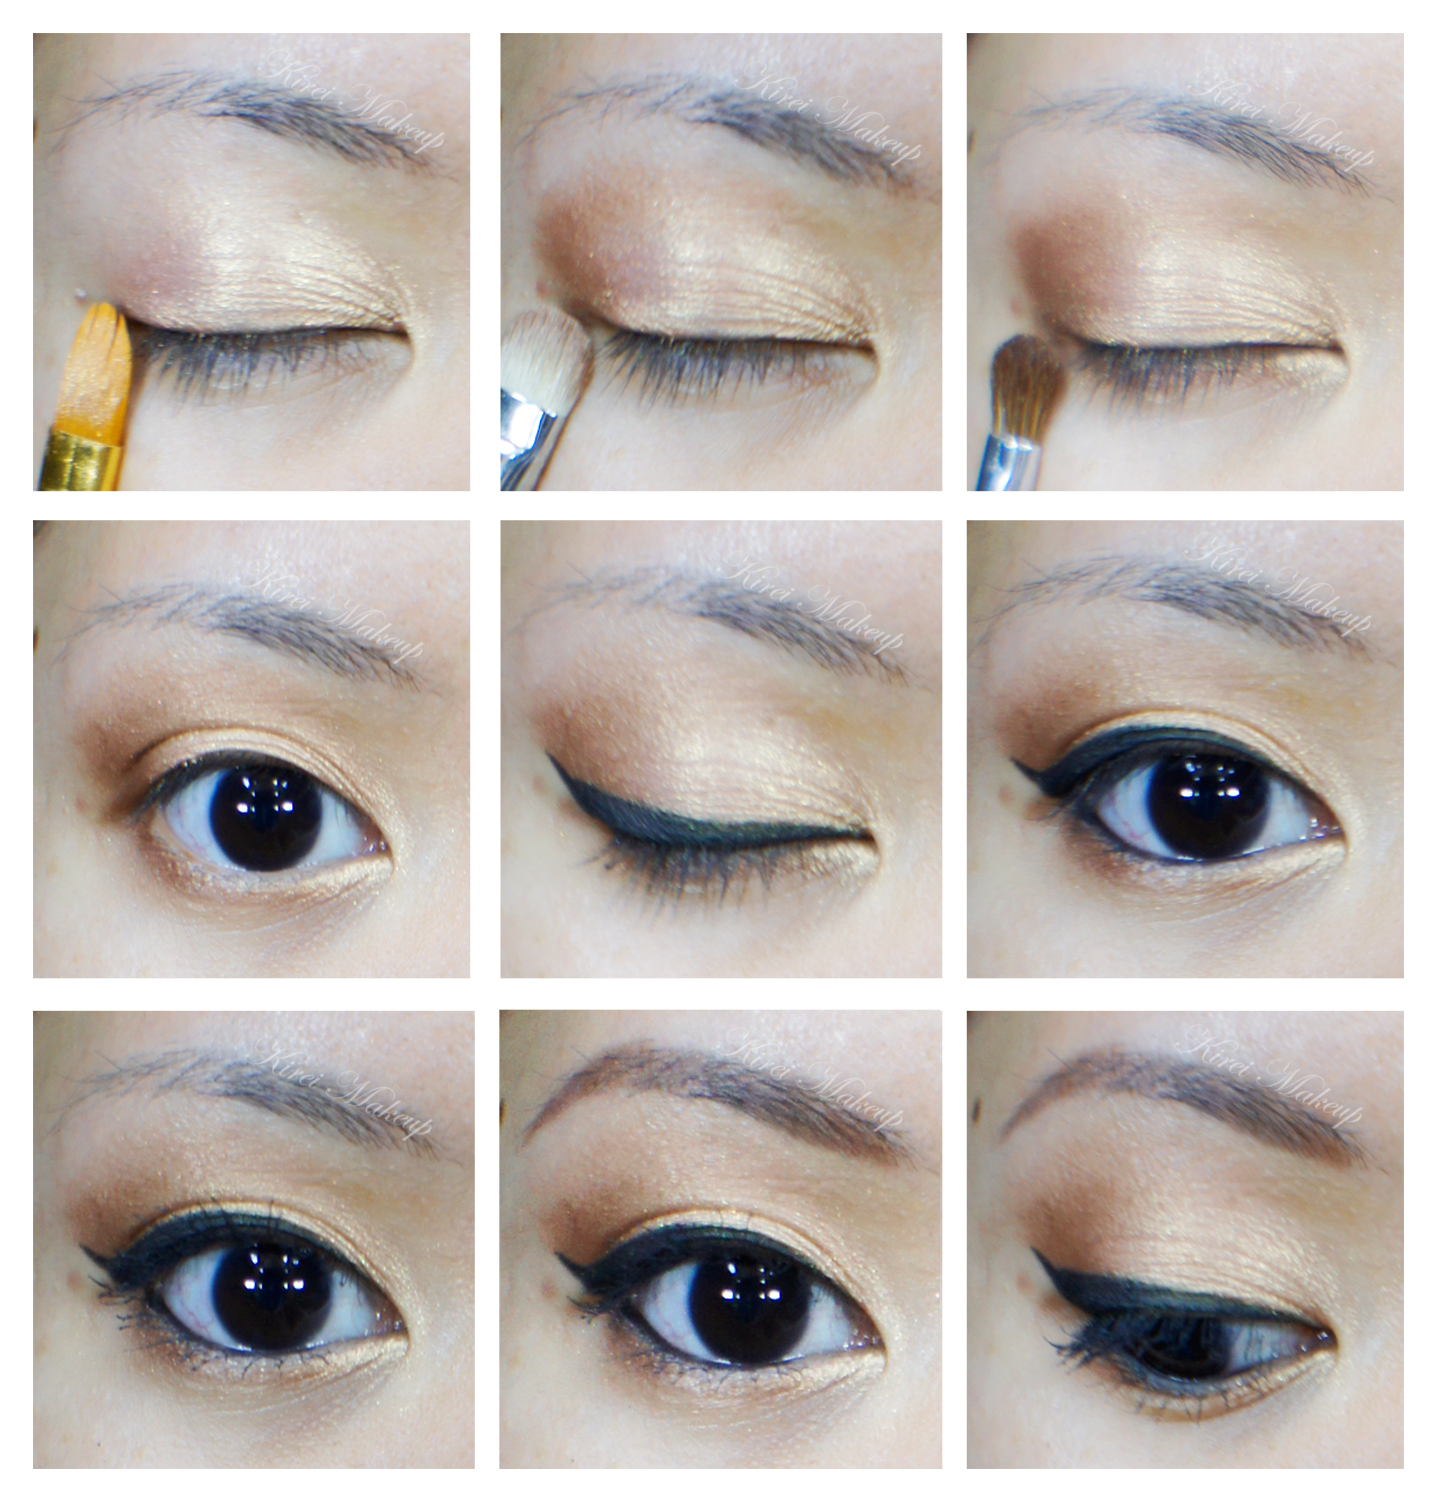
How-to:
1. I prepped my eyelids using UD Primer Potion (original).
2. I applied NARS Etrusque eyeshadow all over my eyelid using a flat eyeshadow brush.
3. Using a clean fluffy brush, I blended the eyeshadow so there’s no harsh edge.
4. I lined my waterline, and lower lash line using MAC Powersurge pencil eyeliner. (You can use black, white, beige eyeliner if you like)
5. I applied NARS Etrusque on the lower lash line using an angled eyeliner brush.
6. Using a clean angled eyeliner brush, I applied L’oreal Infallible Lacquer Liner 24Hr in Blackest Black on the upper lash line creating a winged eyeliner.
7. I curled my lashes and applied Tarte Lights, Camera and Flashes mascara on both upper and lower lashes.
8. I applied false eyelashes (sample) on my upper lashes.
9. I filled my brows in using Anastasia Brow Wiz in Brunette.

10. For the face, I applied MAC Pro Longwear foundation in NC30 using CoverFX cream foundation brush.
11. I applied the concealer from MAC Pro Correct/Conceal palette in Medium under my eyes, as well as below the brows.
12. I set the concealer using CoverFX translucent powder.
13. I contoured my face very lightly using Smashbox contour powder palette (discontinued).
14. I applied Revlon Charmed Cream Blush on my cheeks using a clean foundation brush, and then blending it to my skin using my finger.
15. I highlighted the bridge of my nose, chin, cupid’s bow and top of cheekbones using Benefit Moon Beam.
16. I filled my lips using MAC Dervish lip liner, and then YSL Glossy Stain in Pêche Cerra-Cola (27) on top of it.
Smokey Eyes using Smashbox Full Exposure Palette
Another look using Smashbox Full Exposure Palette! I’ve created a natural warm-toned look using this palette in Smashbox Full Exposure Look #1, and I’ve also created a more glam look in Holiday Makeup using MAC Diva.
This time, I wanted to create a smokey eyes makeup with the palette, and so, I created this look! This look is a mixed of both the matte and shimmer eyeshadows from the Full Exposure palette.
Since it is smokey eyes look, you might want to do your eye makeup first before the rest of your face in case of fall-out.
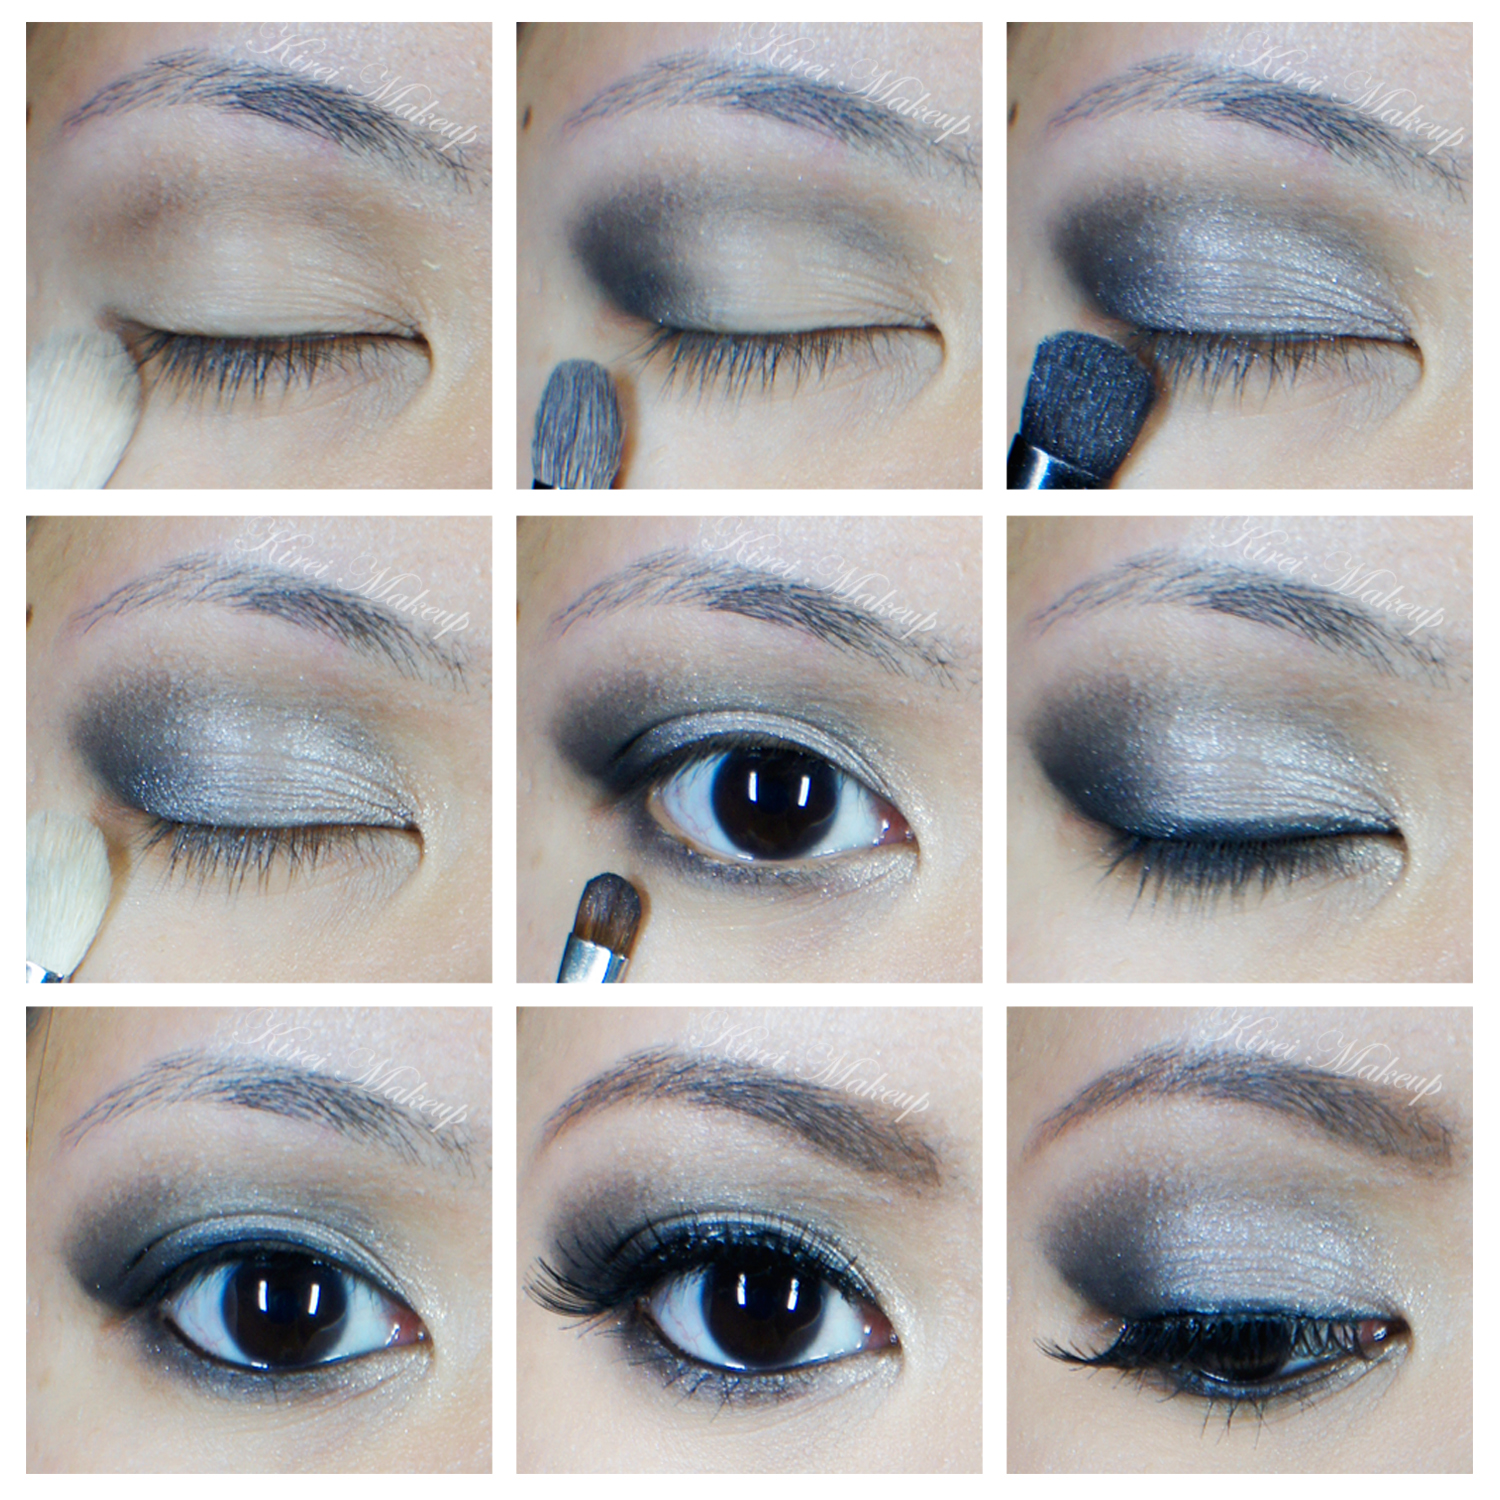
How-to:
1. My eyelids were prep using Urban Decay Primer Potion.
2. Using a fluffy brush, I applied Smashbox Full Exposure eyeshadow in S6 slightly above the crease of my eyes.
3. Using a Smashbox bullet brush, I applied Smashbox Full Exposure eyeshadow in S7 on the outer V and on the crease.
4. Using the black side of the split-fiber brush from the palette, I applied Smashbox Full Exposure eyeshadow in M6.
5. Using a brush used in step 2, I blended the crease of my eyelid.
6. Using a small shader brush (MAC 228), I applied Smashbox Full Exposure eyeshadow in M5 on the inner corner of the eyes, and S7 on the rest of the lower lash line.
7. I lined my upper lash line, tightline and waterline using L’oreal Voluminous Smoldering eyeliner.
8. I applied Gwiyomi eyelashes in 8042 on the upper lashes. (Gwiyomi eyelashes are sold in Jakarta through my friend)
9. I filled my brows using Anastasia Brow Wiz in Medium Ash and Brunette.
10. On the face, I applied Urban Decay Naked foundation using MAC Oval 6 brush.
11. I contoured my face using MAC Mineralized Skin Finish in Dark Deep.
12. On the cheeks, I applied Benefit Hervana blush.
13. I applied Chanel Lipgloss levres scintillantes glossimer (165).

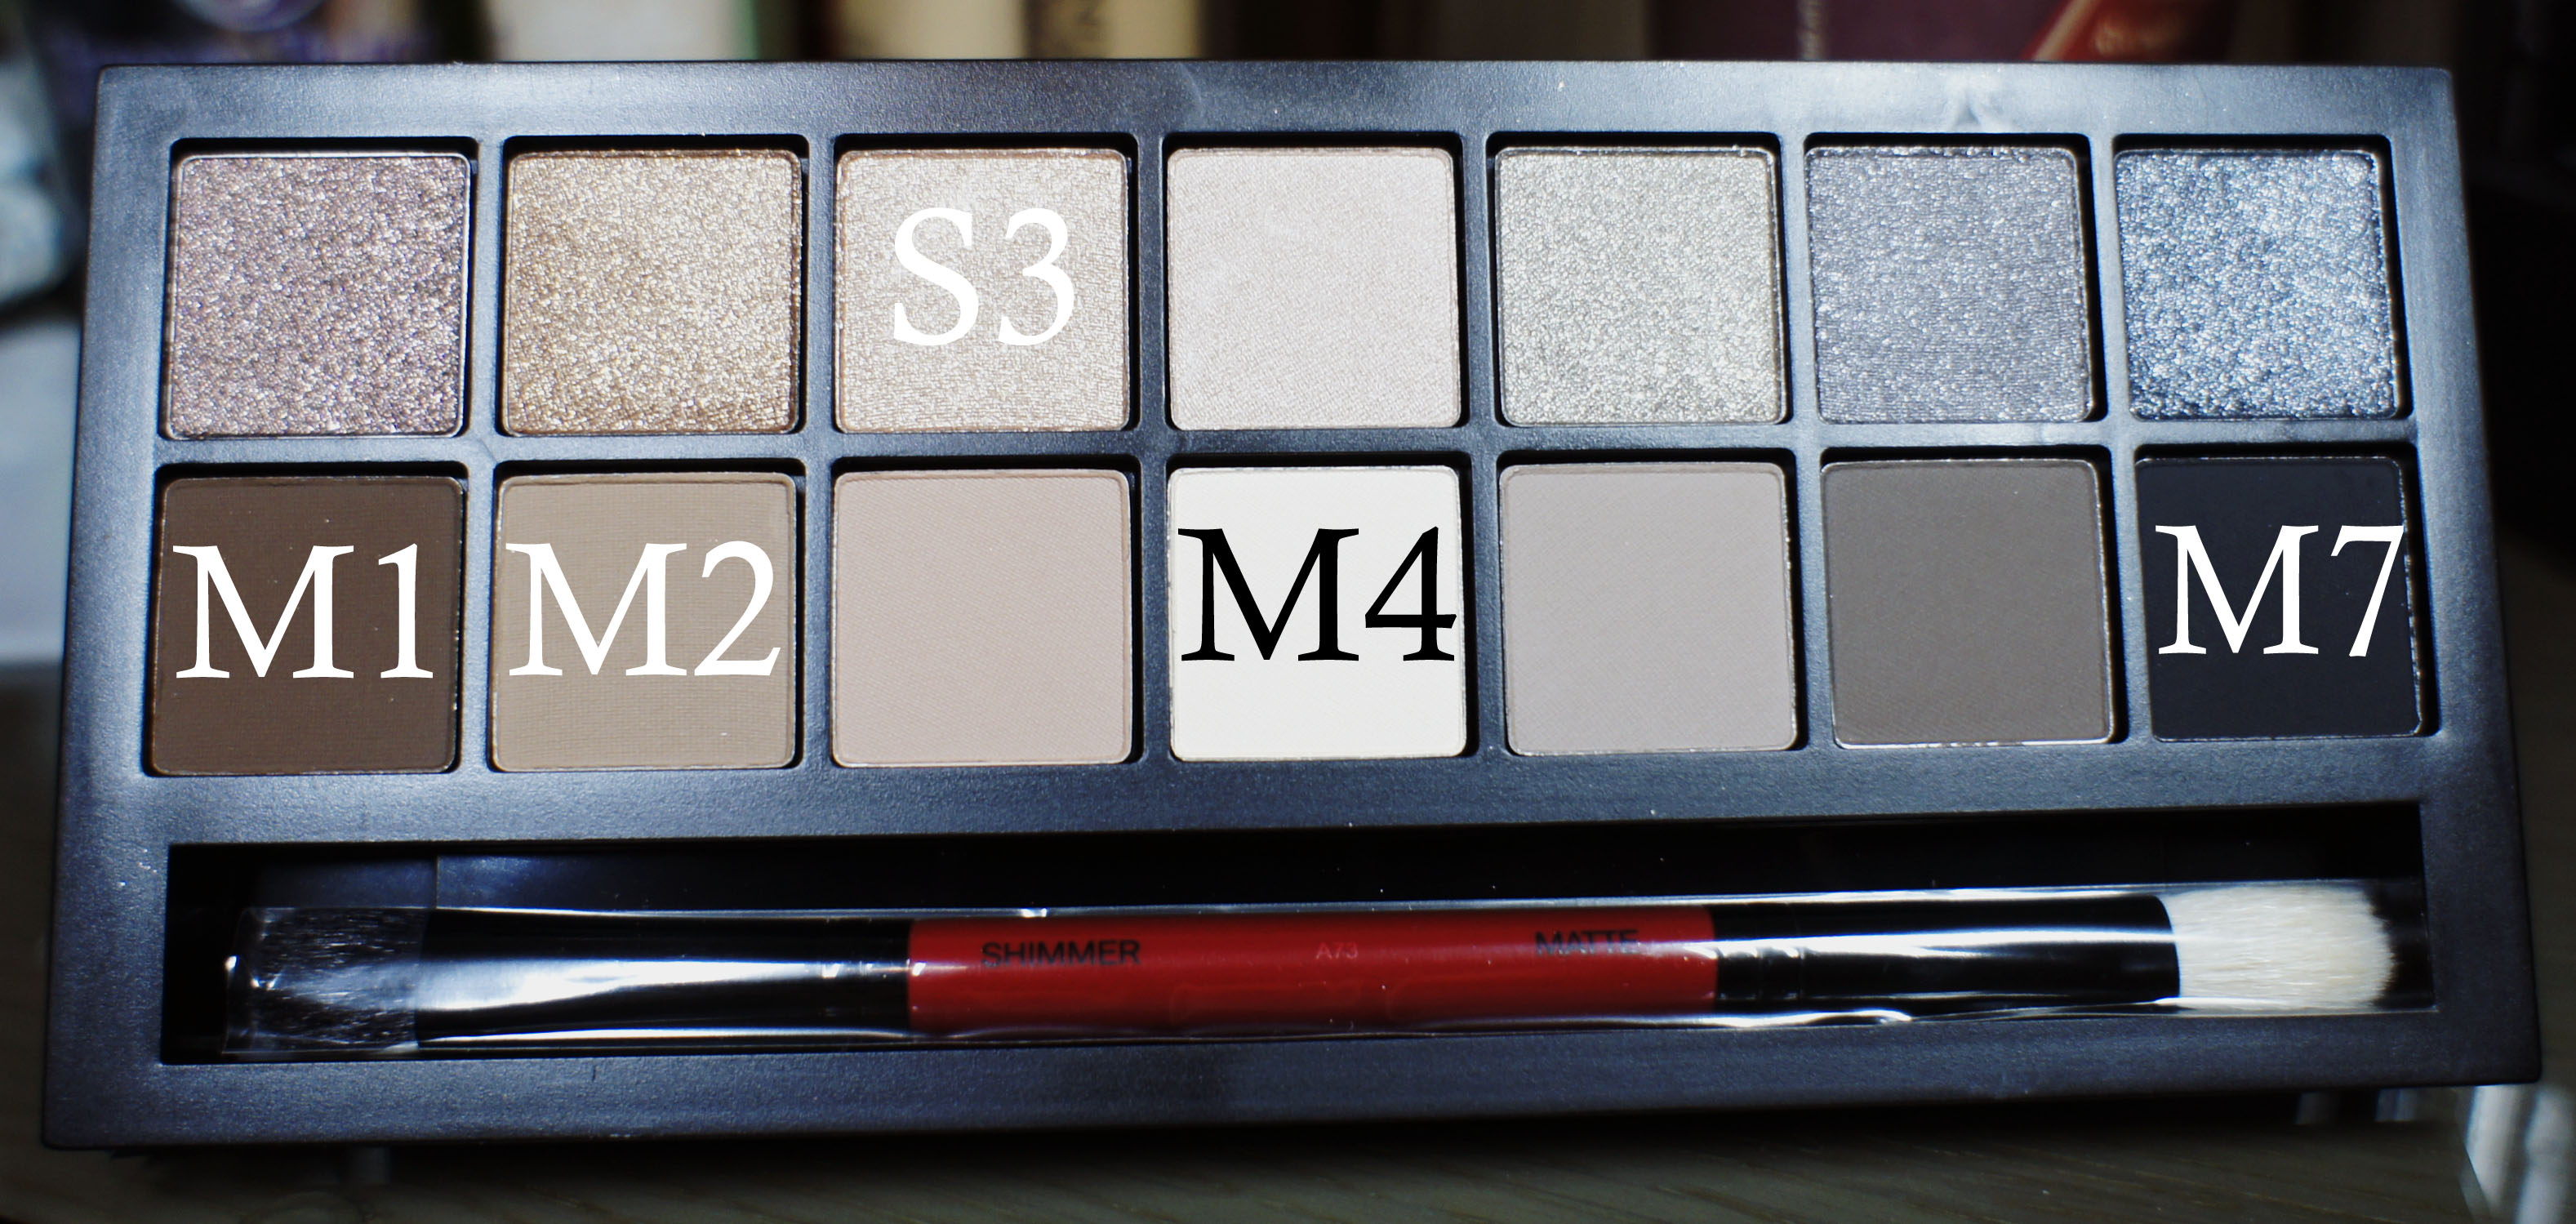
Smashbox Full Exposure Look #1
I’ve recently bought Smashbox Full Exposure palette using my 20% discount from Sephora (yippie!). I’m pretty sure if you guys follow me on Instagram or Twitter, you would’ve seen the picture of the palette there.
Anyways, I’ll talk more about the palette in depth later on. I just have to say, this is an amazing palette! The shimmer side of this Smashbox Full Exposure Palette has beautiful glitters, which surprisingly stayed on the lid really well. Not to mention, the palette consists of nudes, greys, blacks and browns! Both in shimmer and matte! So much love!
This look is perfect for everything! If you want to wear it out on a date, skip the false lashes. It’s so perfect for the upcoming holiday (too early?), brides and any type of parties. It’s warm, not too smoky, not too light. Just enough shimmer, and I love the combination of different textures.
The rest of the face is kept quite minimal, with a tad more highlight to compensate for this winter weather. I used L’oreal Color Caresse Shine Stain to keep my lips moist.

How-to:
1. I prepped my eyelid using Urban Decay Primer Potion.
2. Using a fluffy blending brush (Crown Brush Pro Blending Fluff C433), I applied Smashbox Full Exposure palette M2 eyeshadow slightly above my crease.
3. Then, using Sephora Bullet Crease 221 brush, I applied M1 on the outer V and on the crease.
4. I applied Smashbox Full Exposure palette M7 on the outer quarter of the lid using Crown Brush Round Crease.
5. I used the tip of the Round Crease Crown brush to apply Smashbox Full Exposure palette M1 eyeshadow on the lower lid. Then, I applied M7 just on the outer half of the lower lid.
6. Using Firm Shadow 157 Crown Brush, I applied S3 on the eyelid.
7. I created a winged liner along the upper lashline using Kanebo Kate Super Sharp Liner.
8. I lined the outer half of my tightline using the black side of Revlon PhotoReady Kajal Intense Eye Liner + Brightener in Carbon Cleopatra.
9. I applied Tarte Light, Camera and Lashes mascara, and also Eyeme false eyelashes (sample from a friend) on the upper lashes.
10. Using Red Sable Oval Crown Brush, I applied Smashbox Full Exposure palette M4 under the brows.
11. I filled my brows using Anastasia Brow Wiz in Medium Ash and Brunette.
12. I applied MUFE HD Elixir to prep my face.
13. Then, I applied MAC Pro Longwear foundation in NC30 all over my face.
14. Under the eyes, I applied Giorgio Armani Master Corrector no. 2.
15. Then, I applied MAC Pro Conceal/Corrector in Medium under my eyes, and on my blemishes.
16. I powdered my face using CoverFX Translucent loose powder.
17. I applied MAC Shadowy as contour, MAC Cubic as blush, and Diorskin Shimmer Star Amber Diamond as highlighter.
18. On the lips, I applied L’oreal Colour Caresse Shine Stain in Eternally Nude.
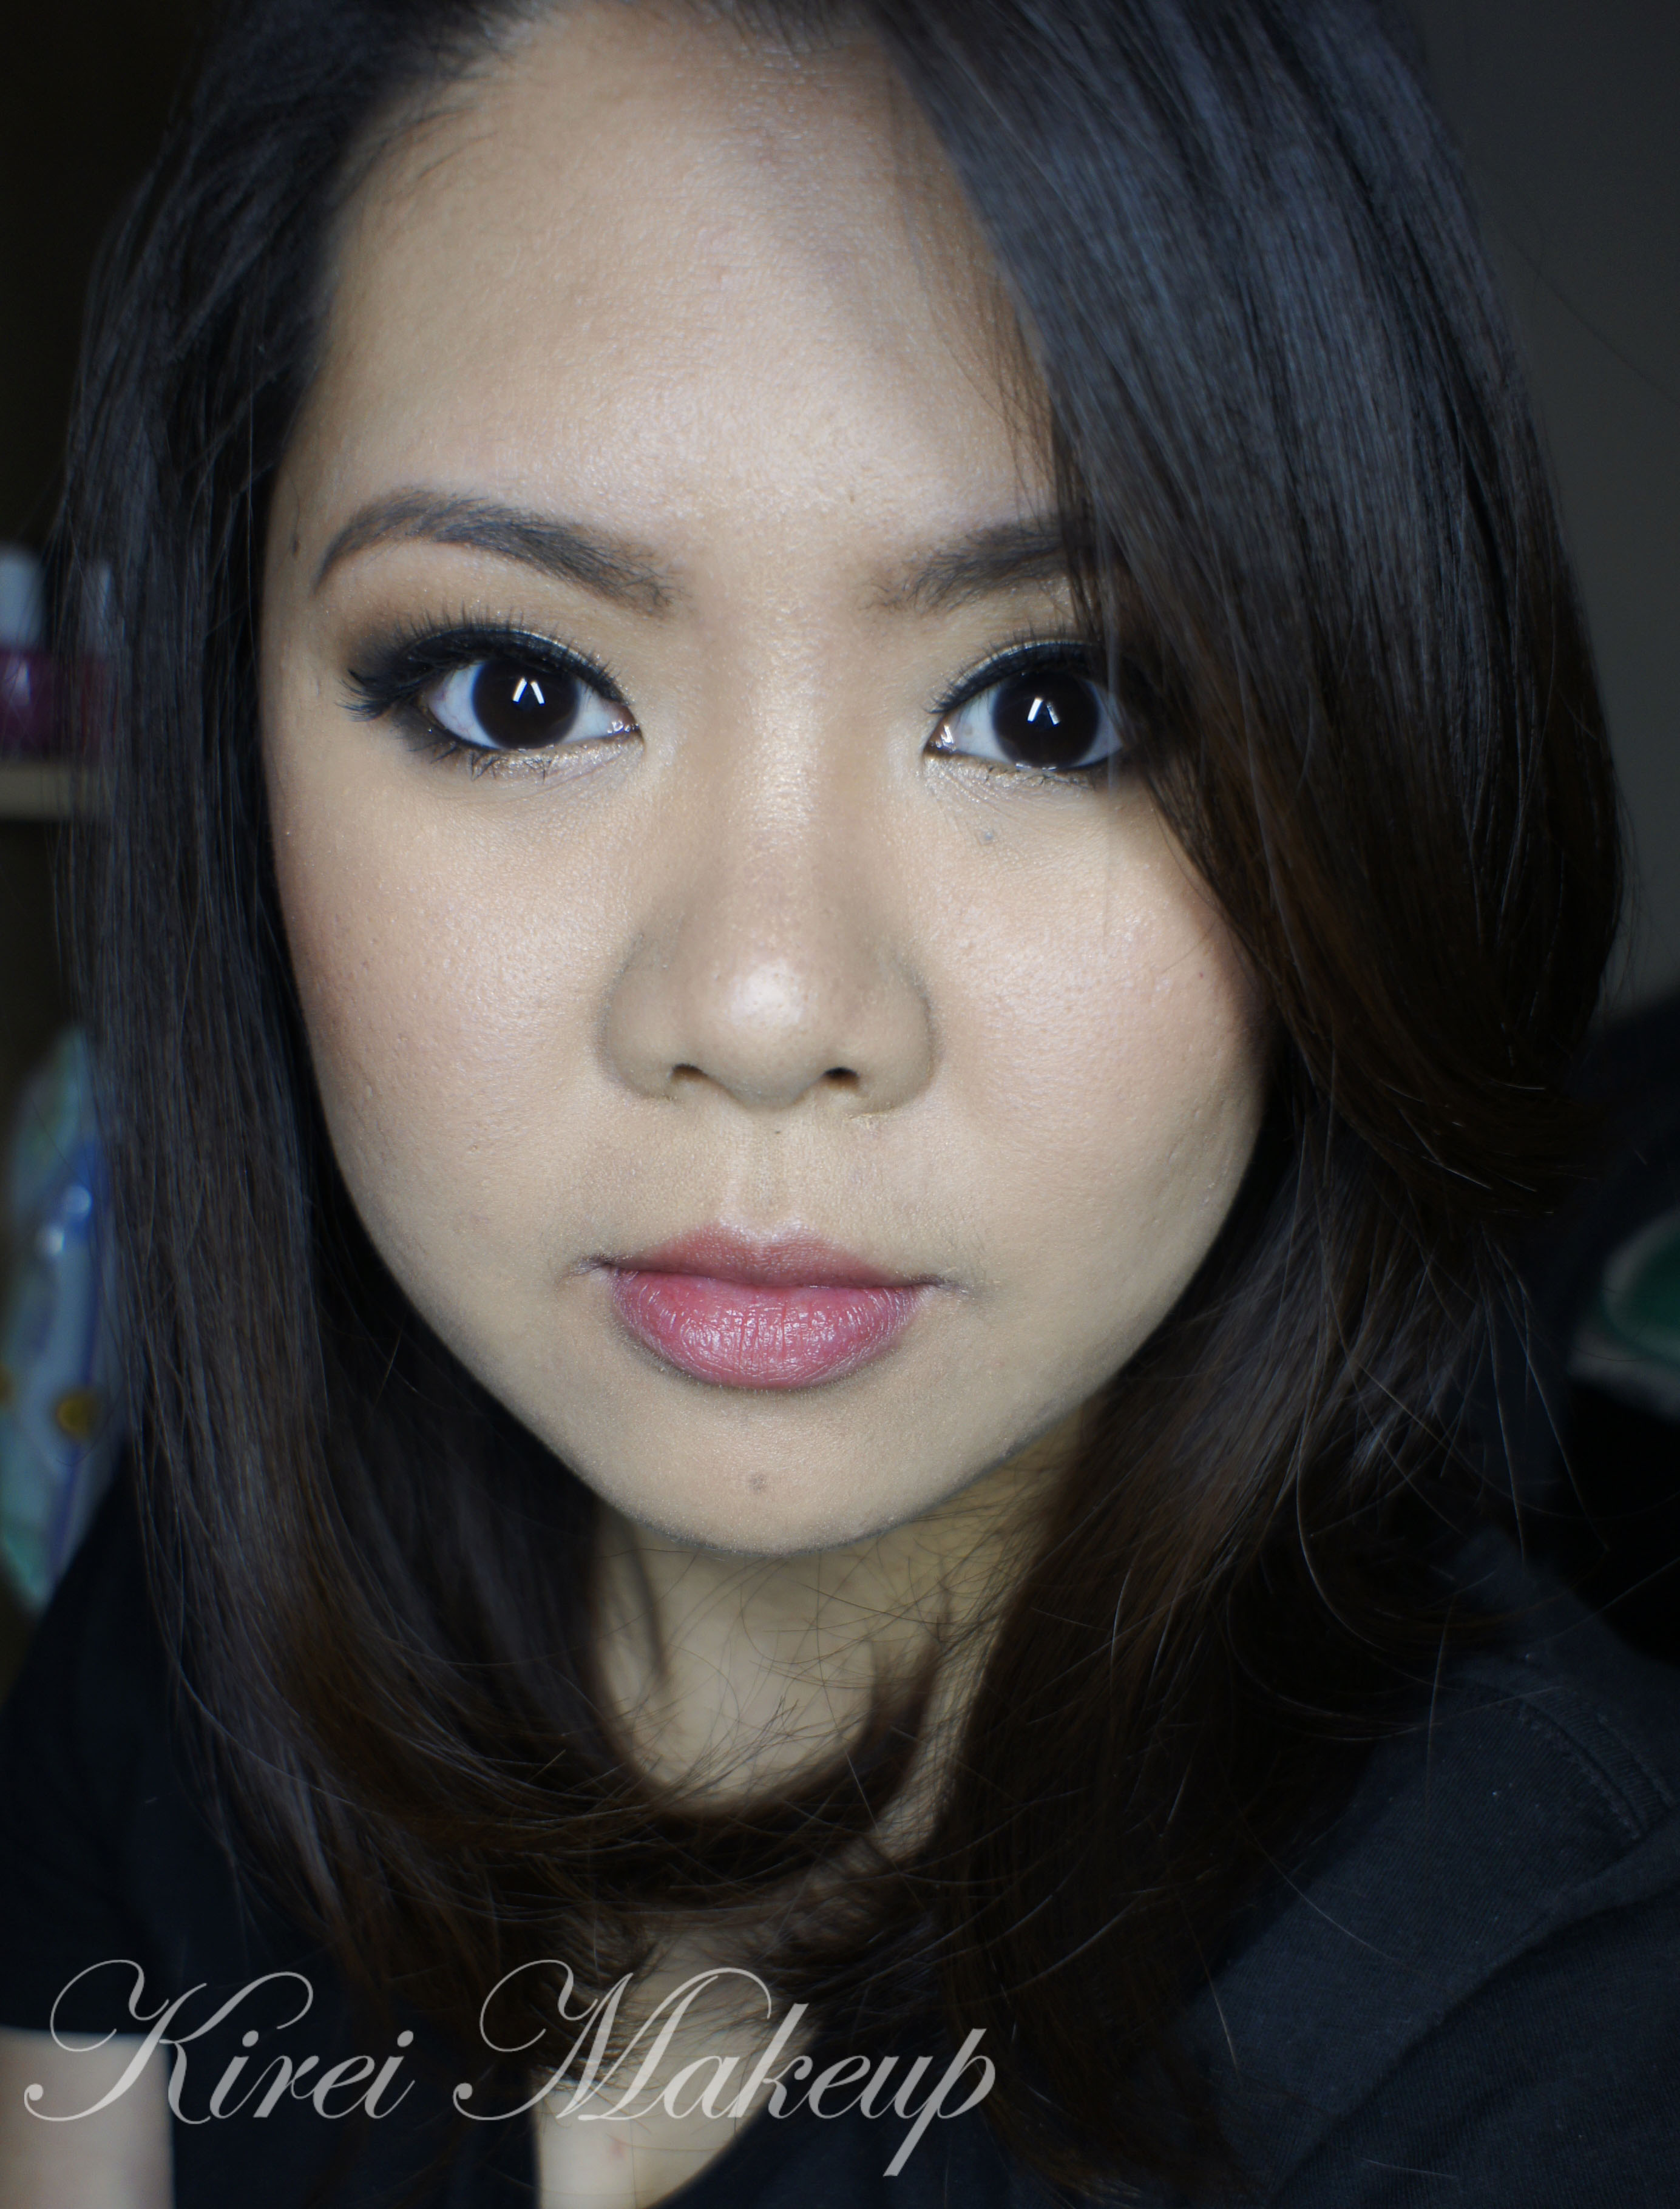
Chanel Kaska Beige re-visited
Hello, everyone! It’s been a while since my last post. I do apologize for the lack of post. Things have been going really crazy in my personal life, and I can barely catch my breath. Anyways, let’s put those things aside, and get back to this whole blogging things back on track!
Today’s tutorial used one of my all-time favorite palette from Chanel, called Kaska Beige. I’ve actually used this palette before in my Chanel Kaska Beige tutorial. This tutorial has a little bit more of a smokier feel than the older post, however still wearable for party, wedding, prom, night-out, pageant etc.
I also added a white eyeliner on the tightline to make my eyes look bigger, and heavier lashes for a doll-eye look. I applied more blush on the cheeks, just to complete the whole “doll” look. I love to add extra pinch of blush esp. in the winter when the colors are grey, and my skin feels blaaaah.
Oh, I also used the new MAC Masterclass Brush Oval 6 on my face, and I’ve to say I love it! I’ll post a review later.
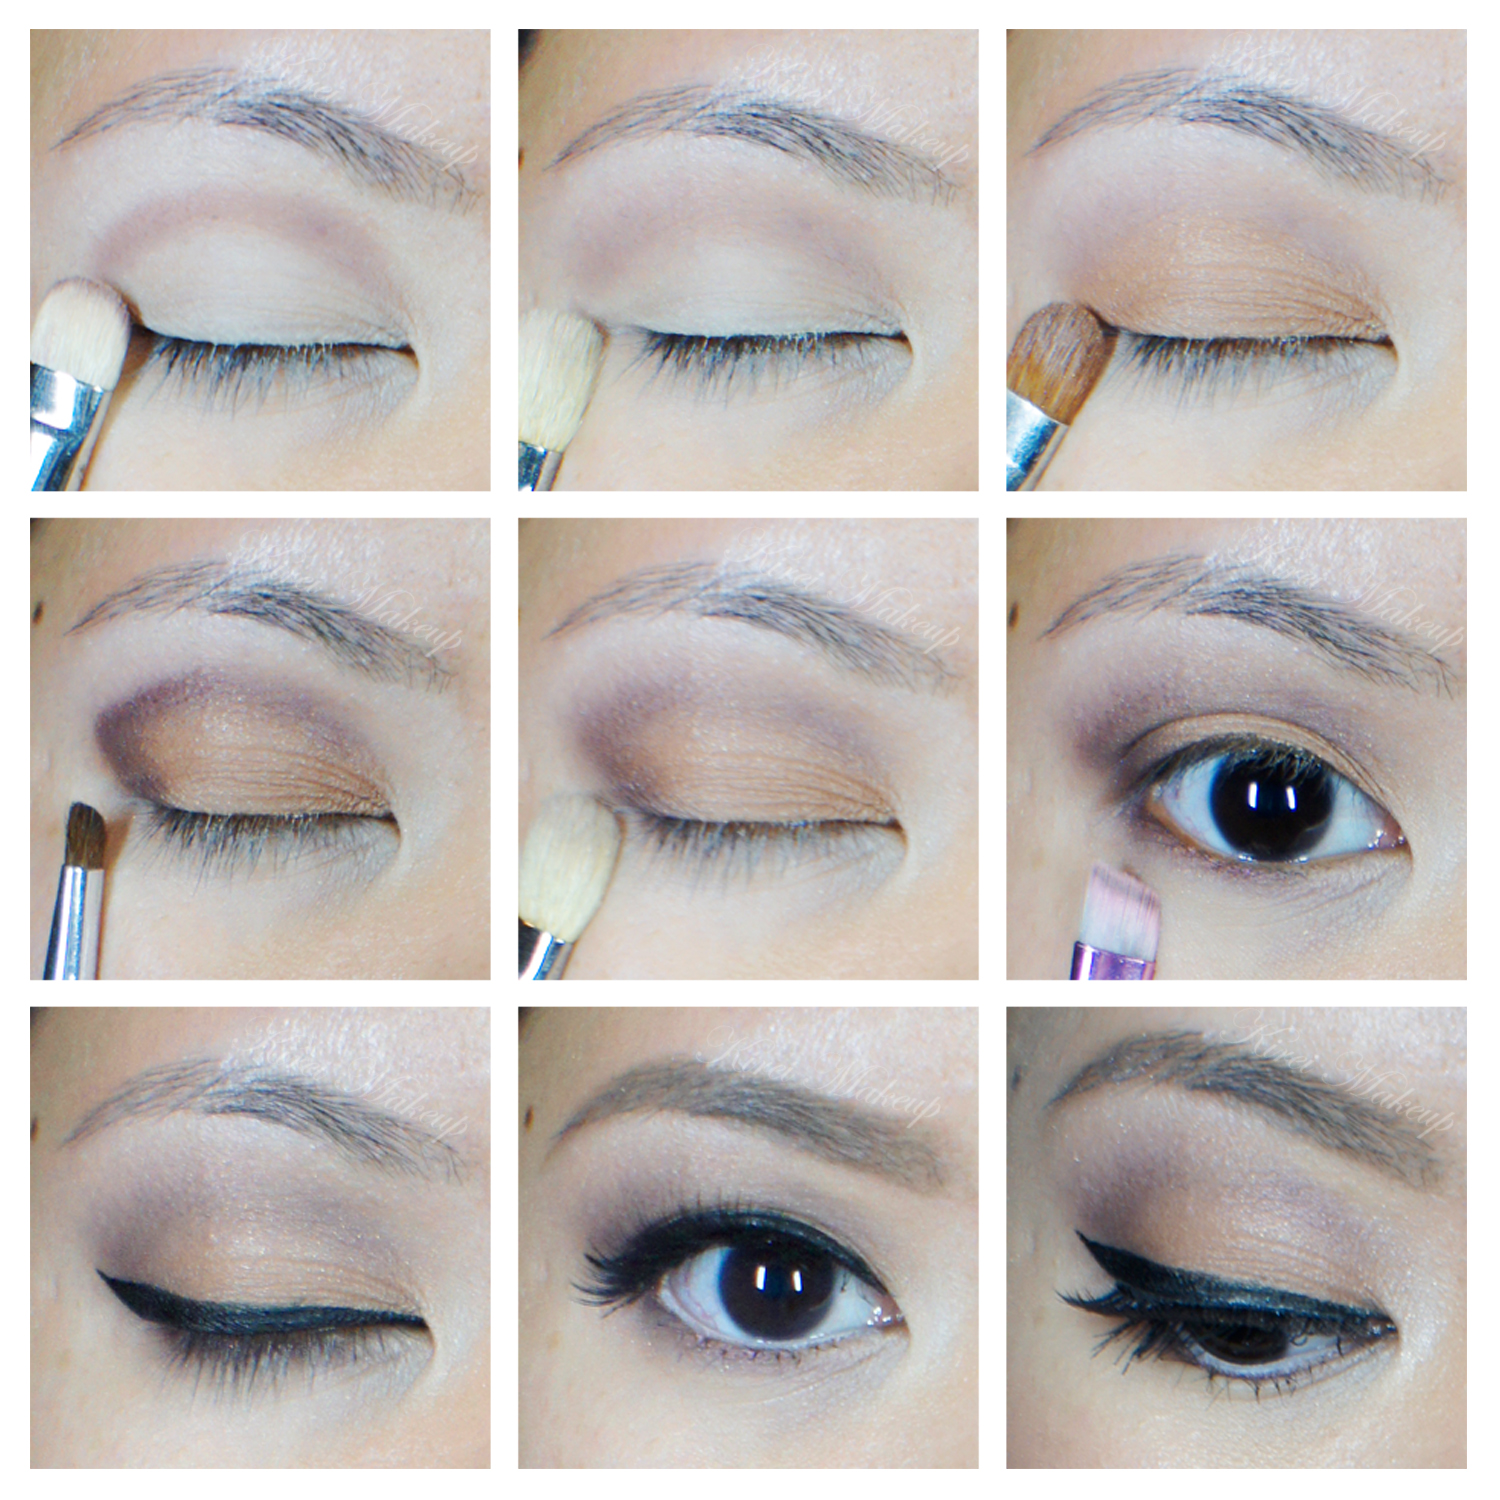
How-to:
1. My eyelid was prep using Urban Decay Primer Potion.
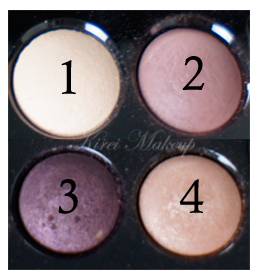
2. I applied eyeshadow 2 (refer to picture below) on my crease using a shader brush (MAC 239).
3. Using a clean blending brush (MAC 217) to blend the edge off.
4. Using a flat eyeshadow brush, I applied eyeshadow 4 on my eyelid.
5. I applied eyeshadow 3 on the outer V using a small angled shader brush.
6. Using a clean blending brush (MAC 217), I blended the outer V.
7. I applied eyeshadow 3 along the lower lash line using an angled eyebrow brush.
8. I created a winged liner using L’oreal Infallible Super Slim Liquid Eyeliner.
9. I applied Tarte Light, Camera and Lashes mascara, and also false eyelashes (sample from a friend) on the upper lashes.
10. I lined my tightline using a white eyeliner from Revlon PhotoReady Kajal Intense Eye Liner + Brightener in Carbon Cleopatra.
11. I filled my eyebrows using a mixture of Anastasia Brow Wiz in Medium Ash and Brunette.
12. I applied eyeshadow 1 under my brows and in the inner corner of my eyes.
13. I applied MUFE HD Elixir to prime my face using MAC Masterclass Brush Oval 6.
14. Using the same brush, I applied MUFE HD foundation all over my face.
15. I applied MAC Pro Conceal/Correct in Medium under my eyes.
16. I set my foundation using MUFE Pro Finish powder.
17. I contoured my face slightly using MAC Shadowy and NARS Ita Kabuki brush.
18. I applied MAC Dainty blush along my cheeks using MAC 219 brush.
19. Then, I applied NARS Mata Hari right on the apples of my cheeks using MAC 219 brush.
20. I filled my lips using MAC Dervish lip liner, and then top it off using Revlon Colorstay Ultimate Suede lipstick in Socialite.
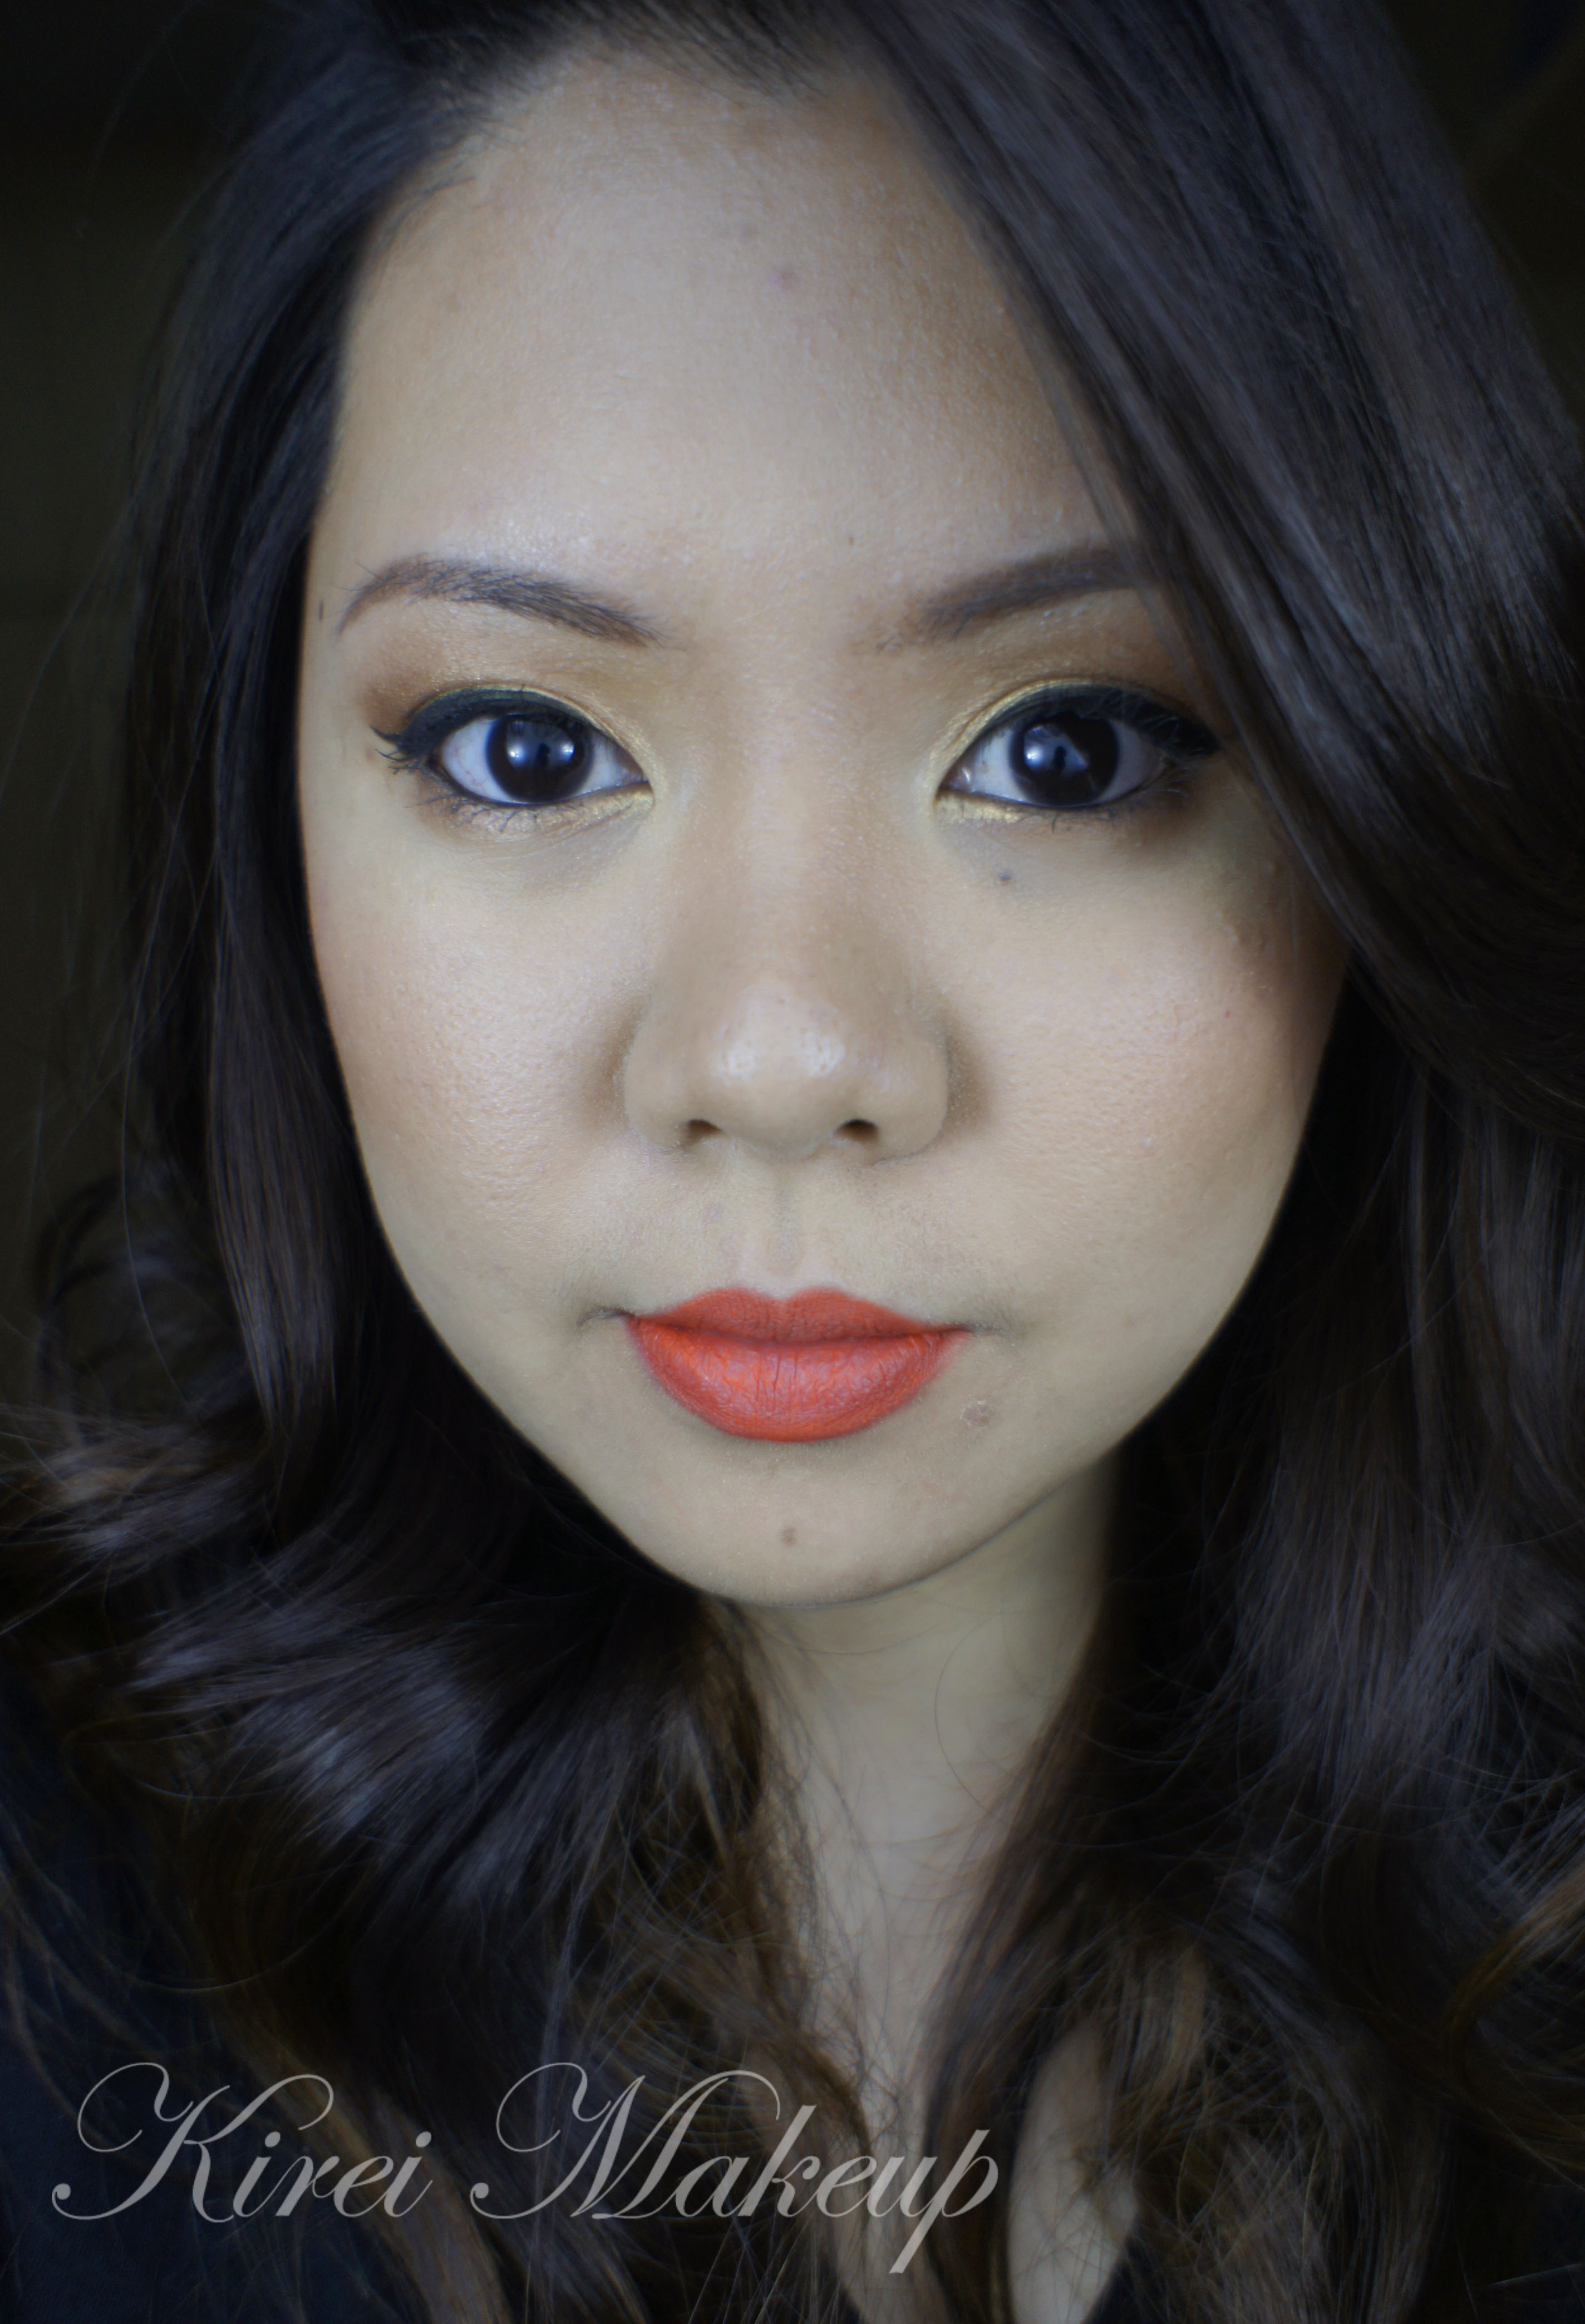
Summer Splash
This look today is one of my fav. summer makeup. It doesn’t matter where I am in the summer, somehow I always seem to resort back to this look. It’s very light and bright, and of course you can always eliminate some of the steps below to make it easier and to suit your own look. Most of the time, I only used the MAC Melon pigment on my lid with mascara, skipping the liner and the contour colors altogether.
Anyways, the 2nd look to this post used an orange lip liner. I don’t know where my orange lipstick is, so I only used the lip liner to fill my entire lip. Of course you can change the lips to whatever color you want, red, pink, or even nude. No rules, just fun playful makeup.
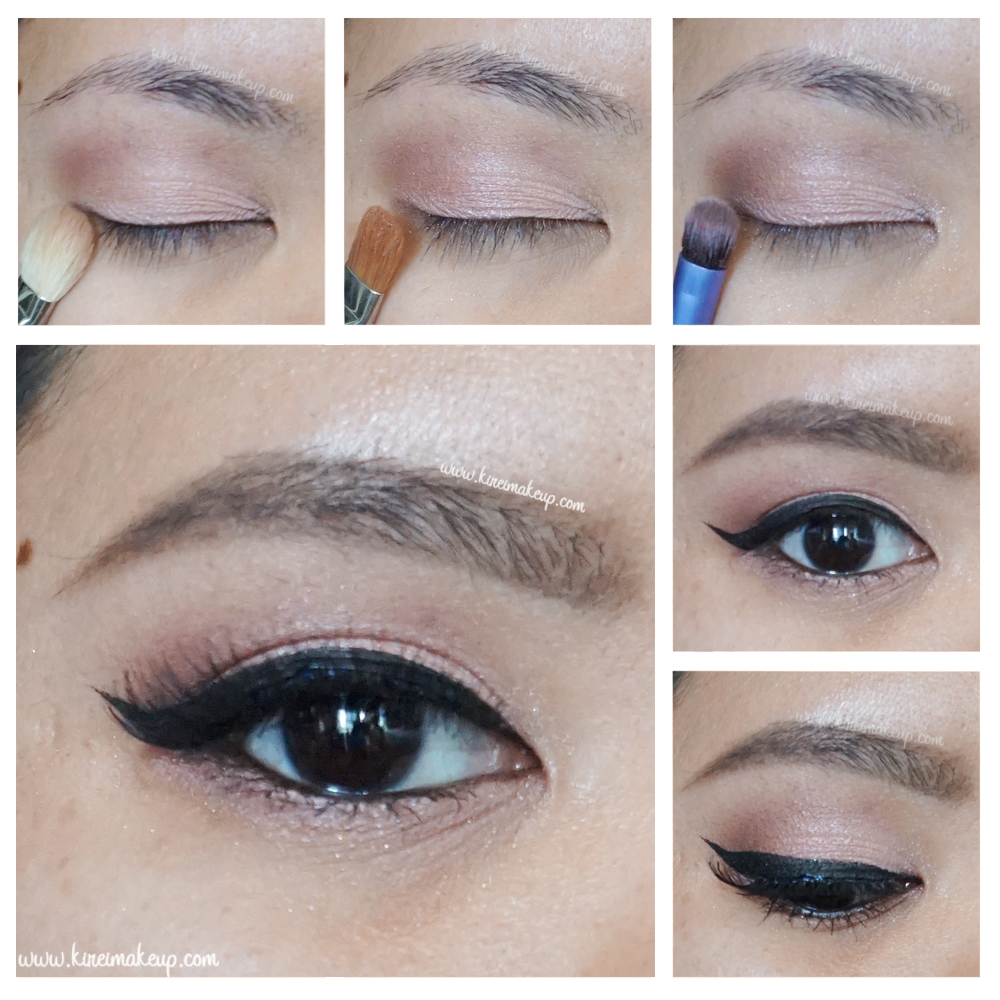
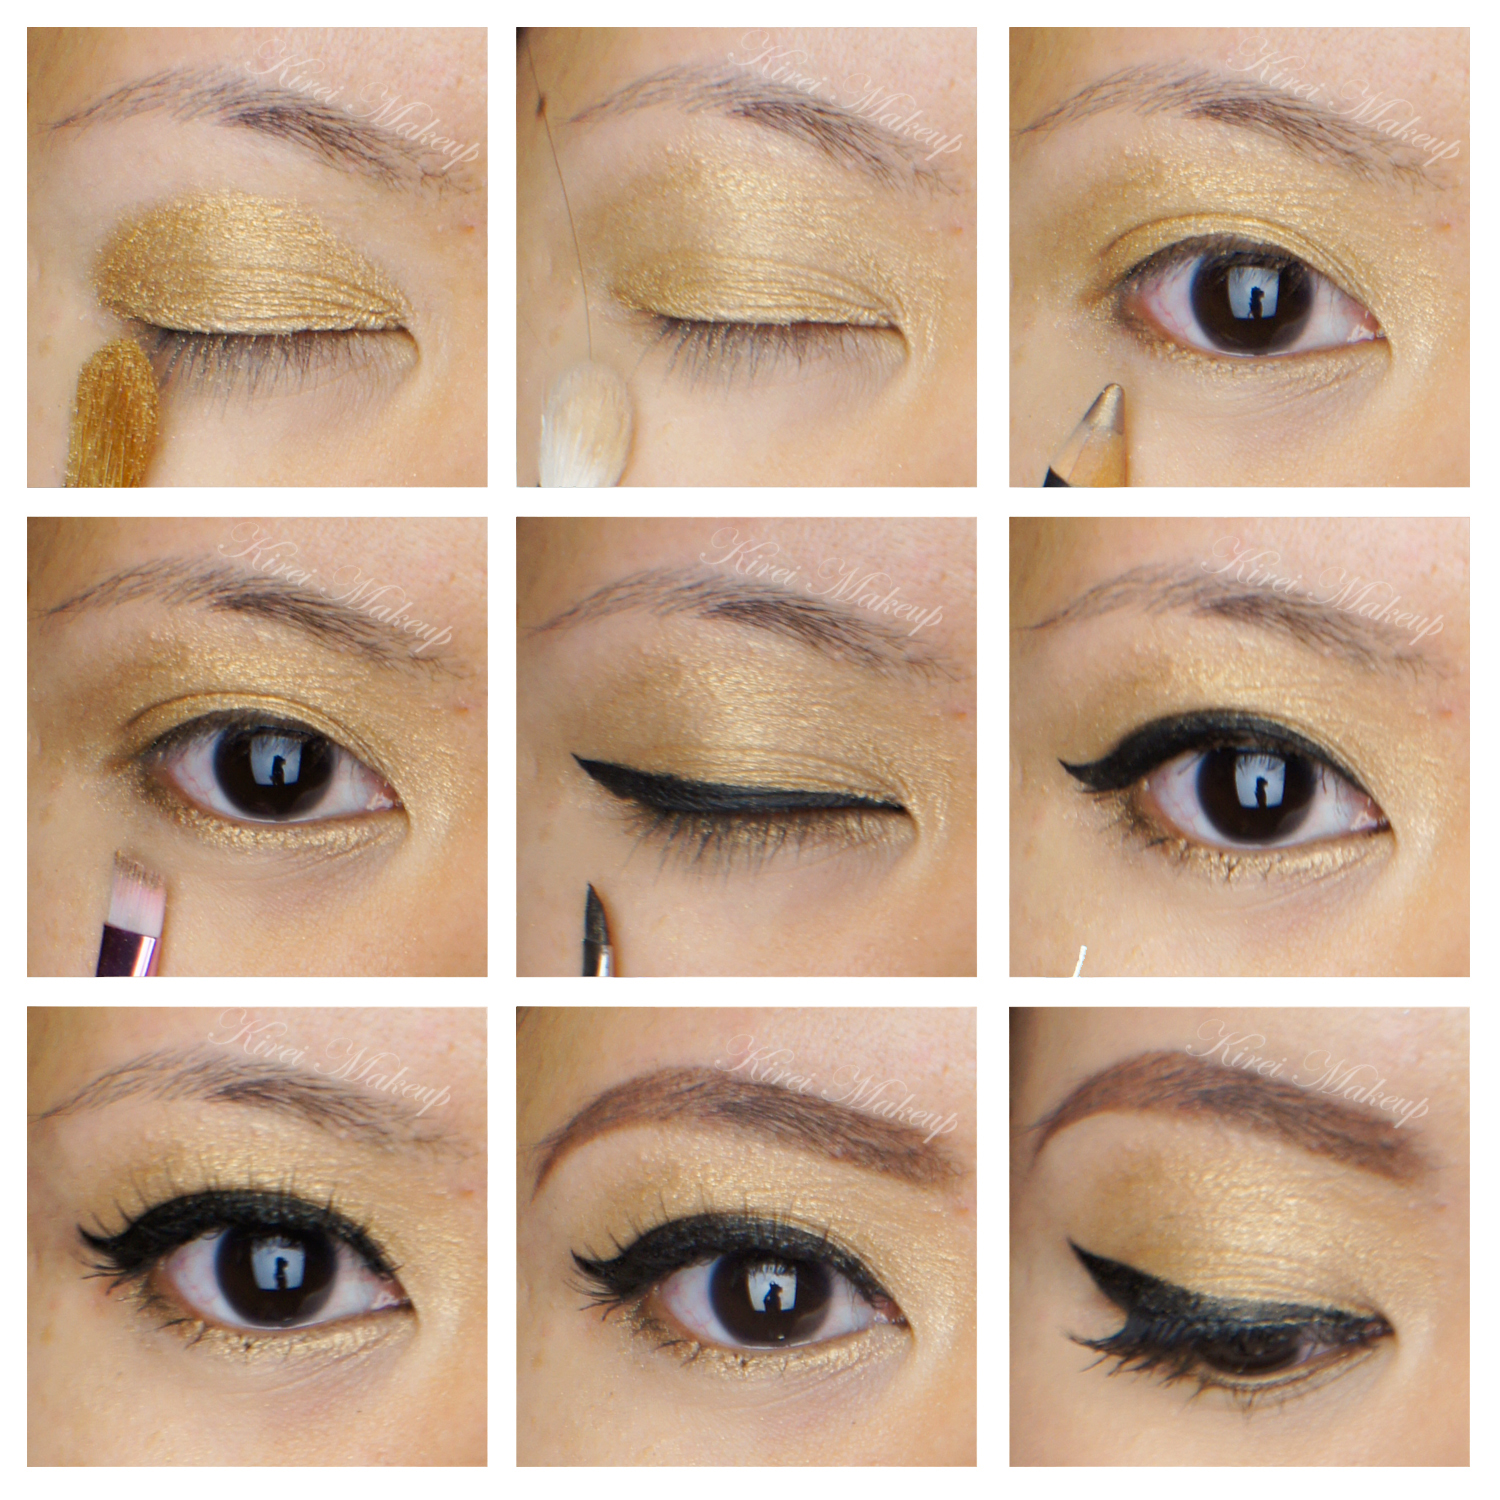
How-to:
1. Using a synthetic brush, I dipped the brush in water and then dipped it in MAC Melon pigment. I mixed it at the back of my hand to turn it into a paste form and applied this paste to my lid, and on the inner corner of the lower lid.
2. Using a shader brush, I applied MAC Bronze eyeshadow on the outer V and on the crease. I used whatever left on the brush and ran it through the lower lid.
3. Using a clean fluffy brush, I blended the crease to remove any harsh edge.
4. I applied Smashbox Deep Golden Brown on the outer corner, blending it inwards. I focused most of the color on the outer V of the lid.
5. Using whatever left on the brush, I applied it on the lower lid.
6. Using an angled eyeliner brush and MUFE Aqua Black, I created a winged liner along the upper lash line.
7. I lined my waterline using whatever product remained on the brush from step 6.
8. I curled my lashes and applied Maybelline Express Volume Turbo Boost mascara on both top and bottom lashes.
9. I filled my brows in using Shu Uemura Hard Formula 9 brow pencil.
10. I applied UD Naked foundation all over my face using a foundation brush.
11. I contoured my face using MAC Studio Tech in NW 55. (If you want to know how I contour my face, check out this post for powder contouring or here for cream contouring)
12. I applied MAC Peaches blush on the cheeks.
13a. For the lips, I applied YSL Pur Couture rouge no. 17 using a lip brush.
13b. For the orange lips, I lined and filled my lips using MAC Entertain Me lipliner.