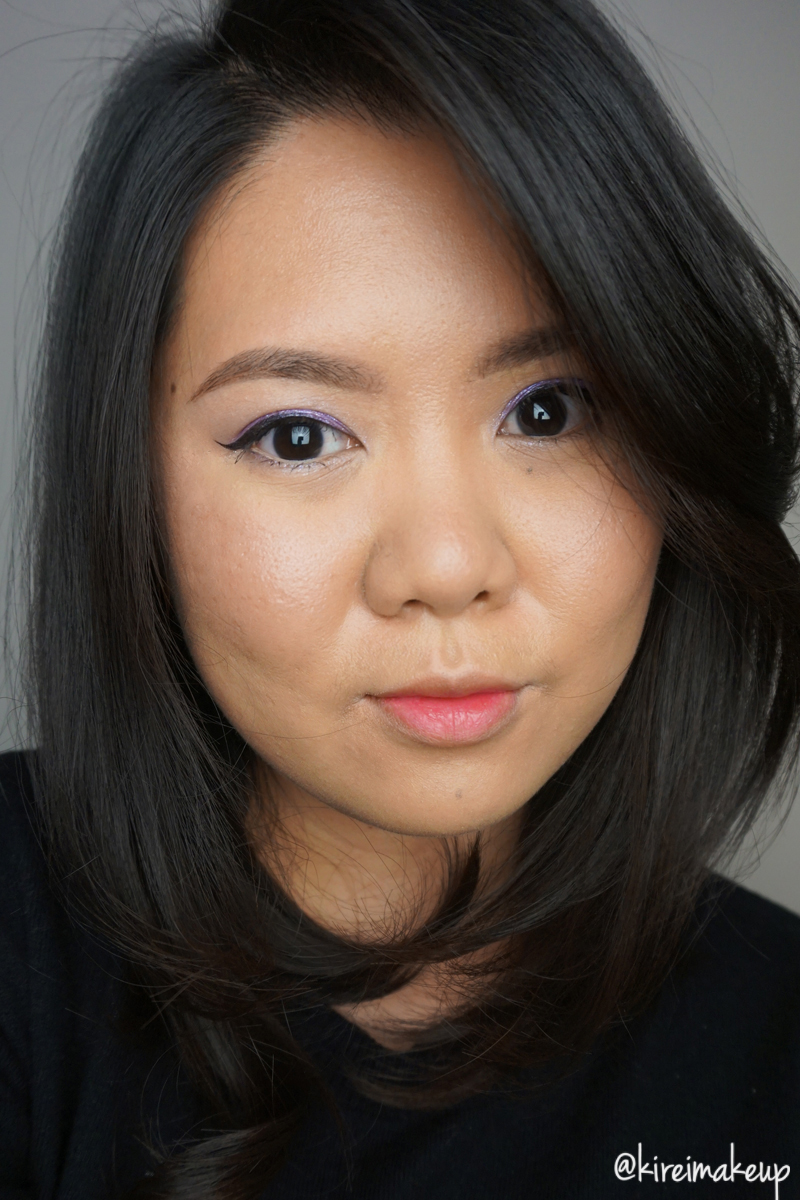
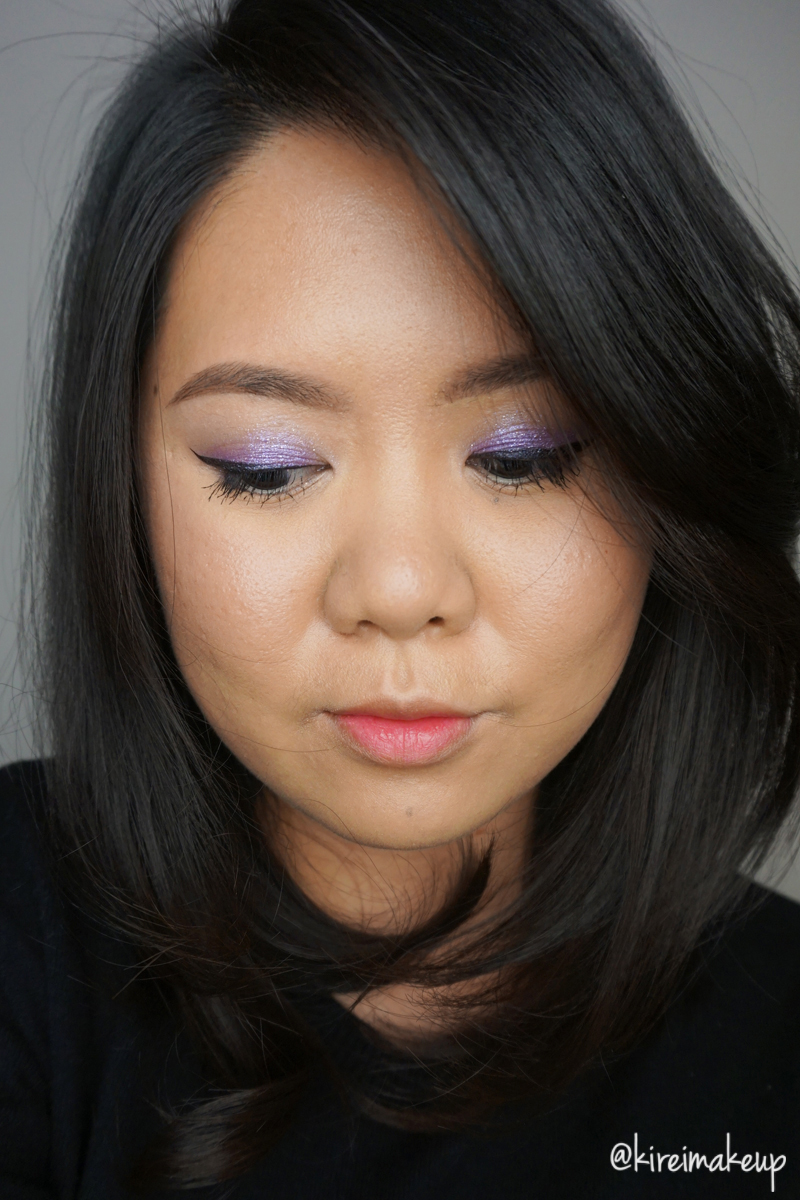
I can’t believe it’s almost December! Are you guys ready for the Holiday season? If you are ready to attend parties and eat great food, then you should be prepared with great makeup looks! For this post, I want to share with this Lavender Glitter party makeup. One tip I want to share is that I applied it dry first as a base, then dipped my brush in water and re-apply the eyeshadow wet to get more shine from the glitters!
Just beginning of this week, I received a PR package from THEFACESHOP Canada. I was thrilled when I saw all the products they sent me, thus why I created this look! AThis year, break out of your earthy tones, and neutrals. Come join me in this world of sparkles and pastels. You have to give this look a try! It’s not too out there, but at the same time it has just enough color to make you stand out from the rest.
What is your favorite Holiday look? Let me know in the comment below!

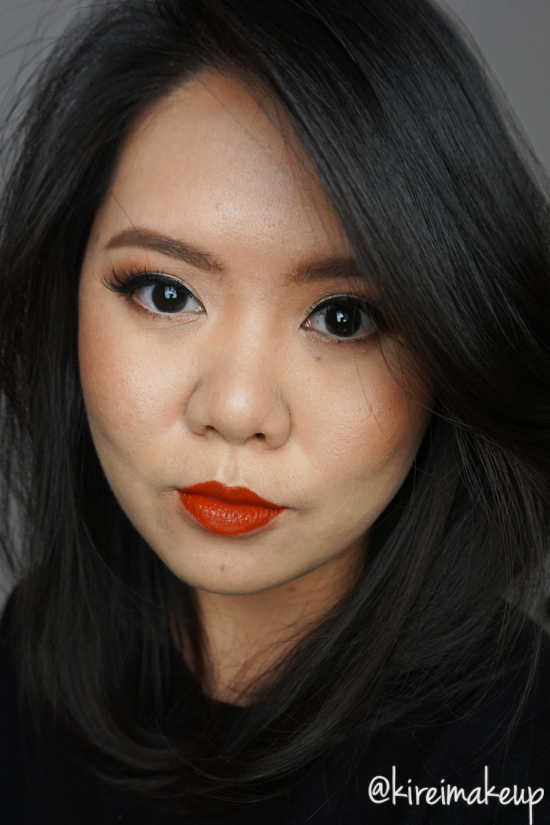
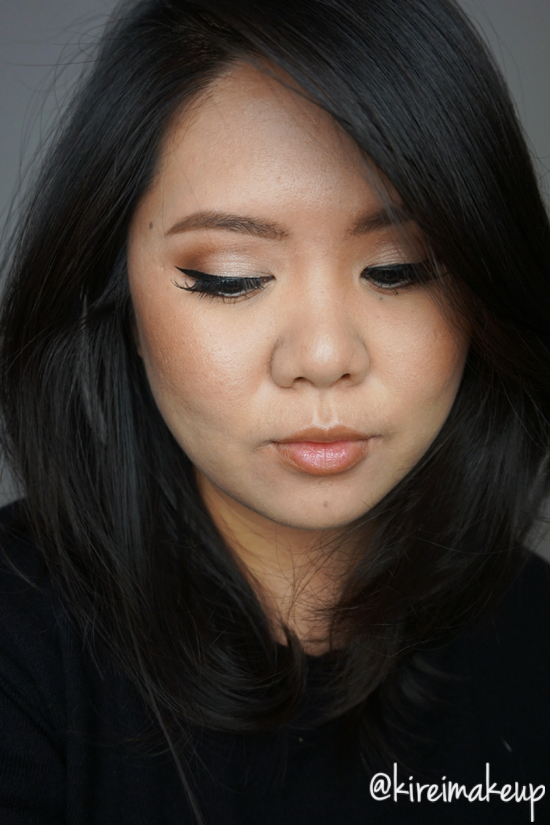
This post is very much inspired by the Korean makeup trends (K-Pop makeup) – luminous dewy skin, simple eyes, and gradient lip (or ombre). This look is very simple, and in a lot of way very cute and girly. The Koreans, they don’t really wear much contouring on the face or eyes. They focus mostly on a very youthful-looking skin which looks very dewy, and Popsicle lips. I skipped the falsies because most of the Korean actresses and singers don’t wear them. It’s not a big part of their makeup ritual, unlike the Japanese who are huge fans of falsies.
The reason why I used 2 blushes for this tutorial is because the blush from THEFACESHOP Canada is a bit too light for my skin. Since it does not show up on my skin, I used my Chanel blush, and then used the one from THEFACESHOP Canada on top of the Chanel one to soften the color, and highlight my cheeks.
I’ll be posting a review of THEFACESHOP Canada products I used on this tutorial next week! So, don’t forget to subscribe so you can get my latest post in your inbox (subscribe button is located on the top right side bar).
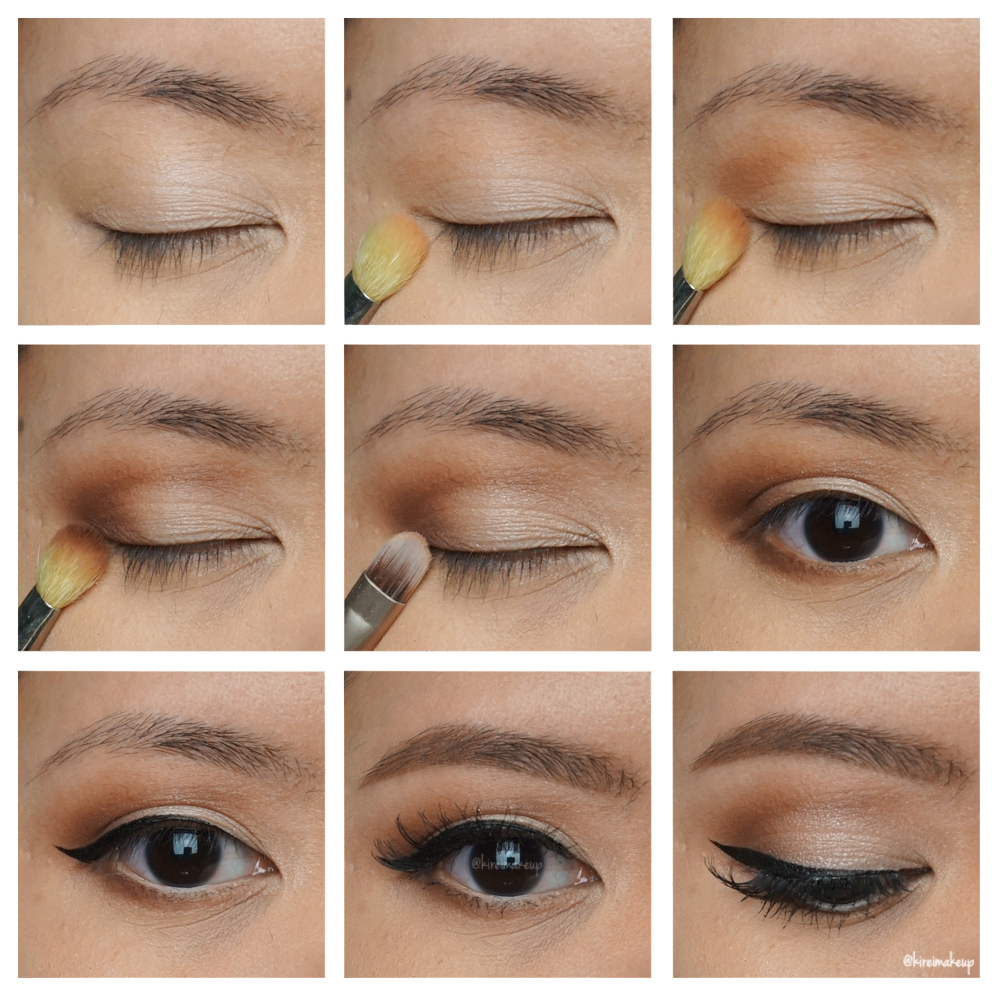
Products used
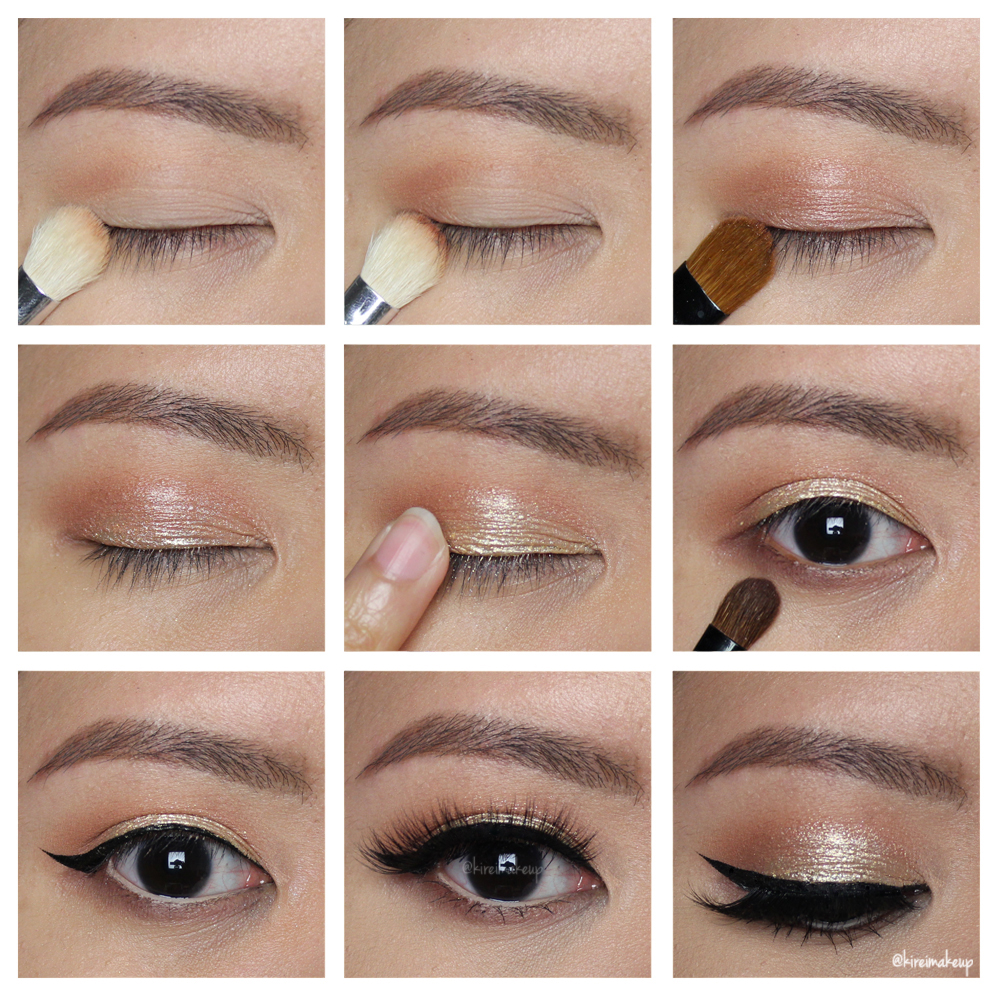
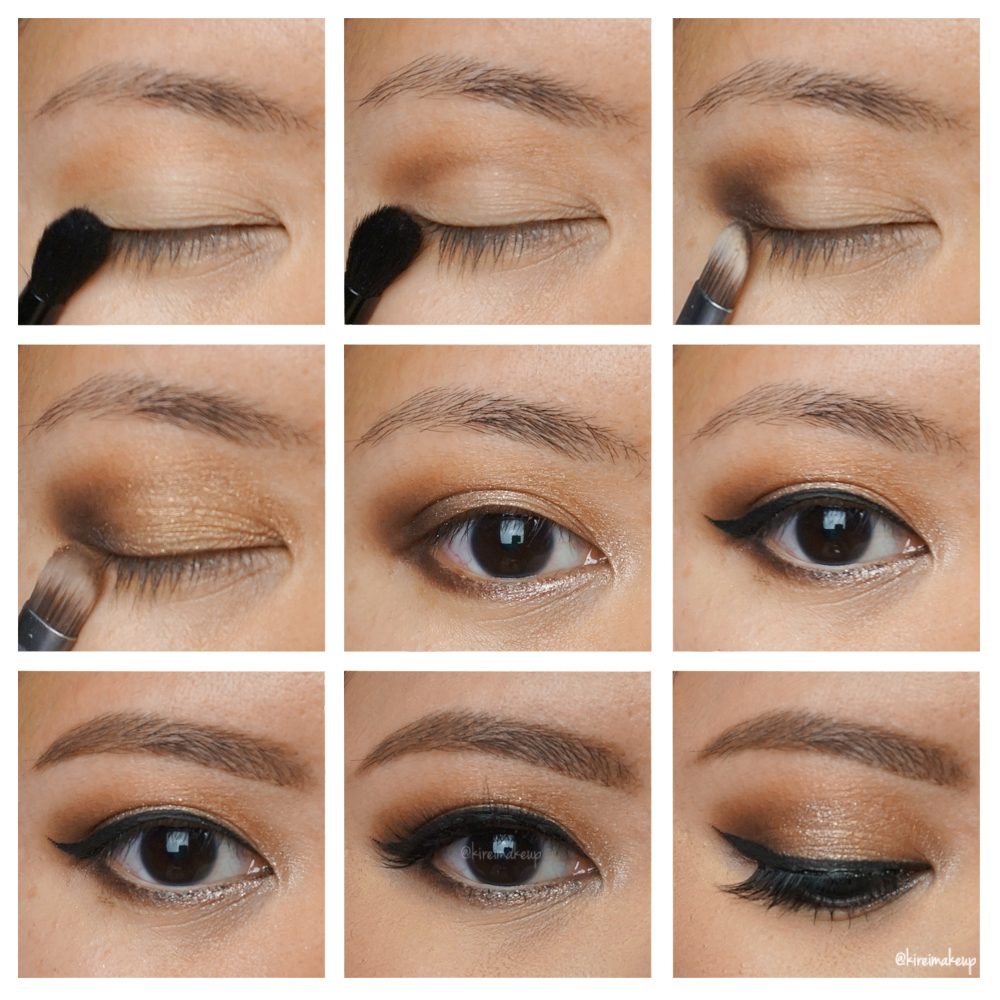
Eyes
- Primer – Urban Decay Primer Potion “Original”
- Lid/lower lash line – THEFACESHOP Canada “Lavender Glitter”
- Winged liner – THEFACESHOP Canada Color Proof eyeliner “Purple Violet”
- Waterline – MAC Chromagraphic eyeliner NC30
- Eyebrows – Anastasia Brow Pomade “Medium Brown”
- Mascara – THEFACESHOP Canada “Freshian Big Mascara (01 Curling)”
Face
Cheeks
- Blush – THEFACESHOP “Candy Violet” single blush; Chanel Blush de Horizon
Lips
- Lip stain – THEFACESHOP Ink Lipquid “Pink Scarf Rose”

