Tropical Punch

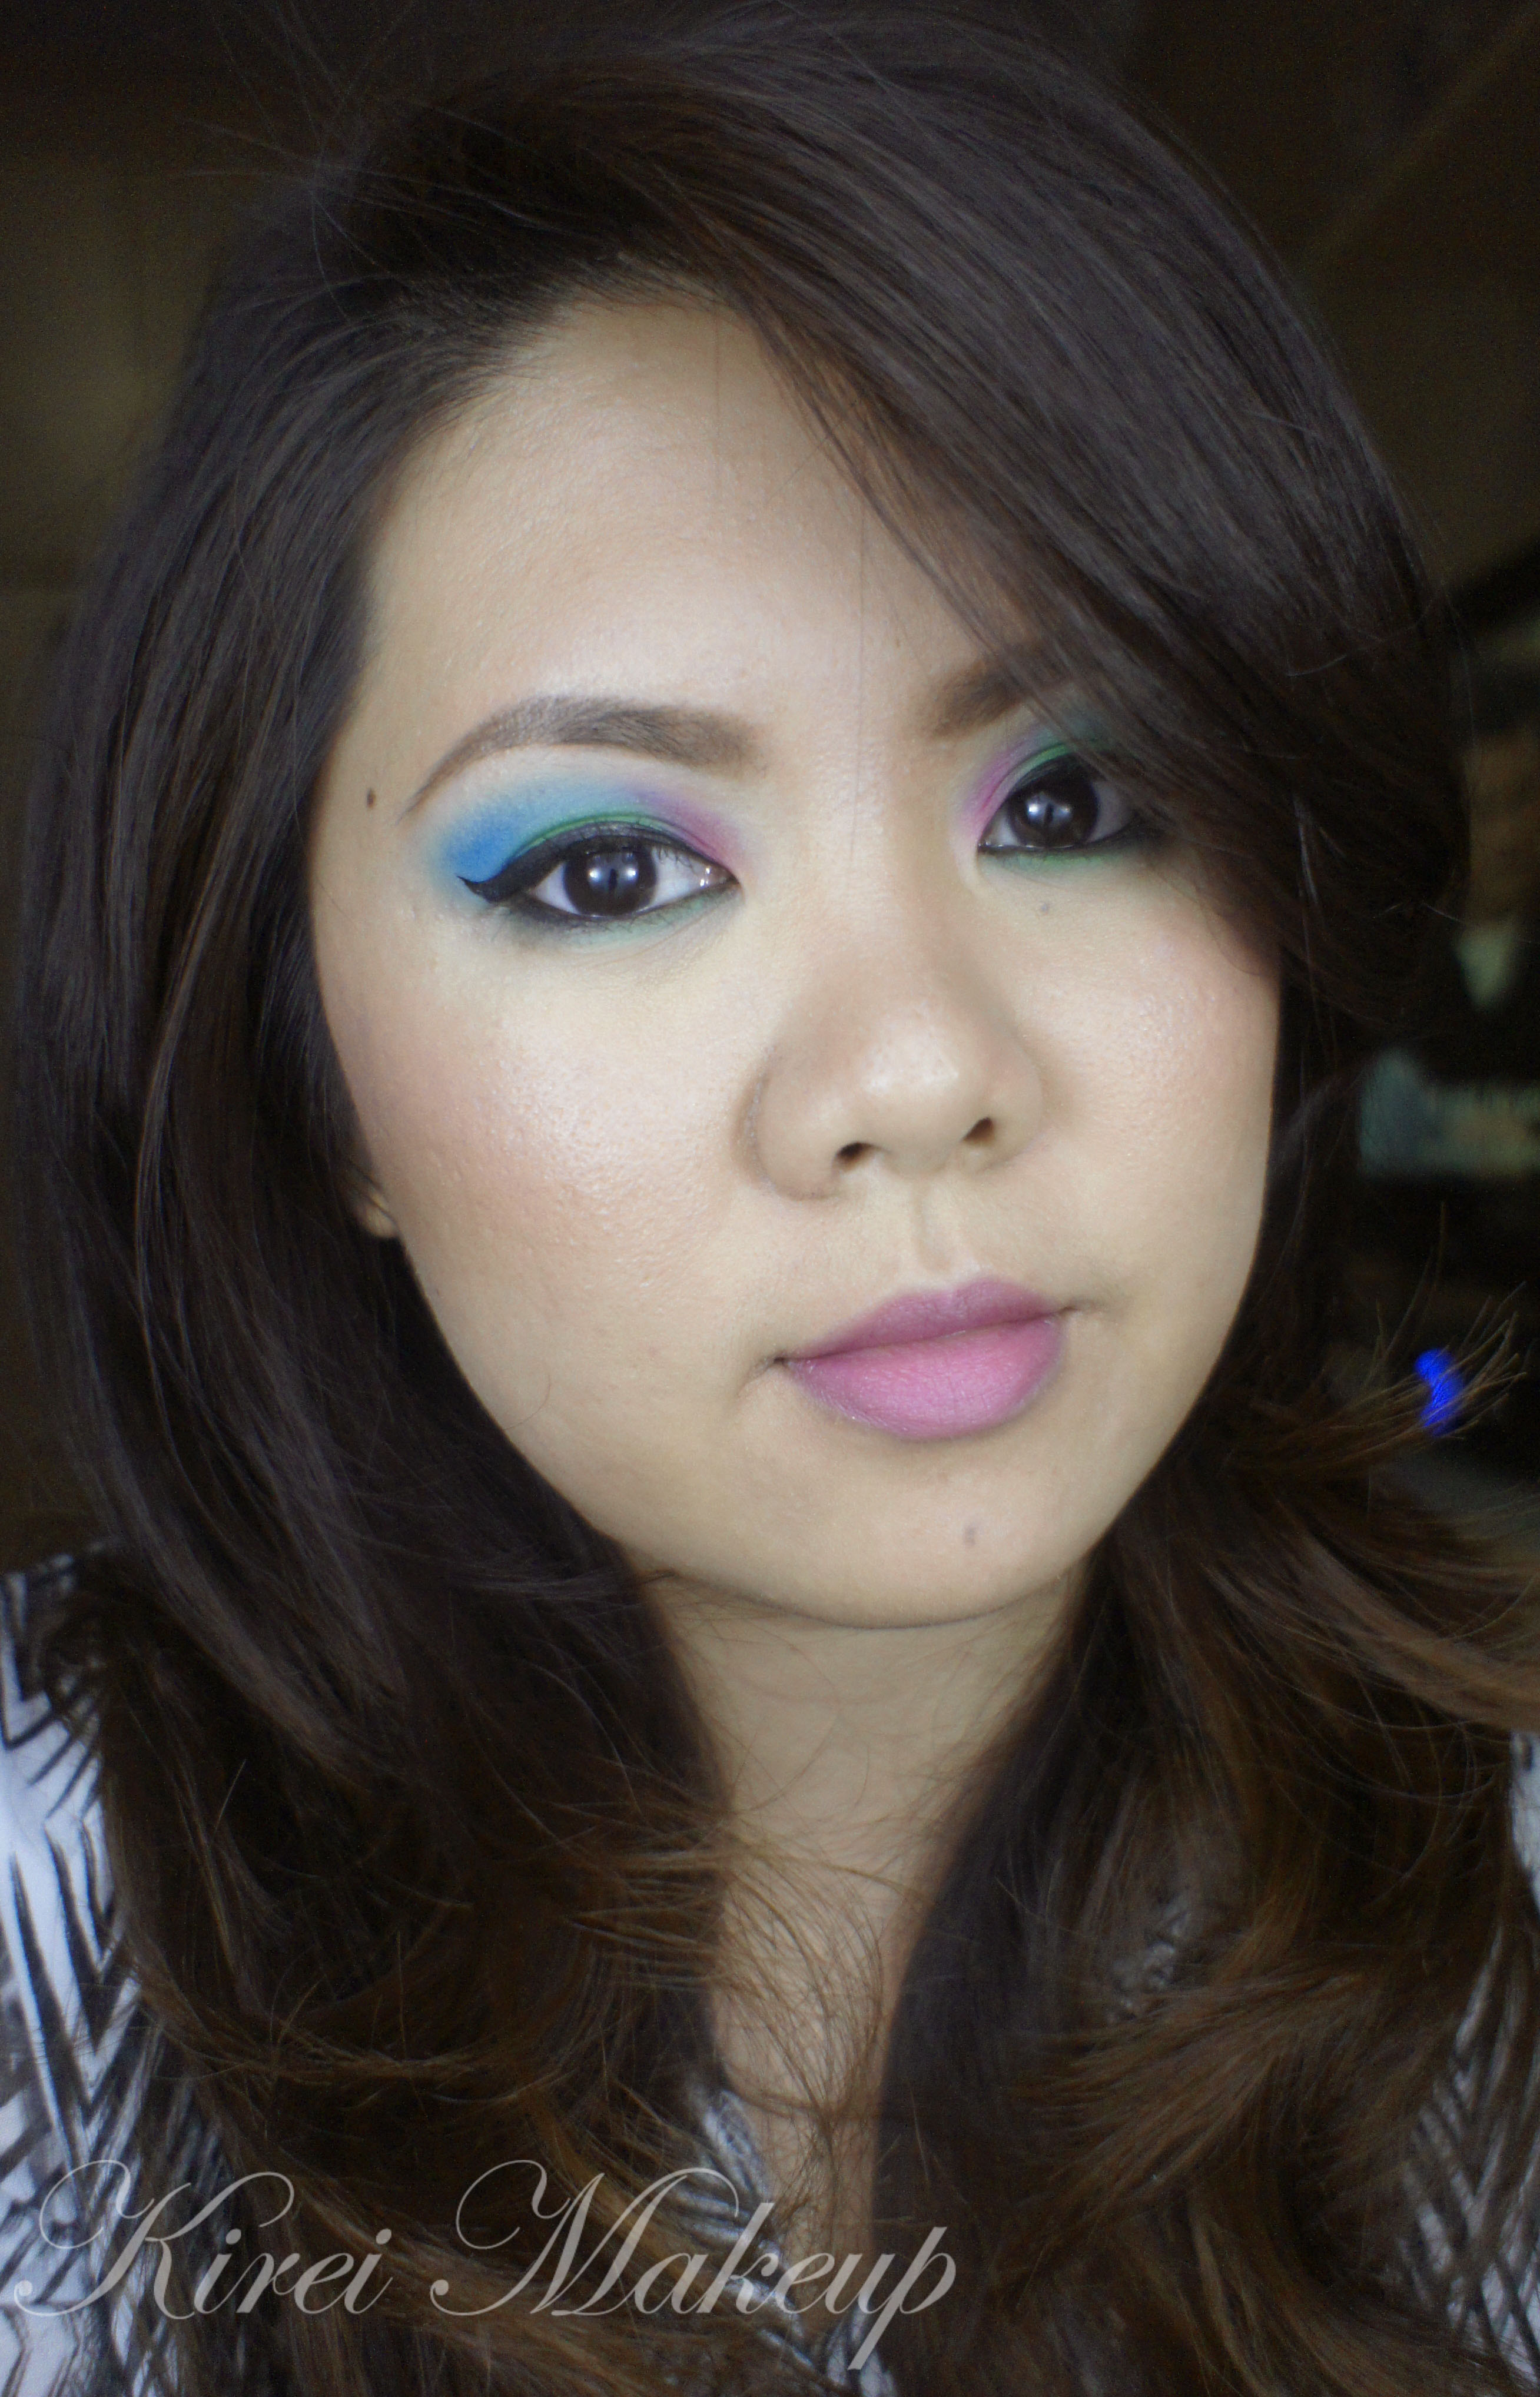
Another look from the Sleek Makeup palette, this time I tried the iDivine Ultra Mattes V1 Brights. I’m not sure how I feel about this palette. The colors are absolutely breathtaking, the pigments were amazing, yet there’s something missing. I’m not quite sure how to put it. I mean, the color glides like a butter, but when it’s time to blend, the eyeshadow seems to just disappear into the abyss. I mean, it’s just gone gone gone. I’ve to re-apply and re-blend the blue eyeshadow (on the crease) over and over again, even so I still am not too happy with the end result.

Anyways, for swatches and close-up pictures on just the palette itself, please click on this post Sleek Makeup iDivine Swatches.

I think I might give this palette another try some time soon. Anyways, don’t forget if you want to buy anything from Luxola, esp. the Sleek Makeup iDivine palettes, go to the LUXOLA website and put LXBLOG when you check out to get 15% off! (any underlined and bold words will lead you to luxola website, or to another post of mine).

How-to:

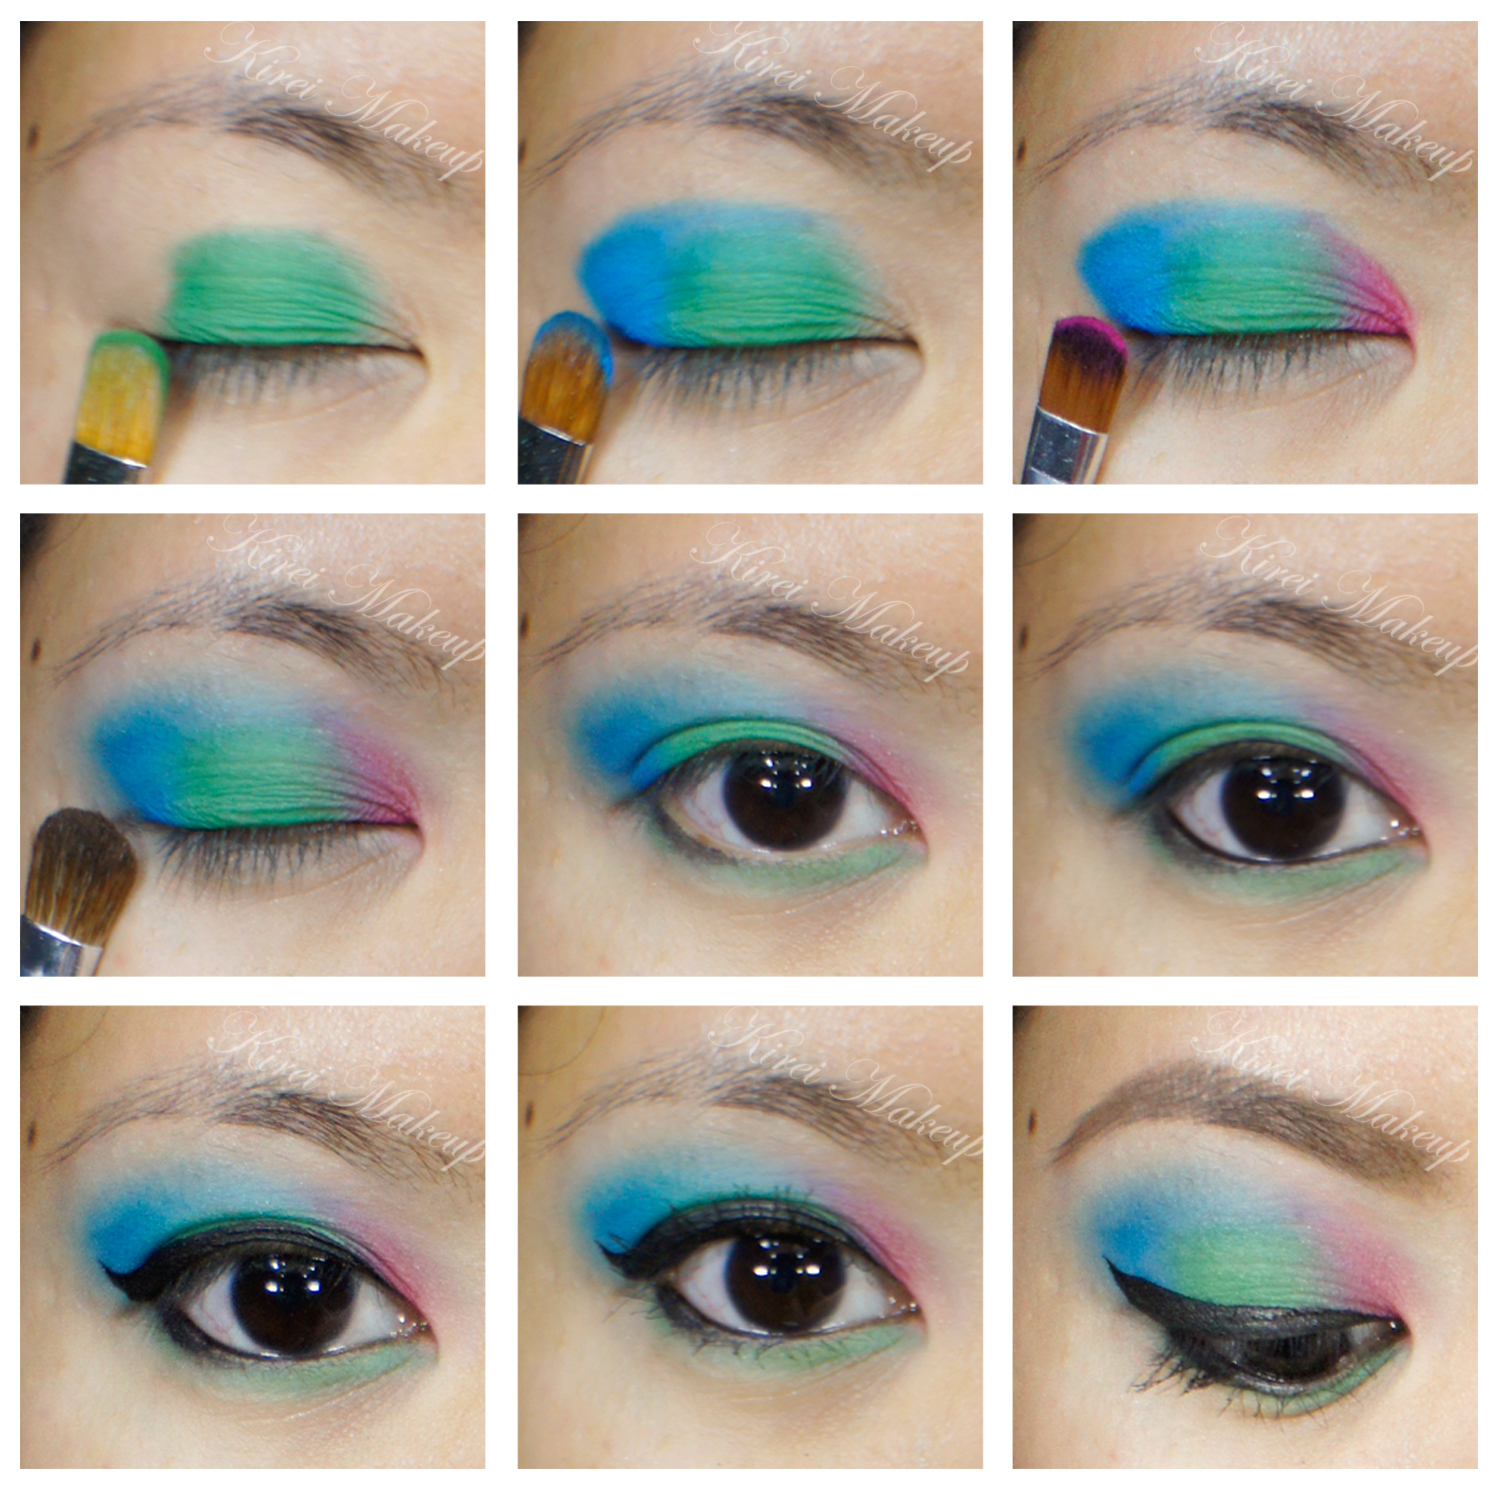
1. Using a flat eyeshadow brush, I applied MAC Paint Pot in Soft Ochre all over my eyelid up to the brow bone (not in picture).

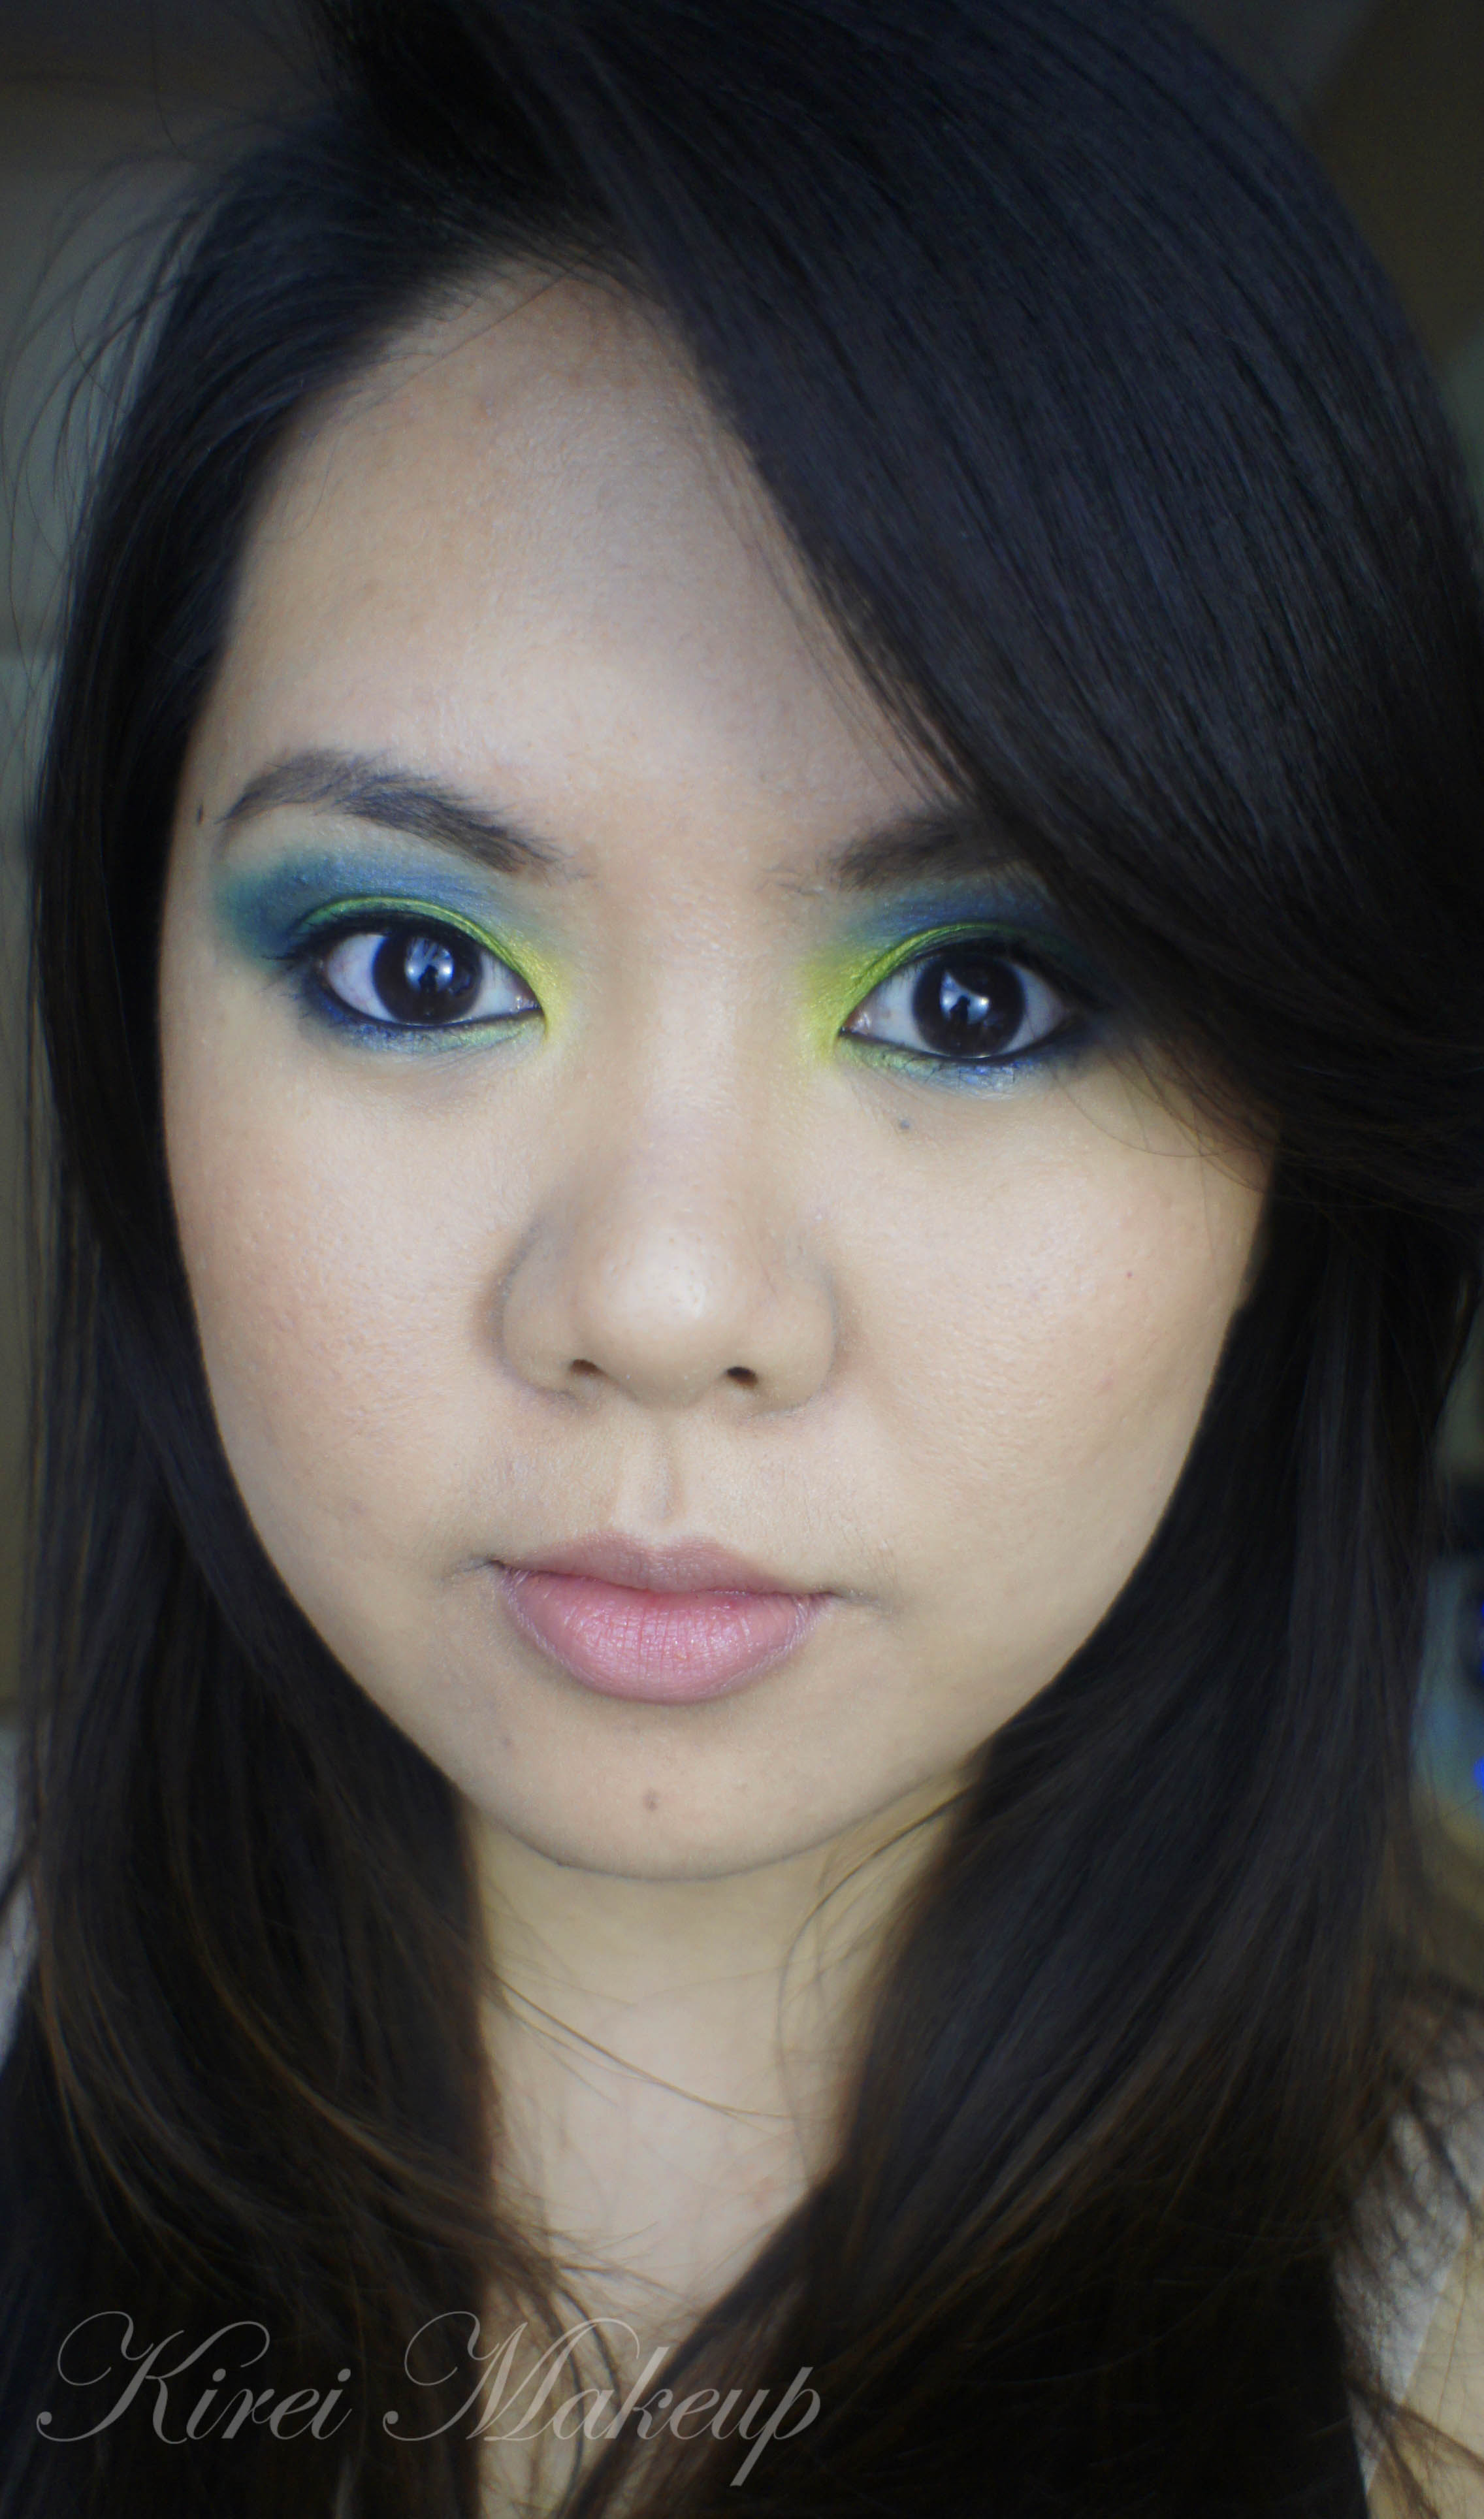
2. Using a clean flat eyeshadow brush, I applied Sleek Makeup DragonFly eyeshadow on the center of my eyelid in a patting motion. Watch out for fallout, kids!

3. Using another flat eyeshadow brush, I applied Bolt from the same palette on the outer corner of the lid and slightly on the crease.

4. Using another clean flat eyeshadow brush, I applied Pucker from the same palette on the inner corner of the lid.

5. I use a fluffy blending brush to blend the edge of the blue eyeshadow to remove any harsh line.

6. I used a clean small fluffy brush just to blend it so there’s no harsh lines separating the 3 different eyeshadows.

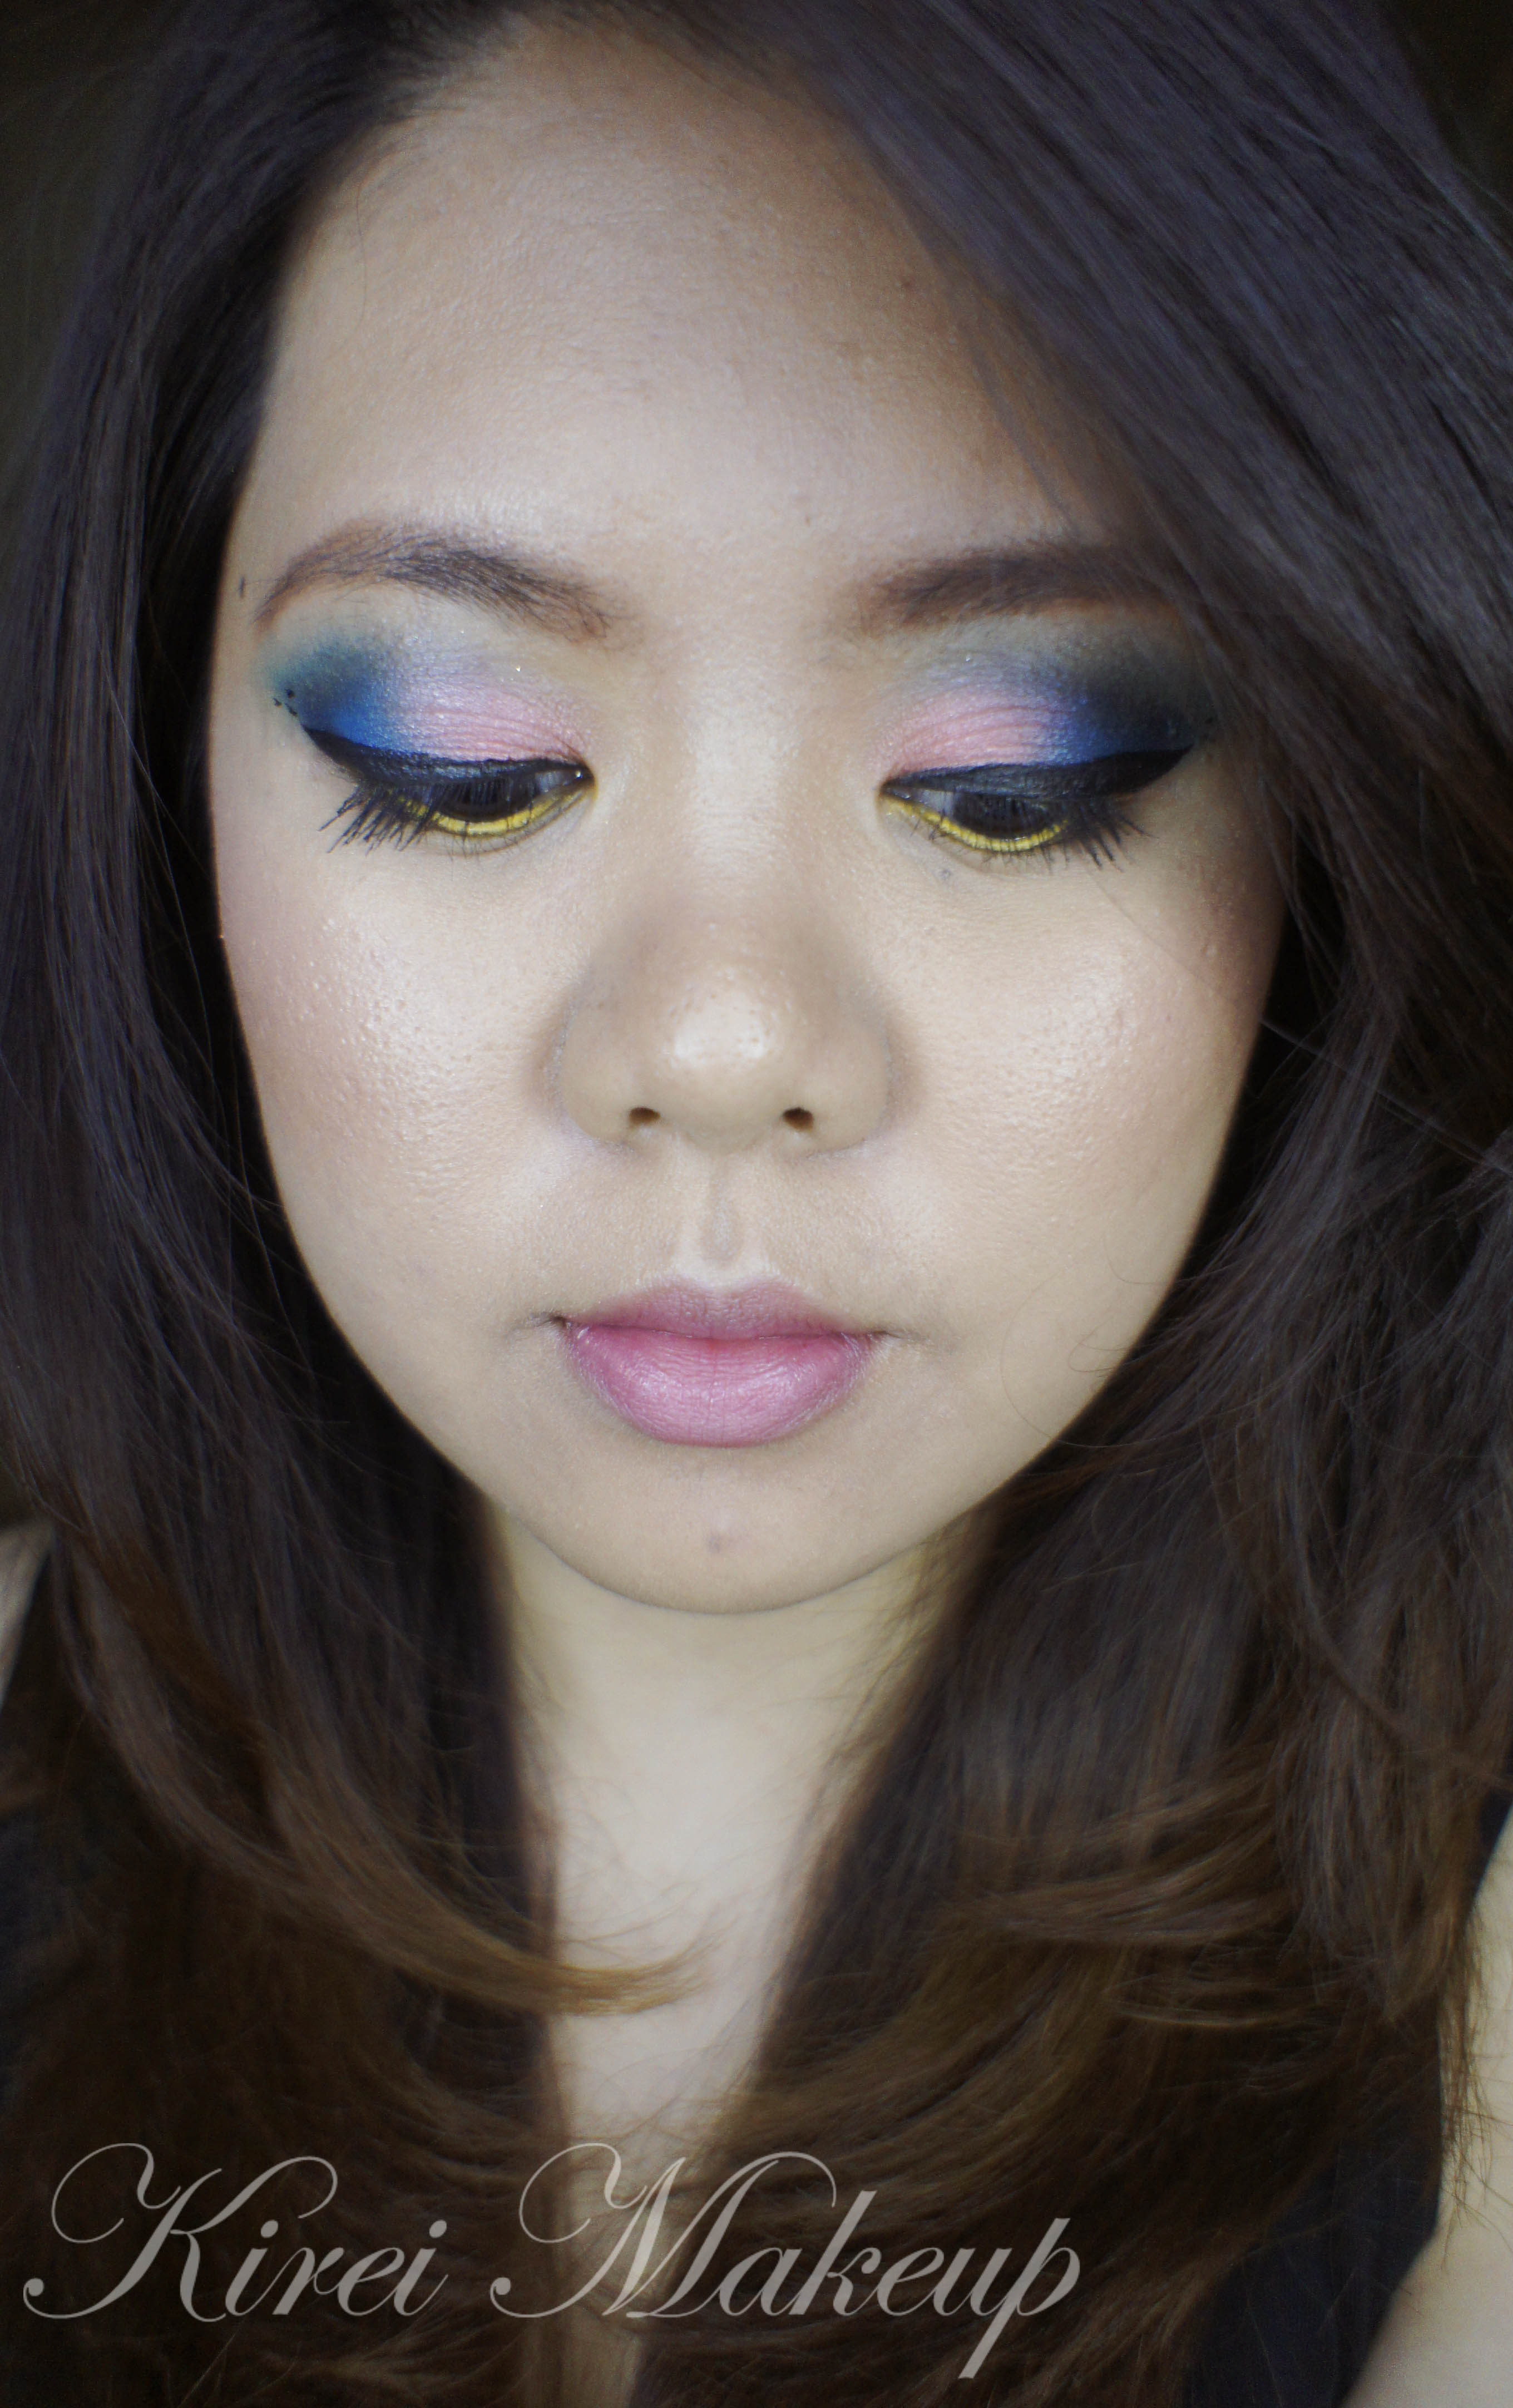
7. I applied Dragonfly on the lower lid using a small shader brush.

8. Using an angled eyeliner brush, I applied Smashbox Blackout eyeshadow on just the outer corner of the lower lid. I applied this eyeshadow right along my lower lash line.

9. I lined my waterline and tightline using L’oreal Voluminous Smoldering eyeliner.

10. Using Kate Sharp eyeliner, I created a large winged eyeliner along my upper lashline.

11. I curled my lashes and applied Maybelline Express Volume Turbo Boost mascara on both top and bottom lashes.

12. I filled my brows in using an angled eyebrow brush, as well as a mixture of MAC Omega and MAC Brun eyeshadow.

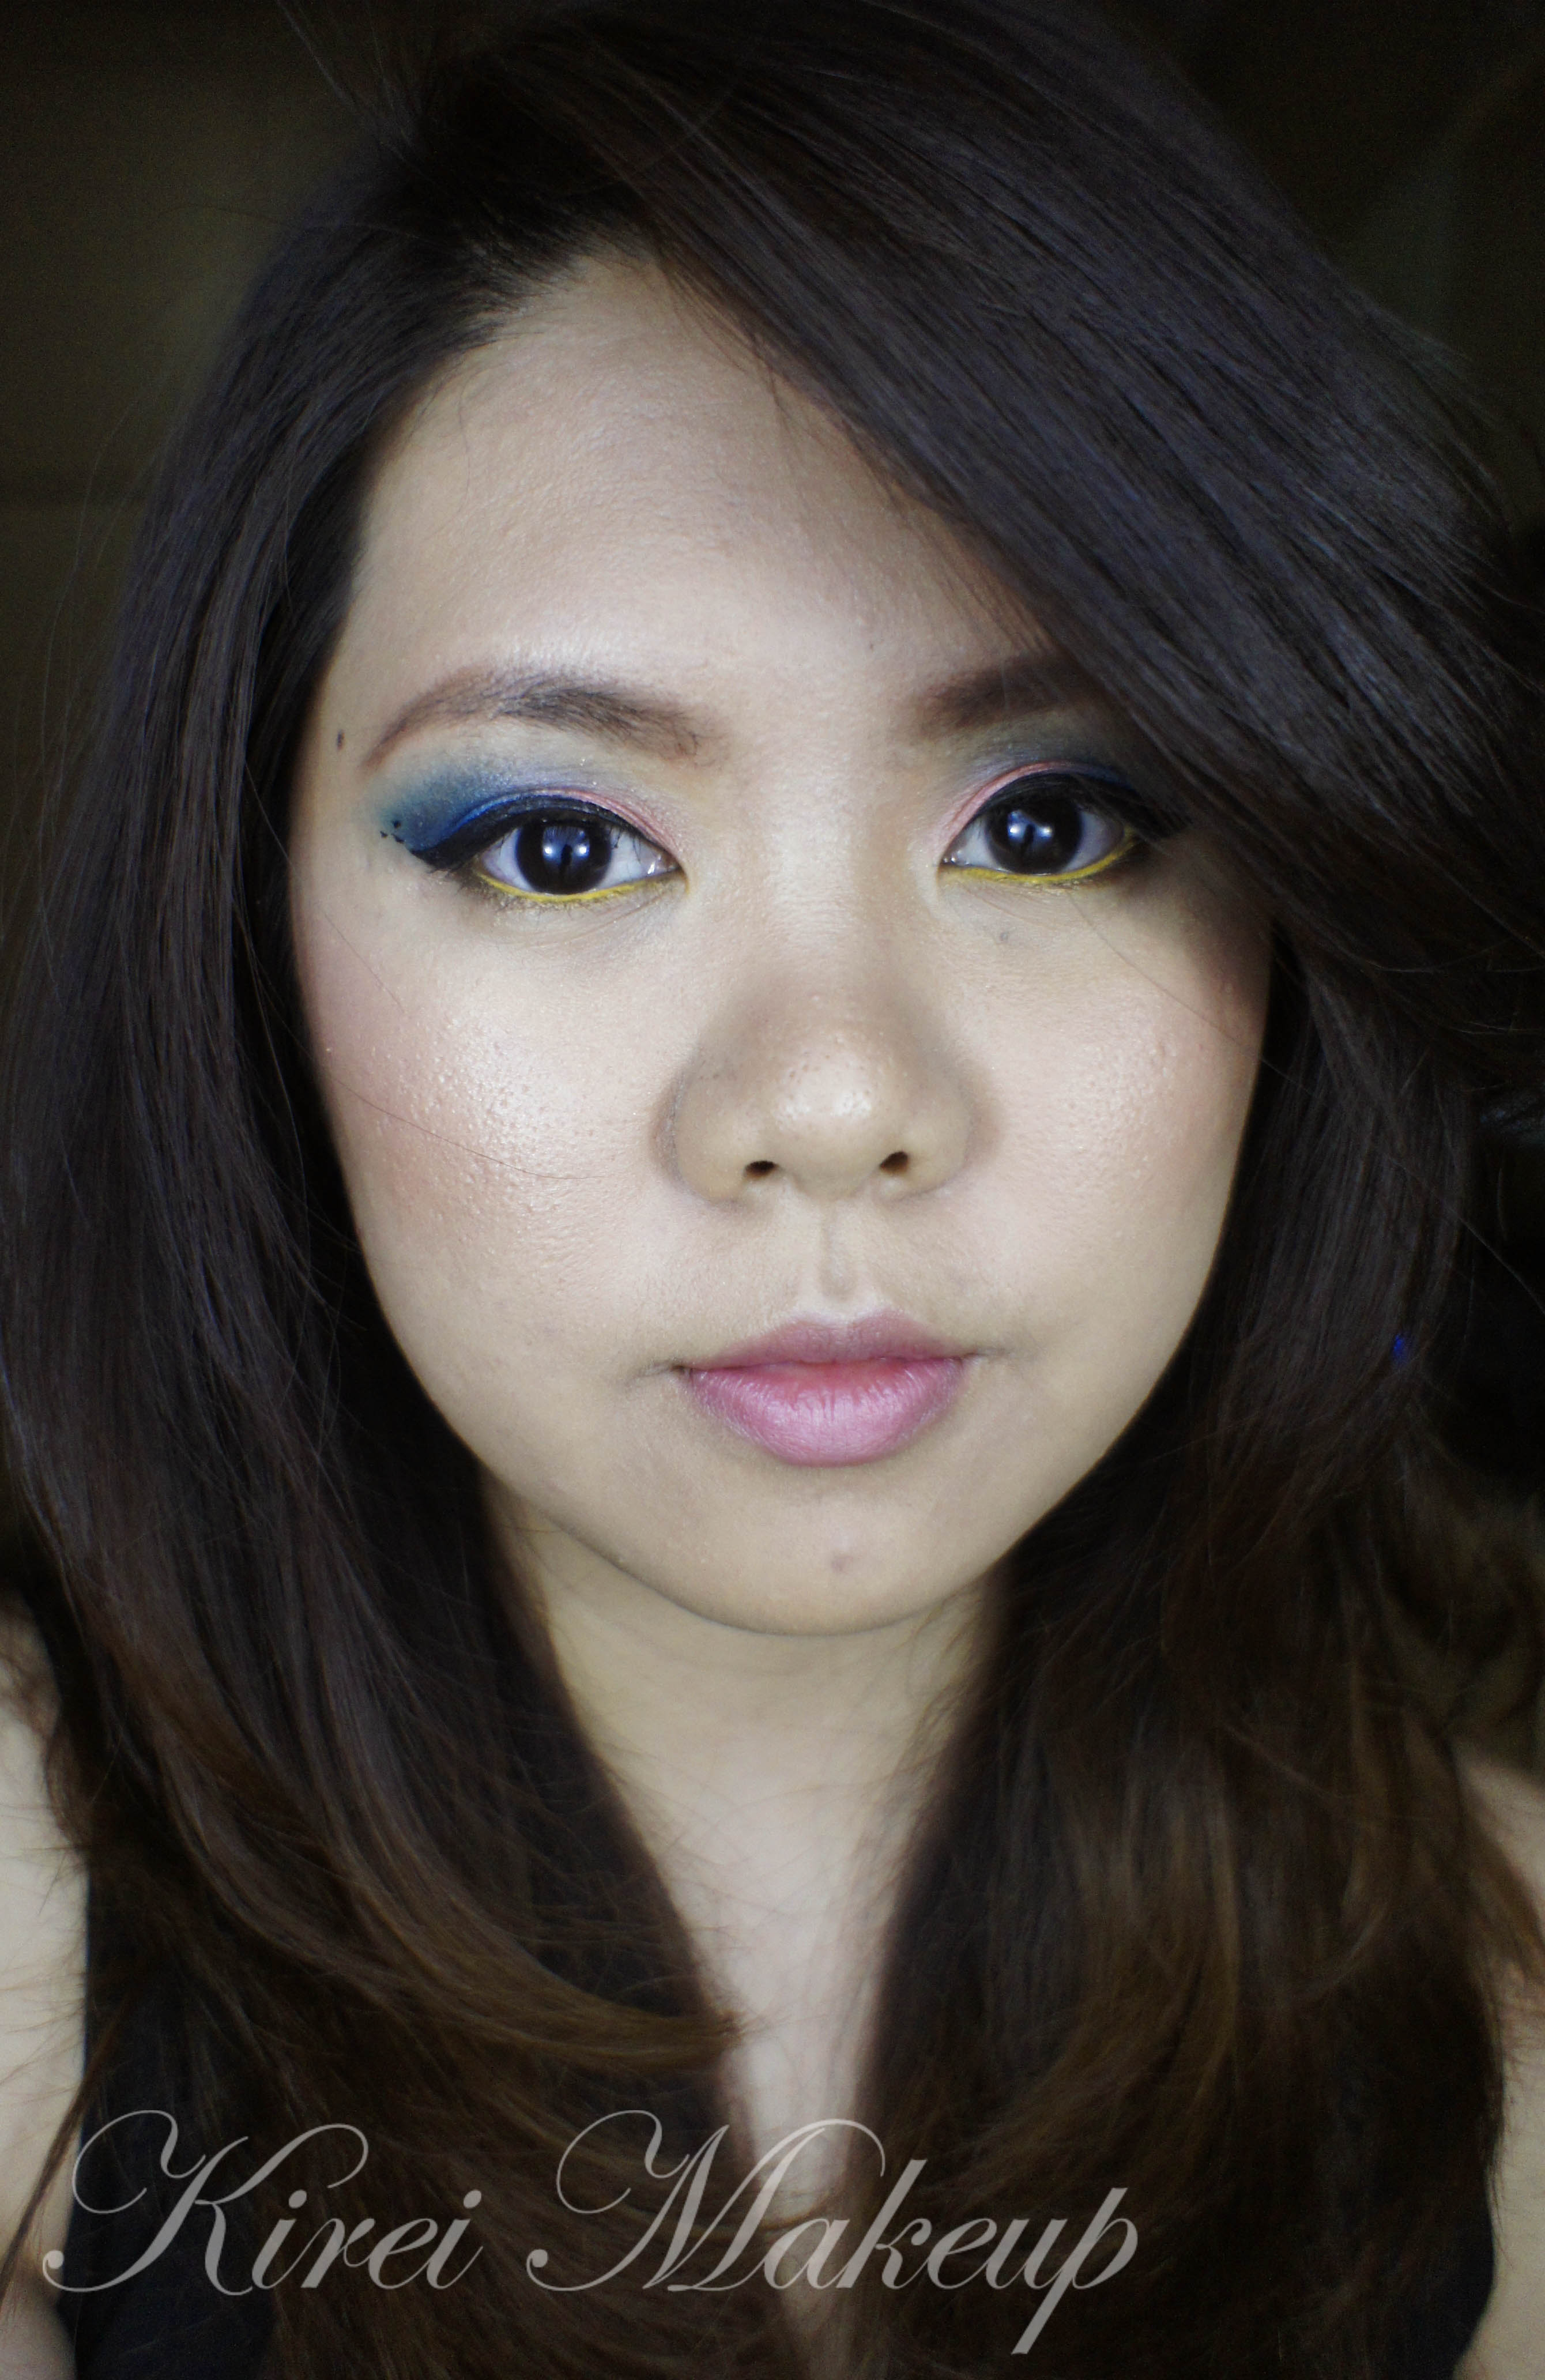
13. I applied Pow from the iDivine V1 palette under the brow and on the inner corner of the eyes.

matte brights eyeshadow

14. I applied Urban Decay Naked foundation using a foundation brush from the center of my face, blending it outwards.

15. Under the eyes, I applied MAC Pro Conceal/Correct concealer in Medium.

16. I powdered my face using CoverFX translucent powder.

17. I applied MAC Blunt as a contour on the hollows of the cheeks and sides of the nose.

18. I applied Benefit Coralista on the cheeks and completed the look by applying Tarte Lipsurgence in Hope.

idivine ultra mattes v1 brights makeup

Coral and Blue

I wanted to do another look with the MUFE Aqua Cream no. 9. I had to find a good reason to buy it right? Hahaha…I decided to incorporate some blue and yellow. I found inspiration from my trip to Bali couple months a go. The performers in Bali use a lot of blue, pink and gold. In my own twist, I decided to use coral, blue and yellow (and a tiny bit of bronze). When I used to perform(Balinese traditional dance) back when I was a kid, they used to put the 3 dots using a toothpaste (applied using toothpick). For this look, I added 3 tiny dots at the end of the eyeliner to replace the toothpaste.

I’ve found an issue with the MUFE Aqua cream no. 9. You have to work really2 fast to blend it. If you want a lot of colors on your lid, you have to apply it thinly first and then layer it as soon as you can. Speed is your friend when using this product.

Let me tell you my sad story. Ah, talking about it made me so angry! Anyways, so as you guys know I owned Maybelline 24hr Color Tattoo in Edgy Emerald, Tenacious Teal and Inked in Pink. I always made sure that any of my cream products are closed tightly. However, for some reason, I guess may be when I was rushing since I have been traveling a lot these couple months, my Tenacious Teal wasn’t properly stored! The lid was loose and guess what! It’s drying out!!! *sigh* Oh the horror! The worse part is that I can only get them in Canada since it’s not sold in Asia yet! *cry*

Anyways…I have to go get alcohol soon so I can revive my Tenacious Teal to its original state. So, do forgive me if the Tenacious Teal isn’t looking so tenacious in this tutorial.

Let’s get down to business now, shall we? 🙂

mufe aqua cream no. 9

How-to:

1. Using a synthetic brush, I applied 2-3 layers of MUFE Aqua Cream shadow in no. 9 on the lid, focusing most of the products on the center of my eyelid.

2. Using another synthetic brush I applied Maybelline Tenacious Teal 24hr Tattoo on the outer half of the lid. I blended the edge of the crease using a blending brush.

3. Using a flat eyeshadow brush, I applied Ben Nye Cosmic Blue on top of Maybelline Tenacious Teal. I blended the color on the crease using a fluffy blending brush.

4. I applied L’oreal Pepsy Coral infallible eyeshadow on the inner half of the lid.

5. Using a small fluffy brush, I applied Smashbox Blackout eyeshadow on the outer V and I blended the shadow using a clean blending brush.

6. I also blended the L‘oreal Pepsy Coral towards the blue using a clean blending brush.

7. I lined my waterline using NYX Jumbo pencil in Milk.

8. Using a small shader brush, I applied MUFE eyeshadow no. 71 on top of the white eyeliner.

9. I applied Smog eyeshadow from NAKED 1 palette along the lower lash line using an angled eyeliner brush.

10. I created a winged eyeliner along the upper lash line using Kat Von D Trooper eyeliner. I also created 3 tiny dots at the end of the eyeliner using the same product.

11. I curled my lashes and applied mascara on top and lower lashes.

12. I filled my brows in using Chanel Mistre brow pencil.

maybelline 24hr tattoo tenacious teal

13. For the face, I applied Estee Lauder Double Wear Light foundation with a foundation brush.

14. I applied YSL Touche Eclat under the eyes, my cheekbones, bridge of the nose and on my cupid’s bow.

15. I applied Benefit Coralista blush on the cheeks and Chanel Confidentielle lipstick on the lips.

yellow eyeliner

Under the Sea

The start of this week has been quite upsetting! Anyways, to cheer myself up I decided to do a tutorial with uber bright colors! Since I’ve been using lots of purple lately, I’ve decided to use blue and greens. The eyeshadow on the inner corner showed up as yellow for some reason, even though it’s actually a chartreuse colored eyeshadow.

Anyhow, I don’t really quite enjoyed how this turned up, may be because I think I winged the blue way too far than usual. Nevertheless, I still love how the colors turned out! Bright and pretty, just the way I like it.

How-to:


1. I applied Sariayu K. Karimunjawa green eyeshadow on the inner half of the eyelid and Ben Nye Cosmic Blue eyeshadow on the outer half of the eyelid.

2. Using a blending brush, I blended the eyeshadow.

3. Using a small shader brush, I applied MAC Rated R on the inner corner of the eyes.

4. Using a small shader brush, I also applied Celestial Blue from Ben Nye on the crease.

5. Using a small blending brush, I blended the color on the crease.

6. I applied Ben Nye Cosmic Blue, Sariayu K. Karimunjawa green eyeshadow on the lower lid using a pencil brush.

7. I lined my waterline and tightline using MAC Smolder eyeliner pencil.

8. I curled my lashes and applied Dior Overcurl mascara on both top and bottom lashes.

9. I filled in my brows using a mixture of MAC Brun and Omega.

MAC R-rated

10. For the face, I applied Estee Lauder Double Wear Light foundation all over my face.

11. I applied MAC Peaches blush on the cheeks.

12. For the lips, I applied Revlon Mauve It Over and a tiny dab of vaseline.

green smoky eyes