Fresh Look – Makeup for School, Work or your First Date

Today’s tutorial is, again, showing you the use of neutral colours for a fresh and simple look. This look is intended for anyone who just wants a little bit of colour and to make themselves look a little bit more fresher. If you’re on your first date (or many other dates), and you’re not sure what type of makeup you should put on, try this look. It’s not too much, yet still adds colours to your face.

I hope you enjoy this tutorial as much as I do. I just love how this makeup is fast, simple, easy and you still look effortless.

How-to:

1. I applied Giorgio Armani Silk foundation all over my face with a damped sponge.

2. I applied concealer under my eyes with the same damped sponge.

3. I filled my eyebrows with Anastasia Brow Wiz lightly.

4. I applied MAC Sweet Satisfaction pro longwear eyeshadow all over my lid. You can apply any eyeshadow that matches your skin colour.

5. Then, using a pencil brush, I applied Lancome Volcano eyeshadow on the upper lashline. You can make this as thick as you want or as thin as you want.

6. Using a clean blending brush, I blended the edge of where the 2 eyeshadows meet.

7. I applied Physicians Formula eyeliner in black along my upper lashes.

8. I applied MAC Sweet Satisfaction (inner) and Lancome Volcano (outer) on my lower lid.

9. I curled my lashes and applied Benefit Bad Gal mascara. Just a light coat will do.

10. I applied Benefit Coralista on my cheeks and completed the look by applying Gosh Nougat Lipstick.

ps: if you have an oily t-zone, don’t forget to apply powder and tapped it on your t-zone area to remove excess oil.

Nude Shimmer Palette by Physician’s Formula

If you’re looking for a cute idea for your girl friends, sisters or yourselves this Christmas try going to Shoppers and get the Nude Shimmer Palette by Physicians Formula. The packaging is super adorable (pink case with black lace)! The price won’t break your wallet (only cad$ 17.99), and the colour payoff is awesome! I think a neutral or nude eyeshadow palette is always a good basic palette that you should have. Whether you’re currently a working woman or a student, you can never go wrong with a neutral palette.

The nice thing about this Nude Shimmer palette is that it comes with 9 eyeshadows. They paired the eyeshadows into trios – base, medium tone and darkest tone. I think it’s a genius idea! The colours look excellent on everybody! In the box, there’s 3 different looks that you can follow – natural, playful and dramatic.

Personally, I tend to mix and match the colour to create my own look. If you are looking for a nude palette that can go from day to night look in an instant, this might just work for you.

In this tutorial, I used the palette to create a party look that is no hassle and will look good in any party dresses. It’s classy and has just enough intensity. If you want to add more drama, feel free to add false eyelashes.

How-to:

1. I applied Lise Watier Portfolio colour corrector on my face.

2. Using a stipling brush, I applied Giorgio Armani Silk Foundation all over my face.

3. Using a big fluffy brush, I tapped Smashbox Halo Powder gently all over my face. I dusted off excess powder afterwards.

4. I applied Physicians Formula eyeliner in Champagne all over my lid. I blended the colour using my ring finger. I also applied this eyeliner on my lower lid.

5. Next, using a flat eyeshadow brush, I applied colour no. 5 (counting from the top), a taupe-y colour, on my eyelid. I blended the edge using a clean blending brush.

6. I applied the same colour on my lower lid.

7. Then, I used my blending brush to apply colour no. 6 on the crease, just to add a little depth. I applied this colour on the outer corner of my lower lid.

8. I lined my upper lash line using Physicians Formula eyeliner in Black. I used a pencil brush to blend this eyeliner. I also used this eyeliner to line my waterline.

9. To ensure that my eyeliner will last, I take an angled brush, dipped it in the black eyeshadow from the palette and stamp the colour on my upper lash line (on top of the eyeliner) and on my waterline.

10. I curled my lashes and applied Benefit They’re Real mascara on my upper and lower lashes.

11. I applied Physicians Formula blush in Rose and complete the look by applying Tarte Lipsurgence in Hope on my lips.

Halloween #1 – Skull

I should have done a step by step tutorial for this, but at first I was just trying it out for fun. I saw a picture of Rick Genest and fell in love with his tattoo. Rick Genest’s whole face and body are completely covered in tattoo! Go check him out here: http://speedballzee.files.wordpress.com/2011/06/rick-genest.png or google him out!

So, for this makeup you only need a few things:

1. Picture of a skull or Rick Genest (or Lady Gaga)

2. Black eyeliner pencil (any brand)

3. 3 brushes – an angled brush (MAC 208) for the thinner shadow, a shader brush (MAC 228) for really dark shadows and smudging brush (I used Sephora’s)

4. MAC Blanc type for highlight

5. Any medium brown eyeshadow if you like

How-to: look at the pictures and just follow it. I outlined everything first then started shading. I used the angled brush for the thinner shades for the teeth and to create dimension. I used the smudged brush to highlight the areas that I want to pop after I finished shading everything. I used the brown eyeshadow last to add depth.

I think I’ll re-do this tutorial on someone else and do a step-by-step explanation and pictures (hopefully this long weekend). Since I was just doing it for fun, I didn’t really take note on how I created this look..lol..

SONY DSC

L’oreal Infallible Bold Eye Contest

Dear family, friends and readers!

Exciting news! I managed to finally complete a video! 😀 With the help of bf who picked the fancy camcorder, model: Tayler who’s gorgeous as always and my workmate John Fleming who did the audio! Please visit http://www.youtube.com/watch?v=Q5Wx2sQLr1A for the video (or watch below). Now, I do have to say a huge thanks to L’oreal Canada who sent me all the great goodies! This video is an entry for the L’oreal Infallible Bold Eye Contest that L’oreal is holding. So, please do go on youtube and give me a thumb-up if you like the video 🙂

How-to:

1. I applied L’oreal Tru Match Foundation (a mix of W2 and w4) to match Tayler’s skin colour perfectly with a damped beauty blender sponge.

2. I applied UD Primer Potion in Champagne on her eyelids.

3. I applied MAC Cakeshop paintstick so that the eyeshadow’s colour pop even more.

4. Using a flat eyeshadow brush, I applied L’oreal Infallible eyeshadow in Permanent Kaki all over her eyelid.

5. Then I used L’oreal Extra Intense Liquid Pencil Eyeliner on her upper lashline. I smudged it with a pencil brush.

6. I applied Loreal Infallible eyeshadow in All Night Blue on her lower lid with a small smudge brush.

7. With an angle brush, I applied L’oreal Infallible eyeshadow Unlimited Sky in the inner corner of the lower lid.

8. I used L’oreal Infallible eyeshadow in Hourglass Beige to highlight the bridge of the nose, cupid’s bow, brow bone and on top of the cheekbones.

8. Then I applied blush, bronzer and finish the look with lipstick.

10. I applied L’oreal Infallible eyeshadow in Forever Pink on the lips for an added sheen.

For more detailed info, please visit the youtube link so you can see how I did the whole look

ps: for her hair I just did a fishtail braid 🙂

xoxo

L’oreal La Couleur Infallible

I received a pack of 9 eyeshadows by L’oreal last week in the mail! Thanks again, L’oreal Canada. Now, even though this is a sponsored post, I will let you know how I feel honestly about this product. I have yet to try it on, so I shall not comment on how long the eyeshadows last. I will, however, mention that this is by far one of the most pigmented eyeshadows/pigments I have ever used. I will try to post a tutorial tonight or tomorrow using these products.

What I like the most about this product is the way it comes. I’m unsure as how I should call this eyeshadows. They are kinda like loose pigments, yet they are packaged in a way that it’s like a compact eyeshadow. This product is very similar to Giorgio Armani Eyes to Kill eyeshadows. It’s basically a densely packed pigments! I love the fact that it’s super pigmented without being all over the place because they’re not loose pigments. Point is, they are awesome little products that won’t make much mess! 🙂

The texture is like cream eyeshadow, but once applied it’s like a compact/powder eyeshadow. It’s very shimmery, yet the shimmer is not overpowering.

I shall comment on the blendability and lasting power on my next post.

I did not do any swatch because whatever the colour you see on the container, that’s what you will get. Also, I received 9 colours, but this product line actually consists of 11 colours. The 2 colours that I was missing were: Eternal Black and Endless Chocolate. I might get those 2 myself later on.

The 9 colours are:

Permanent Kaki (olive green), Unlimited Sky (light blue), Hourglass Beige (golden beige)

Flashback Silver (silver), Purple Obsession (purple), Burning Black (maroon)

Time Resist White (vanilla white), All Night Blue (deep navy), Forever Pink (rosy pink)

Price is pretty good for the amount of product that you get ($10 for 3.5g, compared to $20 for 4.5g from MAC). You can find this in Shopper’s Drug Mart in Canada.

Featuring: Winson as Avatar

Hahahaah..So, last weekend, I was bored and fortunately enough, my friend, Winson and his gf came over to Hamilton to hang out. We decided to turn winson into an Avatar. LOL. If you’re looking for the tutorial, please follow the link right here: http://kireimakeup.com/2010/01/13/navi-avatar-inspired-look/

I used similar products as the tutorial above, except, I couldn’t find my neutral setting powder, so I had to use Ben Nye Cosmic Blue eyeshadow to set the blue cream makeup resulting in a shinier finish than the previous tutorial. I kind of like the fact that it’s shinier. We kept saying how “glowy” Winson looked. hahaha

Anyhow, I’ll show you a few pictures of the whole process from start to finish right below on the slideshow!

Complections International Academy of Makeup Artistry

I’ve been asked by quite a few people about makeup schools, and the ones that I go into. I’ve touched upon this subject a little bit before. Let me say this again: I’ve been to 2 makeup schools – Paramita Academy of Makeup Inc. (2008) and Complections International Academy of Makeup Artistry (2009-2010).

Today, I’m going to share with you what I think about Complections and the interview that I’ve held with the school. Some of the questions here come from readers/friends who have asked me to ask the school.

Q: What makes Complections one of the best makeup school in North America?

A: Our faculty, definitely. They have to have a minimum of 10 years experience in the industry, and prove great success. In addition, the practical work and job opportunity that the school give to the students will help the students to move along in the industry. Small class sizes allow for feedback from the instructors. Not to mention, with small class sizes, you’ll be able to get to know the instructors and your classmates which could potentially lead to job opportunities. It’s all about networking. And, our school’s President’s commitment to evolve the curriculum continuously. Oh, and not forgetting the photos that you get at the end of every class by the school photographers, which will help with your portfolio.

Q: There seems to be this “passing marks” in the school, what is the importance of marks and attendance?

A: Marks and attendance are just like expectations from the industry. Here, in Complections, we are training students to be prepared for the professional world. The consequences of losing mark is similar to the consequences of, potentially, losing your job because you are late or unprepared.

Q: What are the different courses that the school offered?

A: There’s the 6 or 8-week fashion course. 8-week fashion course include 2-week of hair styling class. There’s also a 14-week special fx and creature design course, the 26-week course, and the 32-week.

Q: For the 14-week, do they have to be a makeup artist before enrolling to the course?

A: yes, for the 14-week spfx/creature design course, they have to a makeup artist for at least a year before they can be enrolled to the class.

Q: For international students, do you provide any help for their stay?

A: For international students, the registrar office will help them to find basic accommodation on a one-on-one with Christine.

Q: You mentioned about job opportunity, do all the students from different courses get the same job opportunity?

A: For job opportunity, as soon as the students finish their fashion course, the school will send out emails notifying about job opportunities that’s been sent to the school through out their stay in school.

Q: So, the students will still received job opportunities even after they graduate?

A: yes. After the students graduate, the  6- and 8-weekers will received notifications up to 3-month, 14-weekers up to 6-month, 26-weekers up to 10-month and the 32-weekers up to 12-month.

For more info about the school you can go to their website:  http://www.cmucollege.com/


My experience in the school:

The school is located in downtown Toronto (bloor subway, yonge-charles intersection). Easily accessible through public transportation. I lived in Hamilton, so I’ve to take the go train every morning and afternoon. Yes, the commuting part was hard at first, but I’ve gotten used to it after the first 3 weeks.

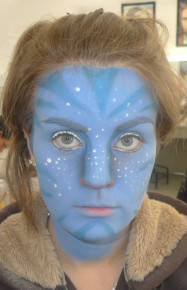
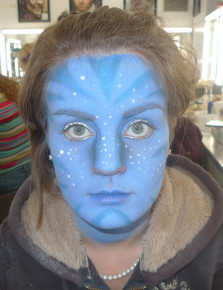
I’ve taken the 26-week comprehensive makeup artist program, which includes hair, fashion, theatre, film&tv and prosthetics (basically everything but creature design). I’ve taken fashion makeup before at Paramita Academy of Makeup Inc., so I have a little bit more advantage than my classmates, but it doesn’t mean that I didn’t learn anything. I came to the school with a mind-set that I do not know anything, so that way, I was able to learn as much knowledge as possible.

I have to say that in each course that I’ve taken, I am very satisfied with what I’ve learnt and how I can apply it to the real world. Every single instructor is amazing, and by far, the best makeup artists in the industry. No kidding! They are still active in the industry, and they are willing to share what they’ve learn in the real world with us. They are by far, one of the most humble, nicest, and talented people I’ve ever known. Each one of them taught us, not only the skills in makeup, but also skills to survive in the business.

The non-teaching staffs are amaaazing. They are friendly, and always willing to be there for us. John in the school’s store is always there to talk to me about products (because I’m a makeup junkie!), Humera at the receptionist always there to say hi/bye whenever I passed by the front door, Joy (oooh, Joy!..lol..i love her!) is always there to listen to you whenever you have troubles or just to bring her cakes (lol). Odessa always send out job opportunities, always willing to give us advice about photoshoots etc (and I always love her wardrobe collections..lol). Christine! Christine is soo patient, and always willing to help students or potential students about anything! payment, visa, permit, accommodation.

The President, Pamela (or Pam), always come out to check each class, talk to the students during lunch time to see how we are doing. Full of smile and always so friendly and nice to everyone!

I love all my instructors: Paula (hair), Jackie (fashion), Kelly (theatre), Tony (prosthetic), and Candice (film&tv). The photographers that take crazy amazing pictures and help build my portfolio: Maxime Bocken and Maja Hajduk. Love my classmates and I’ve made really good friends with a few of them.

Let’s put it in perspectives: I went there for 6-months, every weekend I always get a photoshoot. I was able to work at the IMATS show. Before I even finished school, I was asked to do Ms. Universe Canada Toronto 2010 makeup because of the job notification and during X-mas break, I was able to work with a photographer and model and we were published in an online magazine (Kismet). A job given by the school allowed me to work with the photographer over and over again, and now she just recommended me to another photographer. Some of my classmates and other students from another class offered and took me out on jobs.

I finished school 2 weeks ago, this is my schedule this week: friday, saturday, sunday: photoshoots, my schedule next week: wednesday, friday, saturday: photoshoots, sunday: bridal trial. I’ve even collaborated with Sizzle/Koi (a club in Hamilton) to open a beauty bar on friday and saturday nights.

The school PREPARES you to get job and to do your job out there. But of course, there’s so much that they can do to help you get jobs. You have to be willing to do your parts too!

I totally recommend Complections to whoever you are out there who wants to become a great makeup artist. If you’re really sure this is what you want to do, go do it! Grab your dream!

P1000544


Na’vi (Avatar) Inspired Look

So! The whole Avatar hype and while it’s still hot, I decided to do some face paint on tiff during lunch break today. I used different shades of blues, you can use any kind of blues really. Mine is probably not that close to the colours that they used in the movie, but well, you got to use what you have..=D

Anyway, I won’t be posting the products that I used just because I left them at school and I don’t remember what they’re called (I remember some, so read the description for each photo). But, if you intend to do this look, just use different shades of blues – light blue, dark blue, navy, cornflower blue etc

Pls read the description for each photos if you’re planning to do this for halloween or just for fun! =)..

Obagi Clenziderm Review

Hi all!! Finallyyyyyy I made it back to Canada!! YAAAAY!! =D =D =D

Anyhow..Yesterday I arrived around 6am..I was too tired to do anything..So I couldn’t update the blog..Today is actually my friend’s birthday, Kelly Ng! Happy Bday deaaar!! I love you  sooo muuuch! hehehehe…I have to leave in a bit to attend her bday dinner at her place..we’re going to chill out for a bit..

Anyhow..I wanted to post a Maybelline mascara review, but I ran out of makeup remover, so I’m going to post the mascara review tomorrow..

Disclaimer: every skin is different, so what works for me might not work for you..I do not get paid by anybody to do this, I just want to share it with you guys…I am not recommending the products whatsoever, I’m just showing you what is happening on my skin..

Today I want to share with you a line of skincare products which I’ve been using for several weeks now…Just a background story, I’ve been having acne issues since I was 11 years old…My acne problem have gone from bad to worst to really good when I was back in Jakarta and Singapore…My skin was clear from acnes when I was 16, but it got worst when I moved to Canada when I was 17…I think the problem lies in the change in the weather…Singapore and Jakarta are always hot and humid, but in Canada the weather is dry and cold in winter, but dry and hot in summer…

I’ve tried Neutrogena, Clean and Clear and Proactive but none of these stuffs work for me…It made my skin worst when I was 17 (I found I’m sensitive to benzoyl peroxide)…But, in that summer, I tried Clinique (it uses salicylic acid) and it worked for a few years…Even though the skin was not flawless, but it worked pretty well for a good 3 years, and then it somehow lost its effectiveness…Then I changed to Vichy which again seems to work for a year until they changed their formula, and it irritated my skin…I, then, looked around and finally settled for a brand called La Roche-Posay which is recommended by a dermatologist in Hamilton…The skincare actually works for me, but it doesn’t really do much..

So, now I’m 22 and I decided to see a dermatologist in Jakarta during my holiday…My derm, Dr. Sutardi Santosa, promised me that he will make my skin clear in 4 months as long as I followed his instructions…He gave  me a line from Obagi and an antibiotic to drink (once a day)…So, every morning I have to use: cleanser, toner and t-pads (all contains 2% salicylic acid) and at night I have to repeat all 3 AND a night serum (which contains 5% benzoyl peroxide)…

As I know I am sensitive to benzoyl peroxide, I was ready to see some irritation to occur on my skin…The irritation occured (if you guys followed my twitter you knew I was complaining about it)..However, instead of the usual bad-to-worst scenario, my skin condition actually improves a lot..

The first week was the worst because my skin get red and dry..I was banned from using moisturizer for the first 2 weeks..My skin was so dry that the skin was peeling..In addition, because of the antibiotic, my lips were dry and chapped..After the first week, however, my skin condition started to improve…

After the first 2 weeks, I went back to the derm and he gave me a moisturizer and a sunscreen which I have been using all these while..He also told me to reduce the usage of the night serum…It’s been 4 weeks since the 1st day I used this line of skincare and believe or not, it actually works!

On week 3, my dad told me that he can see improvement in my skin..When I get to Canada, even my friends told me that my skin has improved a lot…I’m surprised that even my pores have gotten smaller…the blackheads are disappearing as well..I did not go for any facial treatment because I want to know whether this skinline products work or not..I think the combination of the products and the antibiotic really work for me…

The photos below will show you my skin condition from week 1 to week 4..Yes, I know it’s that baad! lol..makeup does cover most of my skin problems, but I do crave for a clear skin..=D

I’m soooo happy with the result..Hopefully I can see more improvement after 4mths..=D