Product of the Week: Shu Uemura Hard Formula Brow Pencil

Brows, brows, brows! I’ve been asked to do a brow tutorial, but been putting it on hold for the longest time. Let me first of all, introduce this brow pencil to you guys. Whether you are a beginner or a makeup artist, I think everyone should own the Shu Uemura Hard Formula brow pencil! This pencil is currently my favorite brow product, ever since I ran out of my Anastasia Brow Wiz.

Anyhow, so what is Shu Uemura Hard Formula Brow pencil?

Natural finish and shape. This unique eyebrow pencil only releases color pigment when it interacts with the oils in the brow hairs. The result is natural, defined brows. Smudge-proof and long-lasting. (Shu Uemura, 2013)

Shu Uemura Brow Pencil

If you happen to go to a Shu Uemura counter or their website, you might realized that the shape of their eyebrow pencil is not exactly like my photo. That’s because their pencil is shaped using a cutter in a Naginata shaped. I knew about the shape because I went to a Shu Uemura counter in Canada and they explained it to me back then. However, I purchased this pencil from Shu Uemura counter in Grand Indonesia mall, and they did not cut it for me in Naginata style, instead they handed me in this form. I don’t really care, Naginata or not, this brow pencil still rocks!

Anyways, I might drop by the Shu Uemura counter again just to ask them to re-shape my brow pencil.

Pros

  • The color is perfect. Mine is Hard 9 (Acorn), and I think it has just enough warm undertone for my warm undertone hair. It’s not too red, and at the same time not too ashy.
  • It brings a certain warmness to the face and it works for a lot of people. I’ve used this pencil on several people and for bridal makeup as well.
  • Since its hard formula is very waxy, when you draw this pencil in, it mimicked your brow hair. You can get the most natural finish with this product.

Longevity

I’ve worn this pencil for a good 8-10 hours without any smudging whatsoever in a very warm and humid climate (a.k.a Bali).

Price

I don’t quite recall how much it cost in Jakarta since I’ve bought it quite a while back.  I will let you guys know once Shu Uemura Indonesia answers my tweet 😉

Anyways, I know this pencil costs CAD$29 in Canada and USD$23 in USA.

Cons

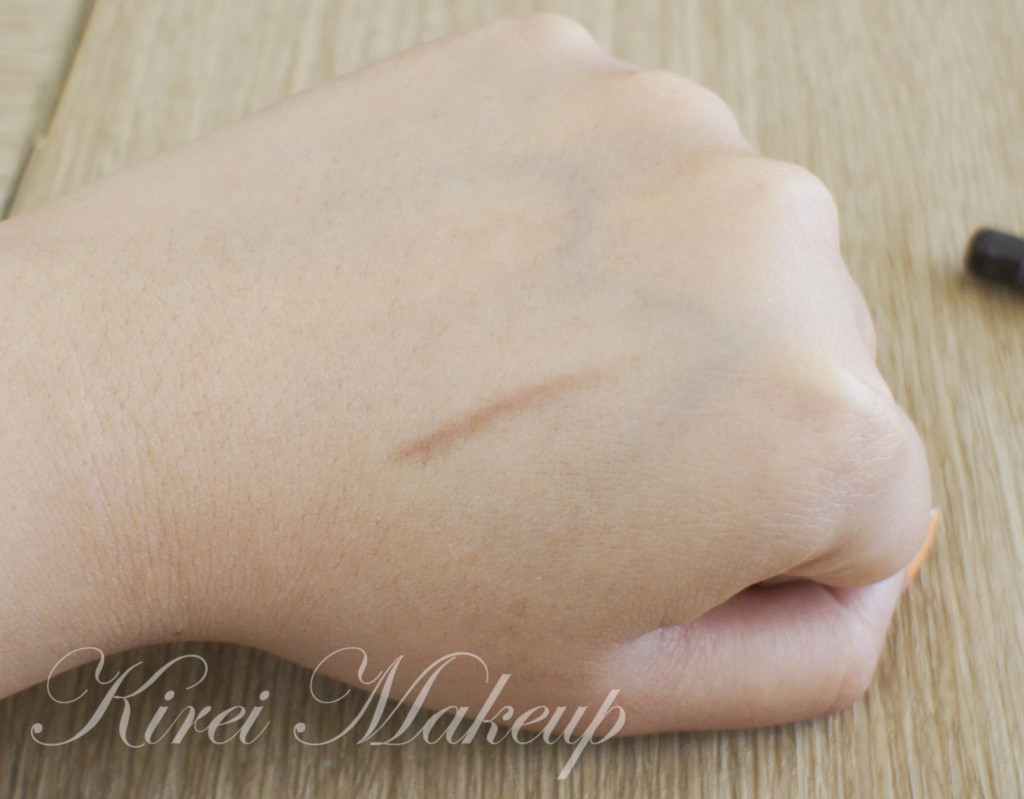
  • Since it’s a hard formula and very waxy, you might not be able to swatch this on your hand. I managed to do it after going at it several times the back of my hand.
  • They carry 2 more colors in Asia than in North America, namely Acorn and Walnut Brown.

Shu Uemura Brow Pencil no. 9

Keep in mind, even if your hair is black, you might want to use brown instead so your brows don’t look harsh.

Also, if you want to know how I shaped my brows, please visit my tutorial in Brows 101.

How-to:

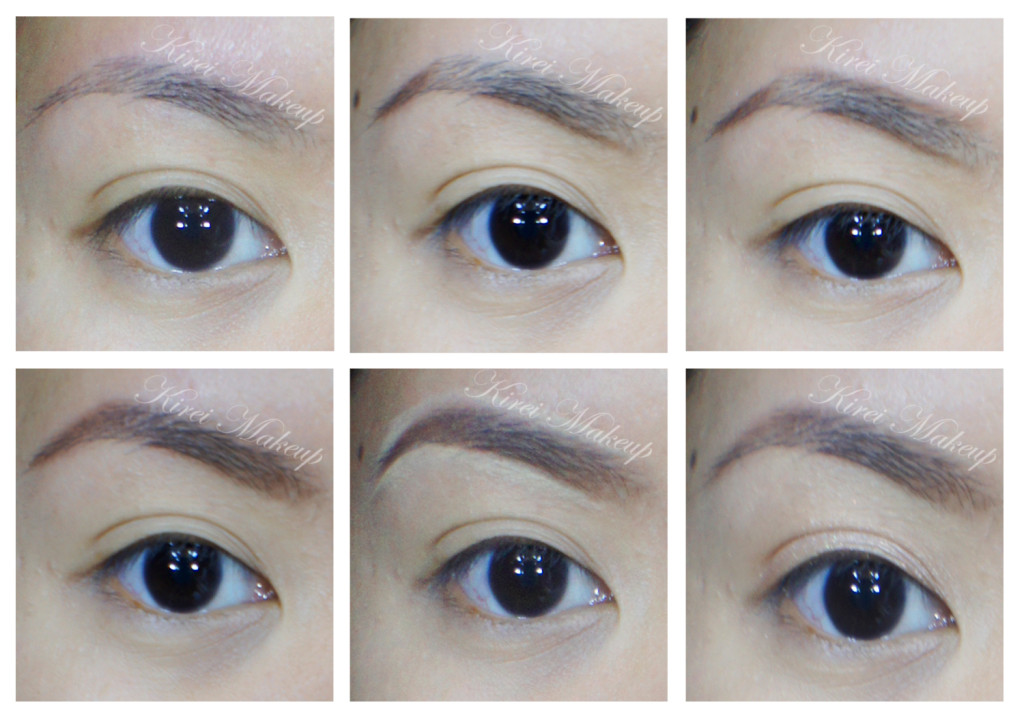
1. Starting with a clean brow, use a clean spooly (or mascara brush) to brush the brow hair upwards. Trim any excess with a cuticle scissors if needed.

2. I like to start with the tail of brow. Just filling it in and extend it slightly.

3. I created a diagonal line on the lower part of my brow from the head to just below the arch (hard to explain, please look at photo below…bahahaha).

4. Next I drew a diagonal line along the top of the brow to the highest point of the brow (i.e. arch).

5. I filled it the rest of the brow using the pencil. (I purposely drew a lot in so you can see the difference between my non-filled brow with the filled-in brow).

6. This step is optional, but works wonder if you want an extra shape or an extra lift. So, using a flat sturdy brush, I applied M.A.C pro conceal/correct palette in yellow corrector along the bottom and top part of the brow. I blended it out using a clean flat brush.

7. At this stage, I brushed my brow hair upwards again using a clean spooly (or mascara brush) for a natural finish look.

Pretty much, lots of my tutorials prior to this post used the Shu Uemura Hard Formula Brow Pencil.
how to do brows

Dark Forest

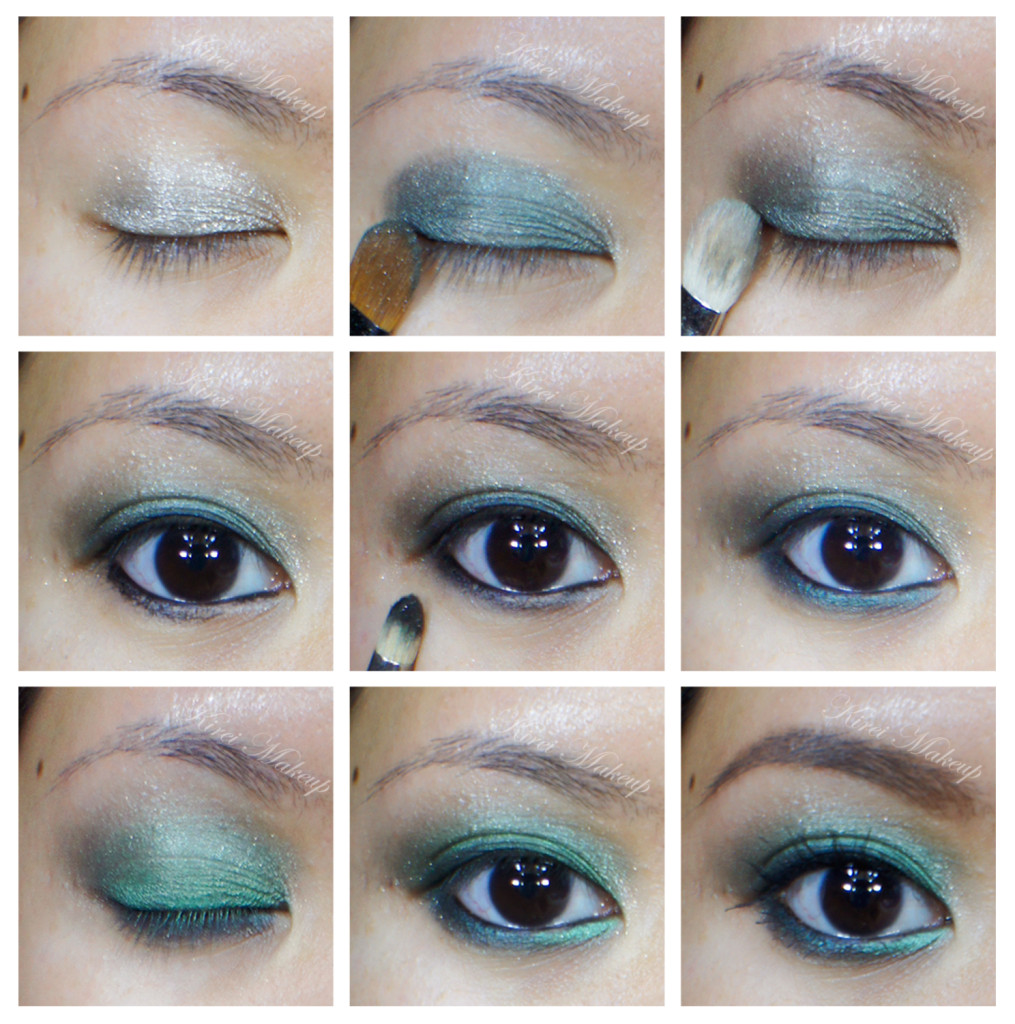
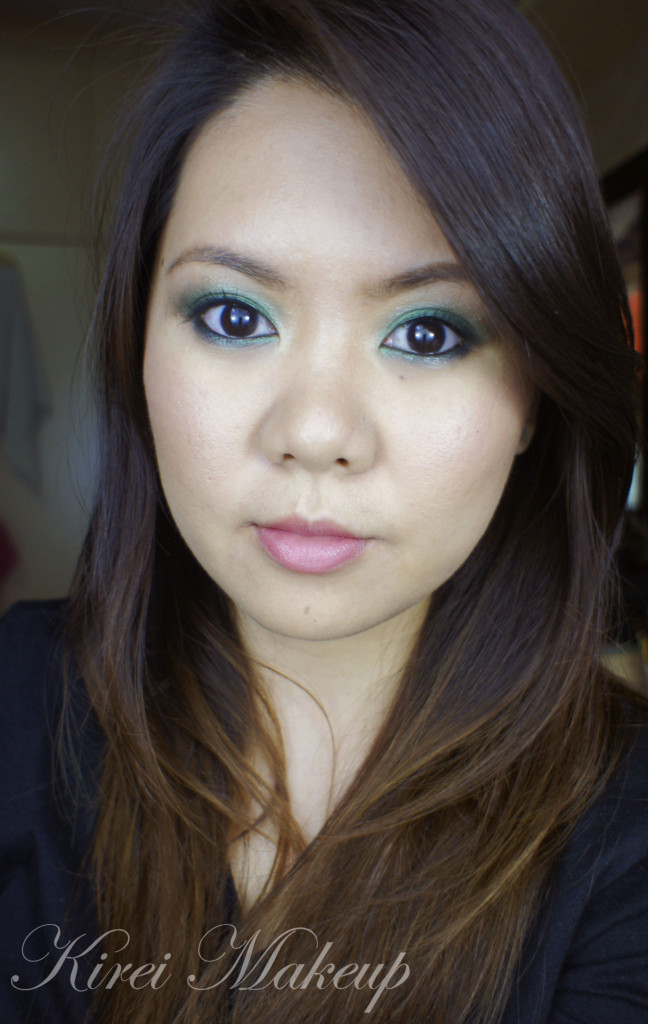
I wanted to do a smoky look just for a night-out on the weekend, and decided to go with green eyeshadow instead of my usual purple. I wanted a dark smoky eyes, but at the same time I want color in it. I was just a very fussy person..hahaha..anyways, I did this look in less than 30mins. Very easy and simple smoky eyes. If you prefer the darker, smokier version, skip the last 3 steps and just apply mascara (and/or false eyelashes).

How-to:

1. I applied Chanel Illusion D’ombre in Epatant all over my lid using my finger.

2. Using a flat eyeshadow brush, I applied Lancome Strut eyeshadow on the lid.

3. Using a clean fluffy blending brush, I blended the crease.

4. I lined my waterline, tightline, upper lash line and lower lash line using L’oreal Voluminous Smoldering eyeliner. Smudged the liner a little to my lower lid as well.

5. I used my pencil brush and smudged the liner on the lower lid.

6. Using an angled eyebrow brush, I applied Lancome Strut eyeshadow on the lower lid.

7. *optional* I applied the green eyeshadow from Sariayu Karimunjawa palette on my eyelid using a flat eyeshadow brush. I also added a little bit of this eyeshadow on the inner corner of the lower lid.

8. I applied black eyeshadow along the upper lashline, curled my lashes and applied mascara.

9. I filled my brows in using Anastasia Brow powder.

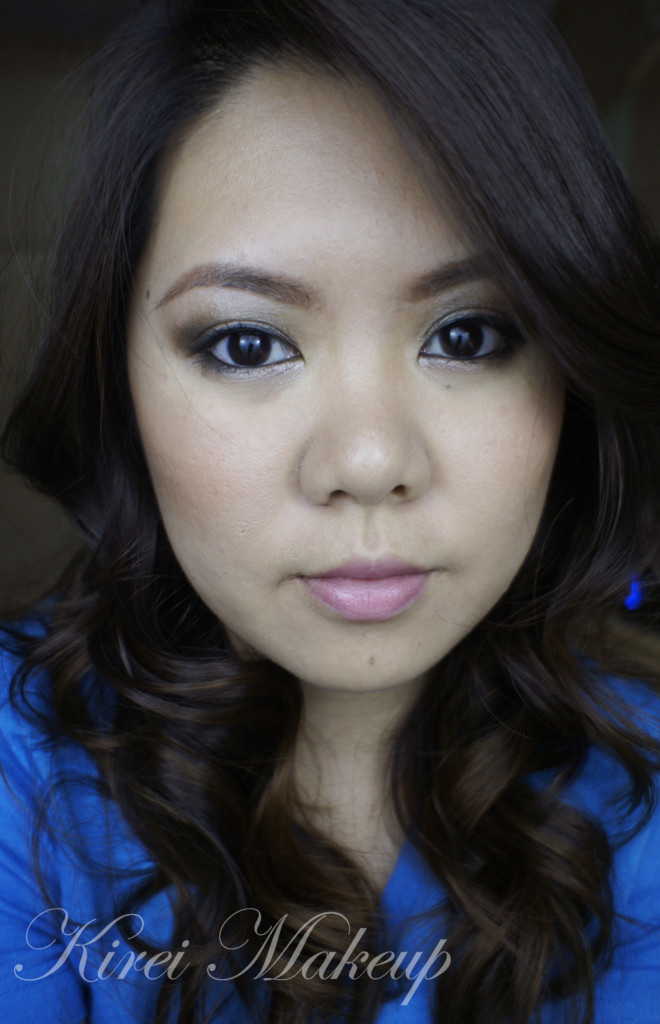
emerald smoky eyes

10. Since I found the brows to be a bit too bold, I decided to tone it down a little by brushing it upwards using a clean spooly (a.k.a mascara brush).

11. For the face, I applied MUFE HD Foundation using my fingers.

12. On the cheeks, I applied L’oreal Visible Lift blush in Rose Gold.

13. I powdered lightly using translucent powder on my T-zone.

14. On the lips, I applied Clinique Chubby Lip pencil in Curvy Candy.

green smoky eyes

Color Me Fuschia

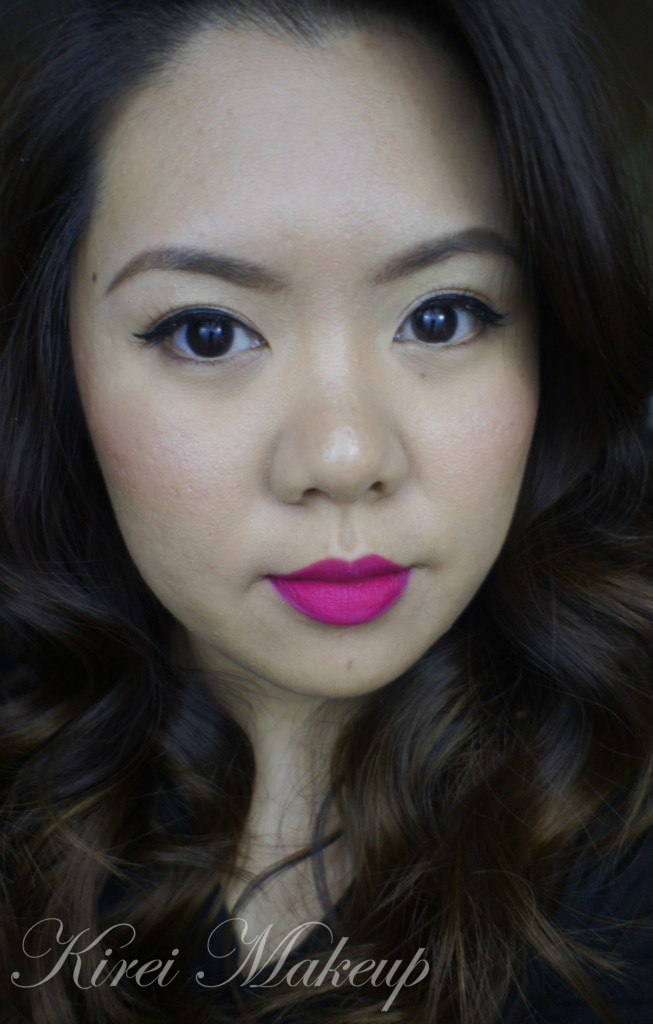
Fuschia lips are here to stay! I’m officially a Fuschia-lips fanatic. I love this bright color on my lips, and I definitely love wearing it when my day is gloomy. I’ve done similar look in Colour Splash and in Eyes, Lips, and Polka Dots.

For this tutorial, I used the lipstick that was given to me from Shu Uemura Indonesia from last week’s Ob Collection event. This Shu Uemura Unlimited Supreme Matte Lipstick in PK376 is a matte fuschia lipstick. This lipstick will suit every skintones. You’ve might have seen Kim K and Emma Stone sporting Fuschia lips on my Pinterest 😉

For the rest of the face and eyes, you can definitely go for very little makeup. I just added eyeliner and falsies because I wanted to make it a little more retro. If you aren’t comfortable with the eyeliner and falsies, just skip them altogether.

How-to:

1. For the face, I prepped the skin by moisturizing it using Body Shop Vit. E moisturizer, and applied L’occitance lip balm on the lips.

2. I applied MUFE HD Foundation using my fingers.

3. I filled in my brows using Shu Uemura Brow Pencil.
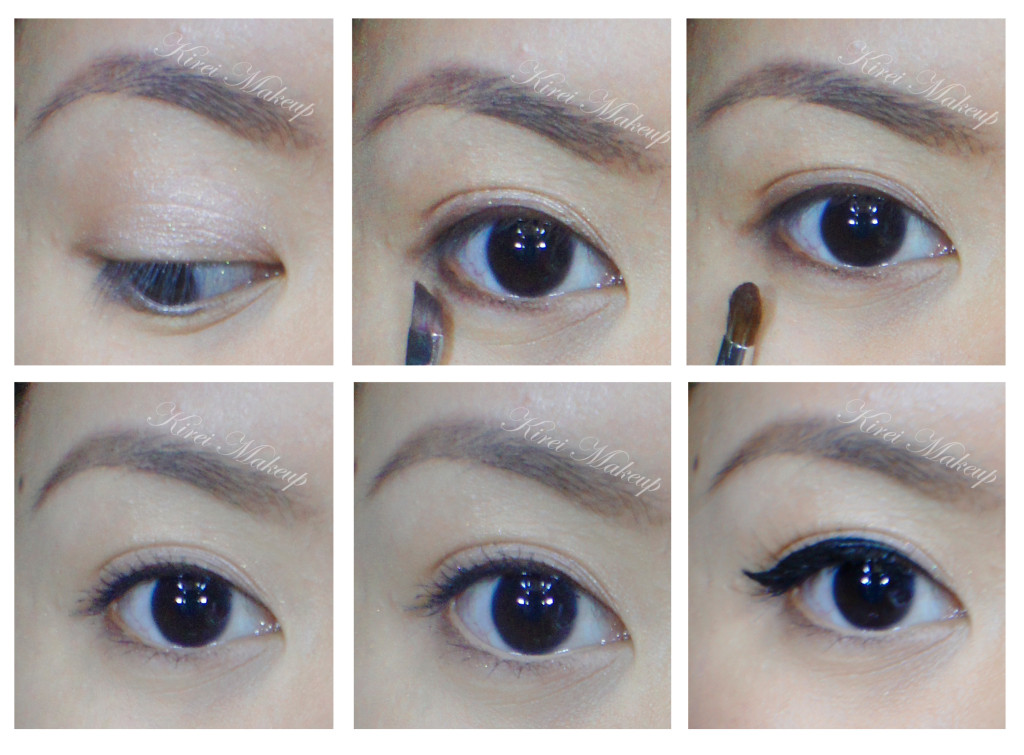
4. On the eyes, I applied Chanel Illusion D’ombre in Emervielle all over the lid using my ring finger.

5. I applied a warm brown eyeshadow (can’t remember the name) on both upper and lower lashline using an angled eyeliner brush.

6. Using a small shader brush, I lightly blended the liner to diffuse any harsh lines.

7. I curled my lashes and applied L’oreal Double Extender Curl mascara on both top and bottom lashes.

8. I lined my waterline using MAC Chromagraphic liner in NC30. *You can stop here if you want and continue on lips*

9. I applied winged liner along upper lashline using Kate Sharp Eyeliner and Ardell Medium false eyelashes.

10. I removed the lip balm on my lips by blotting it off using a clean kleenex.

individual false eyelashes

11. For the lips, I applied Shu Uemura Unlimited Supreme Matte lipstick in PK 376 using a lipbrush.

12. Once I filled in my entire lips, I blot it off using a clean piece of kleenex and re-apply the lip color as needed.

13. *optional* If you want to re-shape your lips, apply lip liner of the same color as your lipstick before lipstick.

14. I applied MAC Fleur Power blush on my face so I don’t look washed out.

shu uemura fuschia lipstick

Product of the Week: MUFE Aqua Creams

I’ve been wanting to do this review for the longest time, and finally I have the chance to do it! If you are looking for a cream shadow or a base that is smudge-proof, crease-proof, water-proof, sweat-proof, tear-proof and everything else (you get the idea), this is the products for you! The aqua cream has a great range of colors, which is definitely one of their assets in this era of cream shadow. I’ve been using this line since 2010, and have never looked back.

What is Aqua Cream?

From MUFE website:

The Aqua Cream is an ultra-pigmented, long-lasting waterproof cream. Highly concentrated in mother-of-pearl pigments, it provides an immediate color intensity with a luminous finish.
Its long-lasting formula will not crease or smudge under the most extreme conditions.

Available in 22 shades, the multipurpose Aqua Cream can be applied on your lips, cheeks and eyes.

Shades #5, 6, 7, 8, 9, 10 are formulated for the Lips & Cheeks.
Shades #1, 2, 3, 4, 11, 12, 13, 14, 15, 16, 17, 18, 20, 21, and 22 are formulated for the Eyes & Cheeks.

Formula:

Volatil oil
Filmogen polymer
Synthetic Ester
High concentration of mother-of-pearls and pigments
Kaolin mineral powder
Paraben free
Dermatologist and ophtalmologist tested

MUFE Aqua Cream

Pros

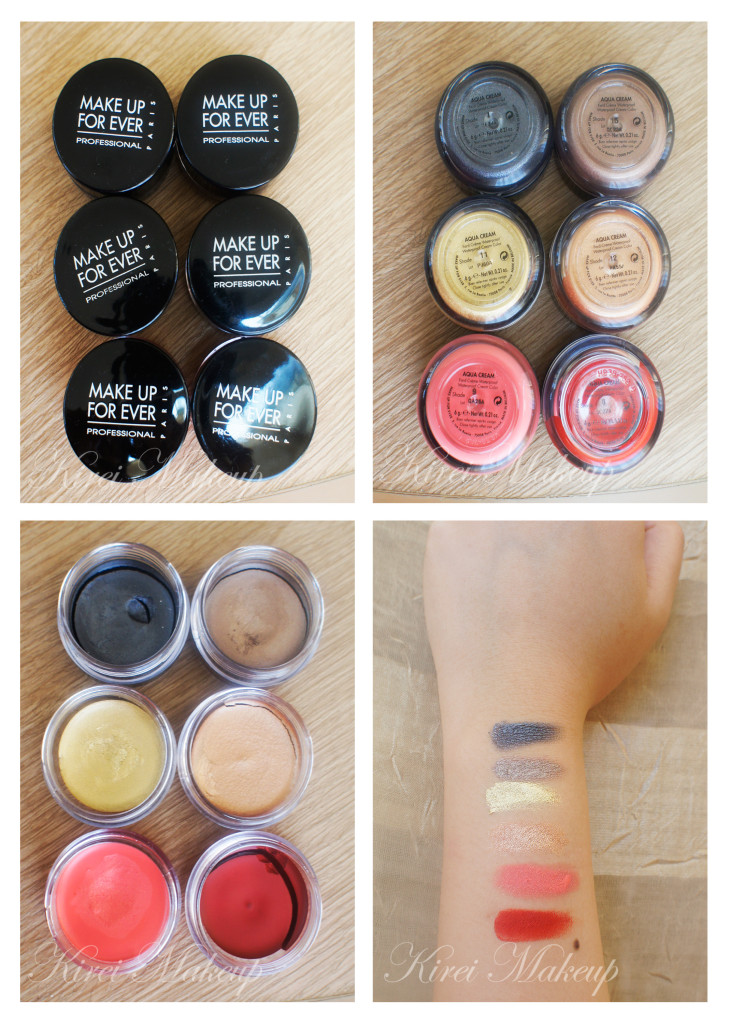
So, I owned 6 different colors (top-bottom, left-right):

  • #1 Anthracite – gunmetal with a silver sheen. The color is leaning towards dark grey than black. I love using this as a base for smoky eyes.
  • #15 Taupe – metallic medium brown with warm undertone. This will look dark brown on lighter skin tone, and light on  darker skin tone.
  • #11 Gold – metallic golden yellow.
  • #12 Golden Copper – rich copper with red undertones.
  • #9 Coral – light coral pink.
  • #8 Red (for cheeks and lips only) – red with orange undertone (think fire trucks). I feel that this product has a golden sheen to it.

Don’t mind the crack in some of them. I had to travel with it a few times (Canada-Jakarta-Bali etc).

Longevity

For all of them, I’d say they (all except #8) lasted a good 8 hours on the eyes. I’ve used this mostly on brides and photoshoots. Once it’s on, it stays ON. This product once it’s on the eyes, it will not move. Like I said, it’s crease-proof, water-proof and smudge-proof.

For #8, I used it for 4-hour and it stayed put throughout. However, when I tried to remove it, it stained my lips pretty much the whole day. It has a velvety finish to it when it dried, so if you prefer a glossy finish, you can apply a clear gloss.

Finish

Out of the 6 that I owned, 4 has a metallic finish (#1, #15, #11 and #12). #9 has a gold shimmer and #8 has a golden sheen to it.

Coverage

You can apply this as a wash of color, or you can build it up in layers.

Packaging

Plastic container with a screw on lid. Very light, made it very easy to travel with.

Price

The product cost CAD$28 for 6 gram in Canada (Sephora). In Jakarta, when I bought #9, it cost me Rp. 250,000 for 6 gram. It’s cheaper in Jakarta than in Canada..(that’s a first!). Since it is cheaper in Jakarta, I might go over and buy a few more colors..hehehee *update as of June 2, 2013* MUFE Indonesia is selling their aqua creams at Rp. 300,000 each. Now, for price-wise, it’s similar to the Canadian counterpart.

Cons

Again, I’ve to repeat this: work fast with this product and in thin layers. The product dries very fast and once it dries, there’s no way of blending it. If you apply this product too thick on your first few layers, you might see a build-up of products on the skin. There’s no way of re-blending it once it becomes lumpy.

Also, for that price, you are better off buying Maybelline Color Tattoo 24-hour gel shadow which cost CAD$6.95! However, the color range might not be as much as the Aqua Cream. On top of that, the color tattoo line is not available in Indonesia.

I’m giving the Aqua Cream 4 winks out of 5!

p.s.: for tutorials using the aqua creams, please check the links below:

Ob for Shu Uemura Collection Part 2

As promised! This is the second part of my Shu Uemura event coverage. If you haven’t seen the first one, please check the Ob for Shu Uemura Collection Part 1 post. Let me warn you that there’ll be lots of pictures.

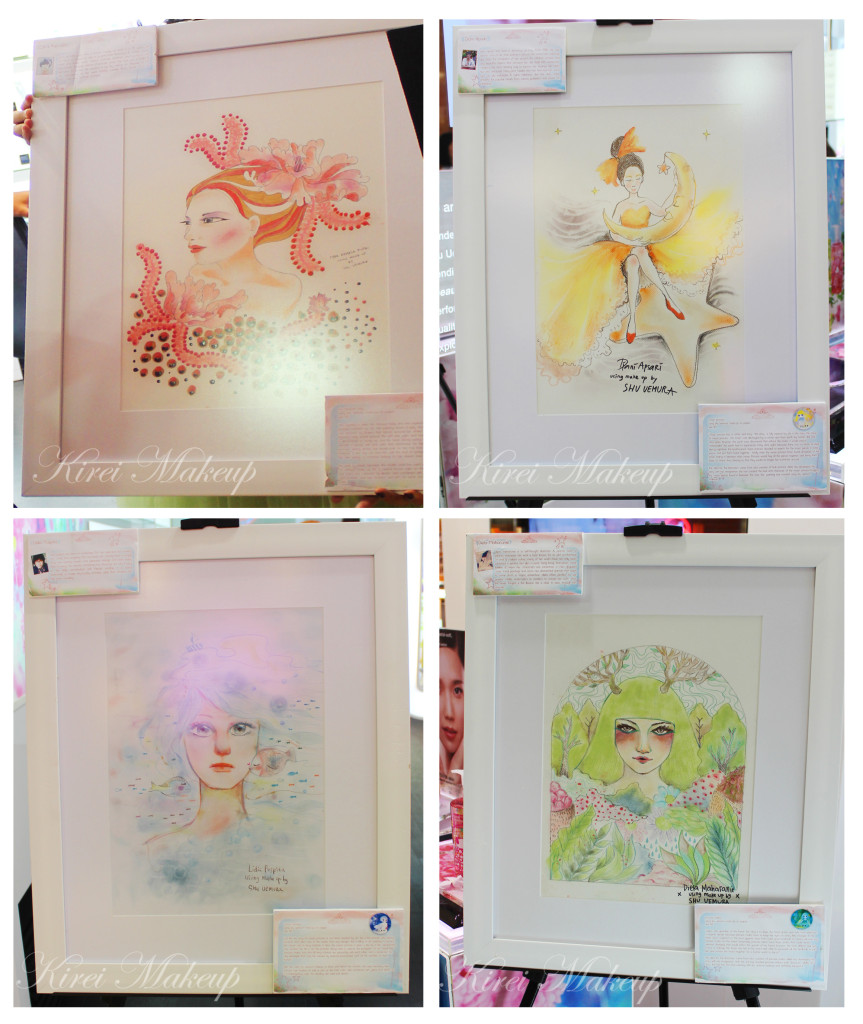
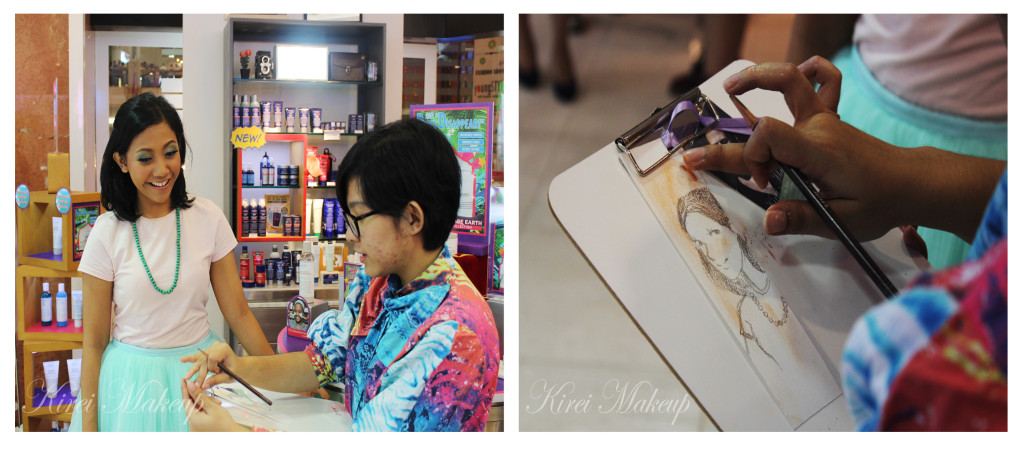
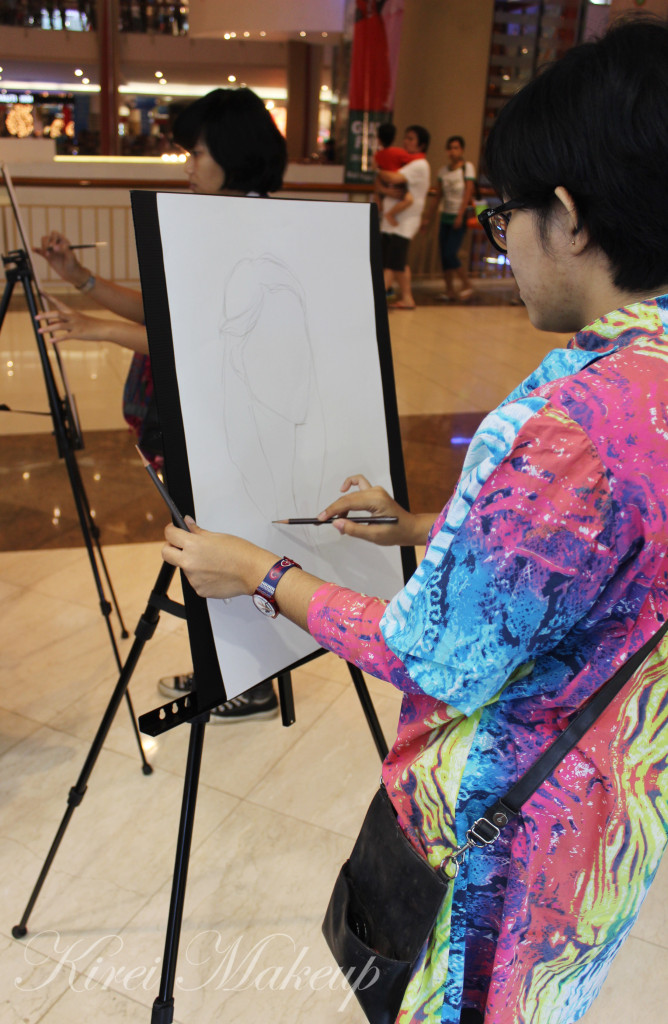
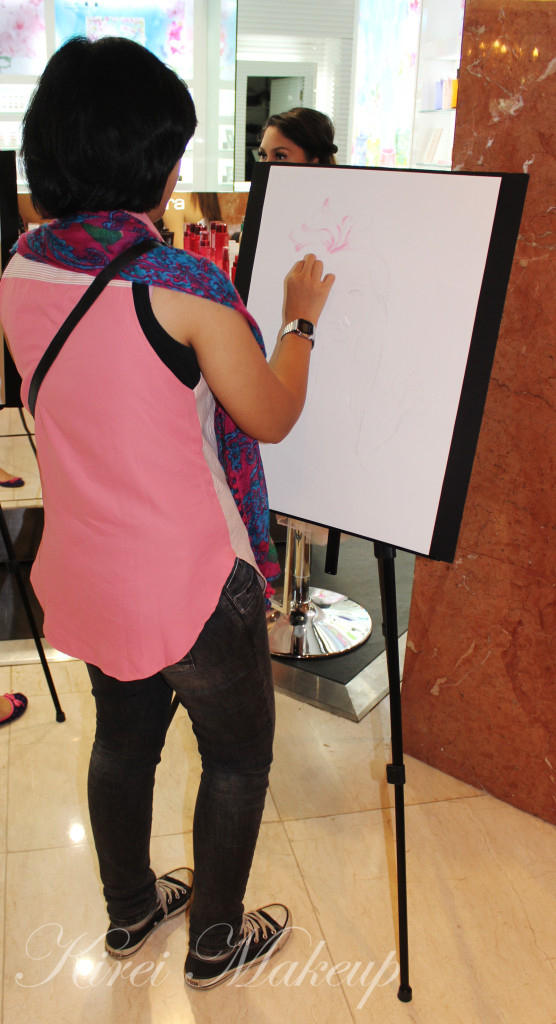
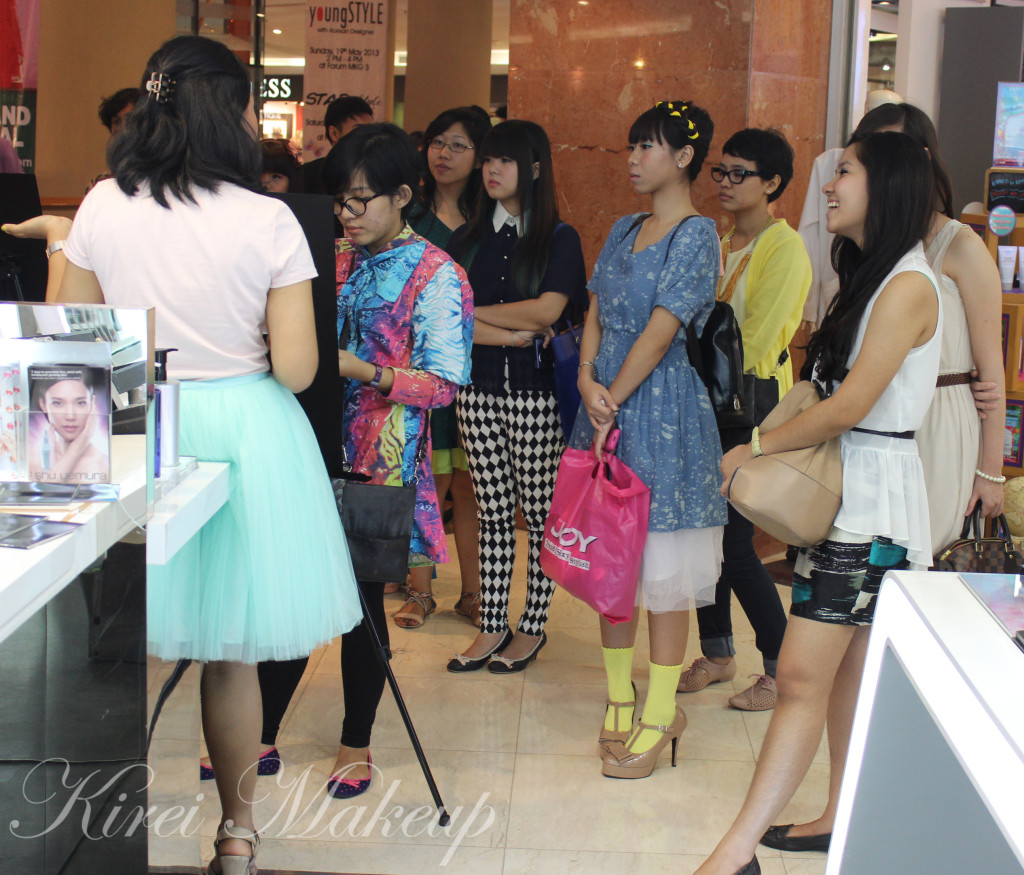
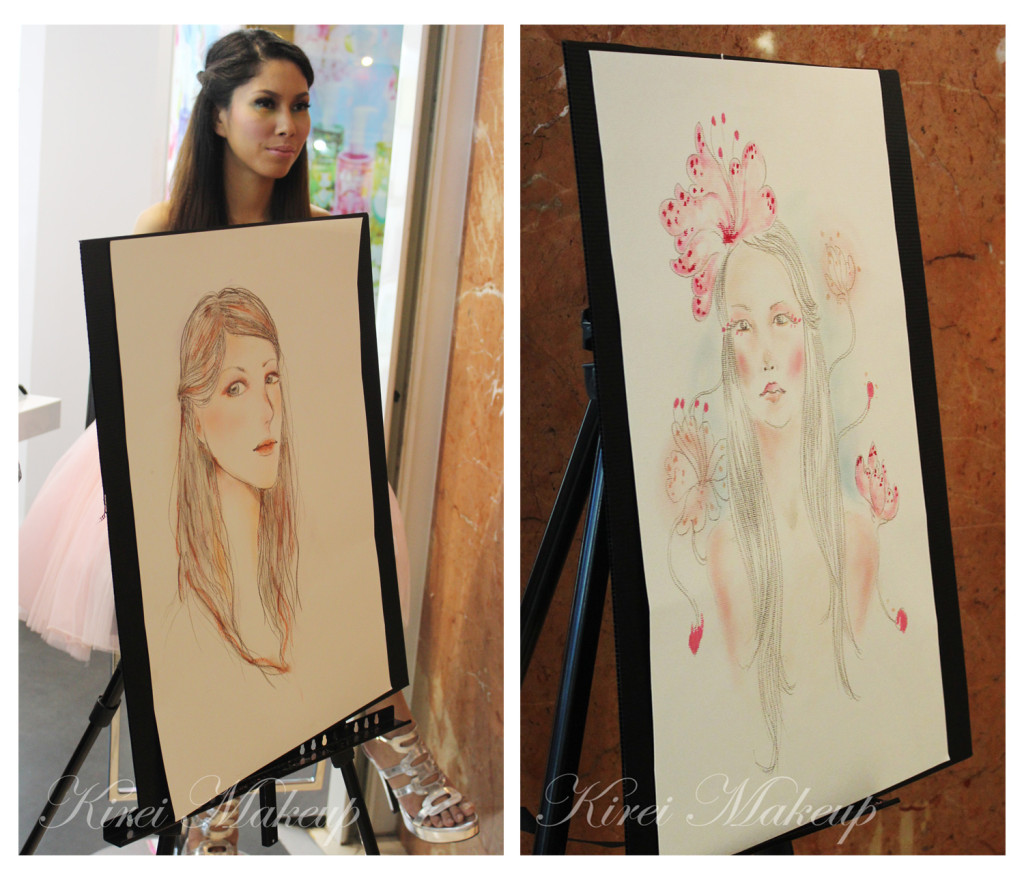
So, as you guys know, last Saturday I went for the Shu Uemura event for the launching of the Ob collection. During this event, 4 illustrators were present, and each created an illustration for the 4 different princesses – cherry blossom, moon, ocean and forest. They have to create the drawing using ONLY makeup products provided to them by Shu Uemura. All the drawings below are created using eyebrow pencil, eyeliner, lipstick, and eyeshadows. They used their fingers and cotton pads to blend the colors. Pretty amazing, don’t you think?

Shu Uemura Ob Collection event

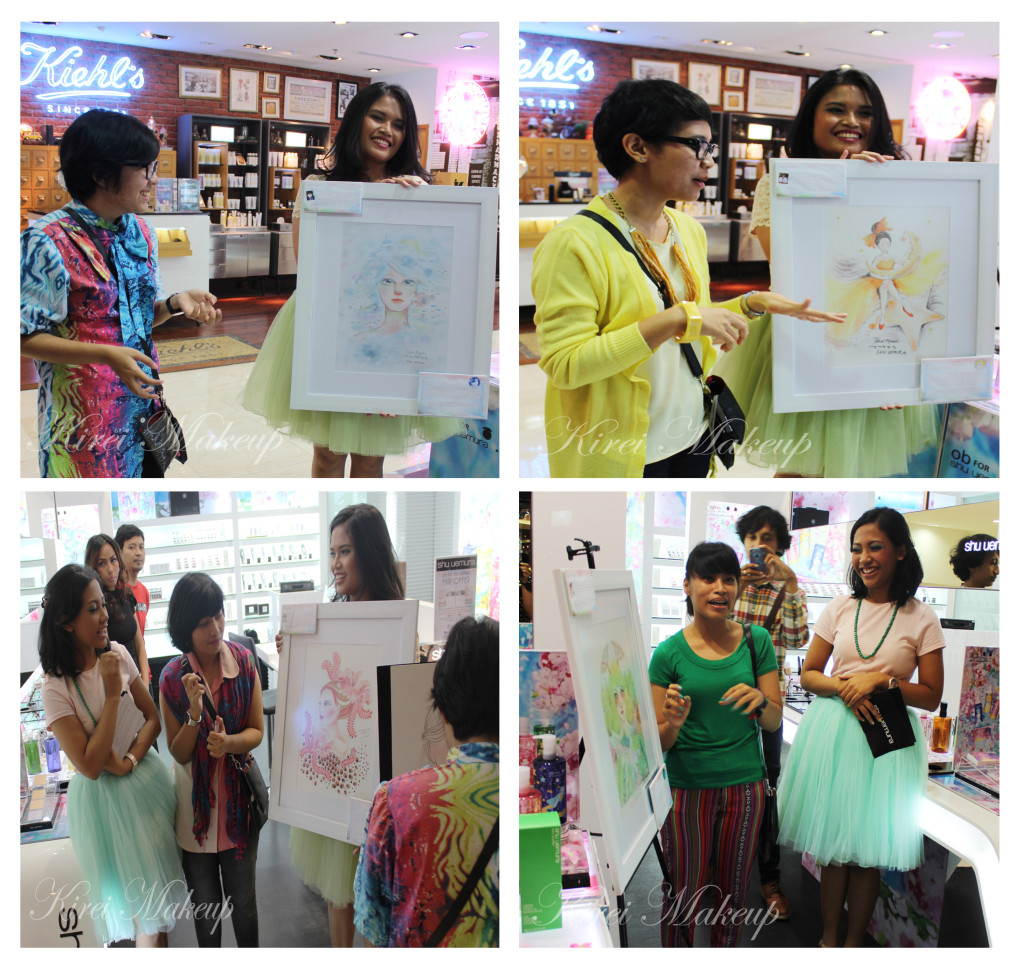
Here you can see the illustrators presenting their works. The illustrators are: Lidia Puspita, Citra Kemala, Diani Apsari, and Diela Maharanie.Shu Uemura Ob Collection event

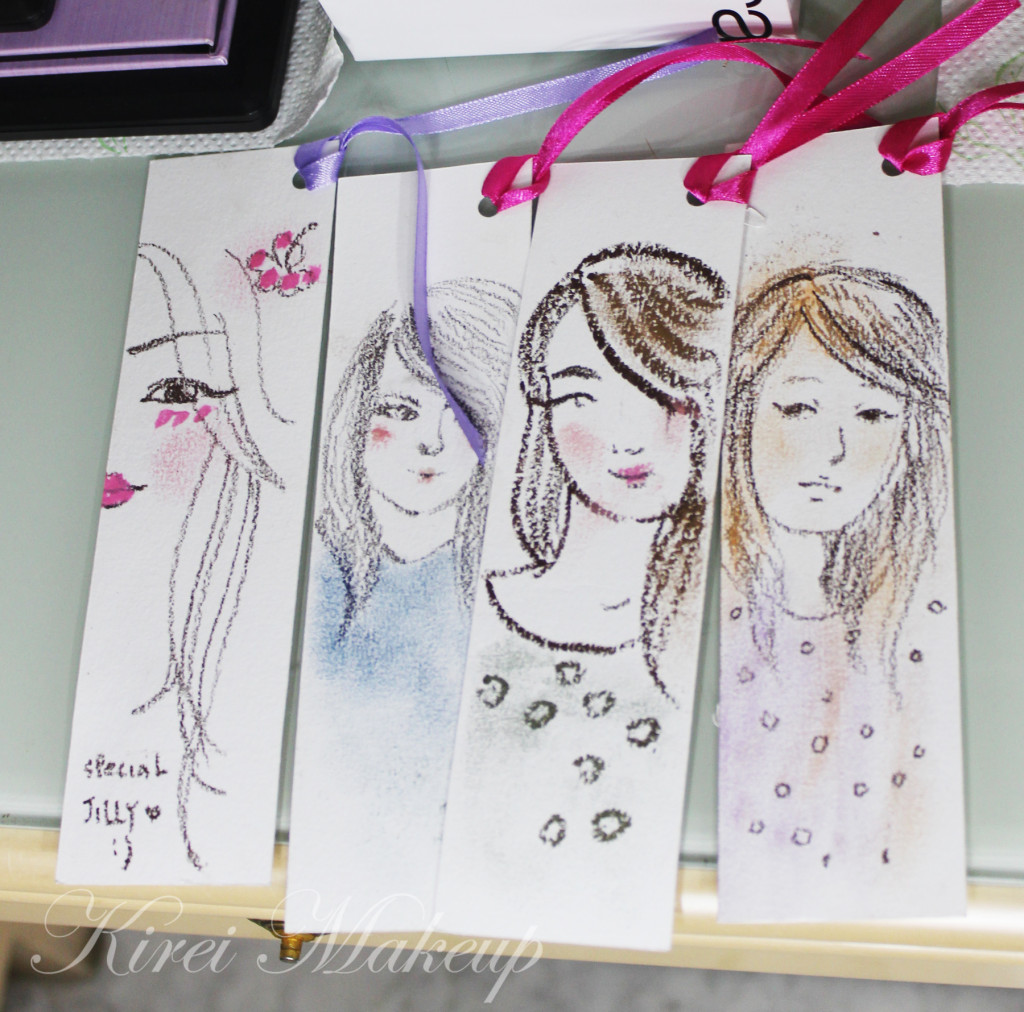
After the event, the illustrators were each given several bookmarks to live sketch anyone who attended the event! Well, since I want all 4 to sketch me, I waited in line one-by-one..bahahaha..I love the sketches! I think they are amazing artists and they are super extremely nice! I get the chance to talk to them, and see them sketched. They are pretty awesome, I tell ya! Shu Uemura Ob Collection event Shu Uemura Ob Collection event Shu Uemura Ob Collection event Shu Uemura Ob Collection

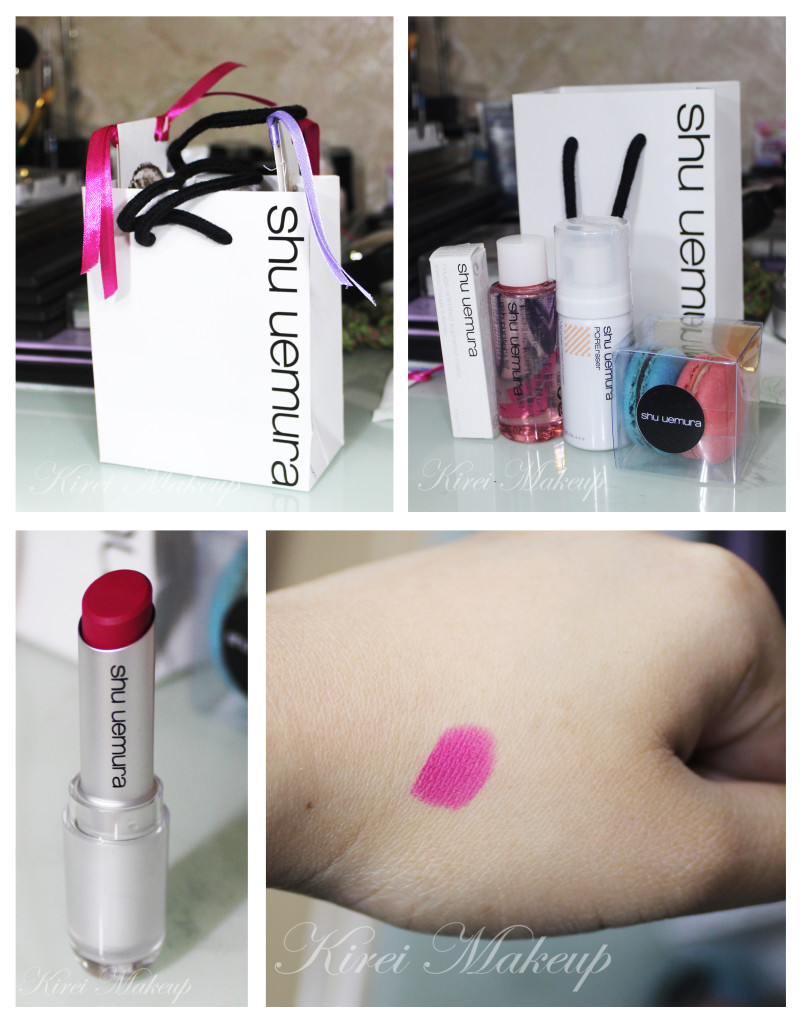
As mentioned before, I received a goodie-bag from Shu Uemura. Inside, I received macaroons, lipstick, UV under base mousse, and Shu Uemura (my all-time favorite) cleansing oil. I love the lipstick! It’s bright, it’s fuschia and it’s matte! Wait for the tutorial, you guys. I’m so going to use the lipstick on the next post.

So, again and again, I’d like to say a BIG THANK YOU to Shu Uemura Indonesia (esp. Regina, Sesa and Dea) for inviting me to the lovely event. I truly enjoyed the event, and in all honesty it was really fun!

Shu Uemura Rouge Unlimited Matte PK 376


Ob for Shu Uemura Collection Part 1

Happy Sunday, you gorgeous people out there! Last Saturday (yesterday), I was invited by Shu Uemura Indonesia to join them in the launching of Ob for Shu Uemura collection at Sogo in Mal Kelapa Gading. The event was fun and definitely intimate. I love this type of event since I get a chance to talk to everyone! I, however, did not swatch the newly released products because I was too busy admiring the illustrators…I’m soooo sorry! I’ll try to swatch the products if I get the chance to go to the nearest Shu Uemura counter!

Let’s get on it! What is this Ob collection all about, you ask?

“On a constant quest for innovation and beauty, Shu Uemura invites you to a magical world for spring 2013. Inspired by Japanese artist ob and the young creators of her generation comes a limited-edition collection that celebrates the rise of a new era in art. in-between reality and a dream beckons you into ob’s creative universe, a world that appears normal at first sight but is filled with fantasy and delight; a world that showcases the emerging vision of a generation of creators who came of age in a radical new digital world. Discover this magical landscape and create a new you – someone you’ve never imagined yourself to be – with a line-up of gorgeous shu uemura products intricately wrapped in the beauty of spring and the sensitivity of a new generation.” (Shu Uemura USA, 2013)

29

16

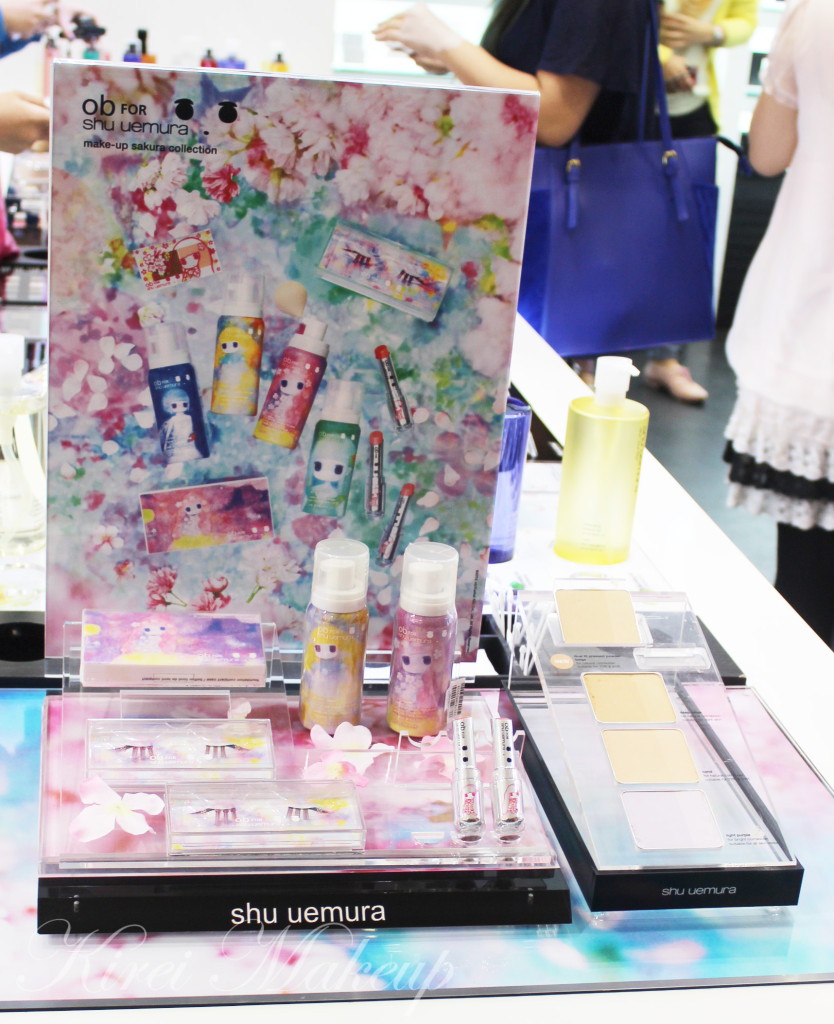
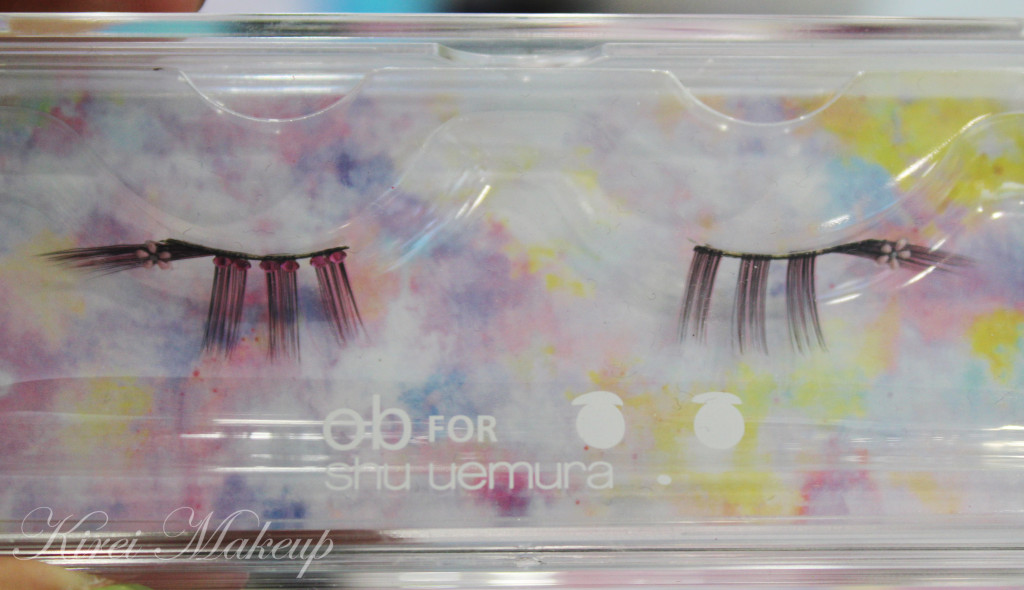
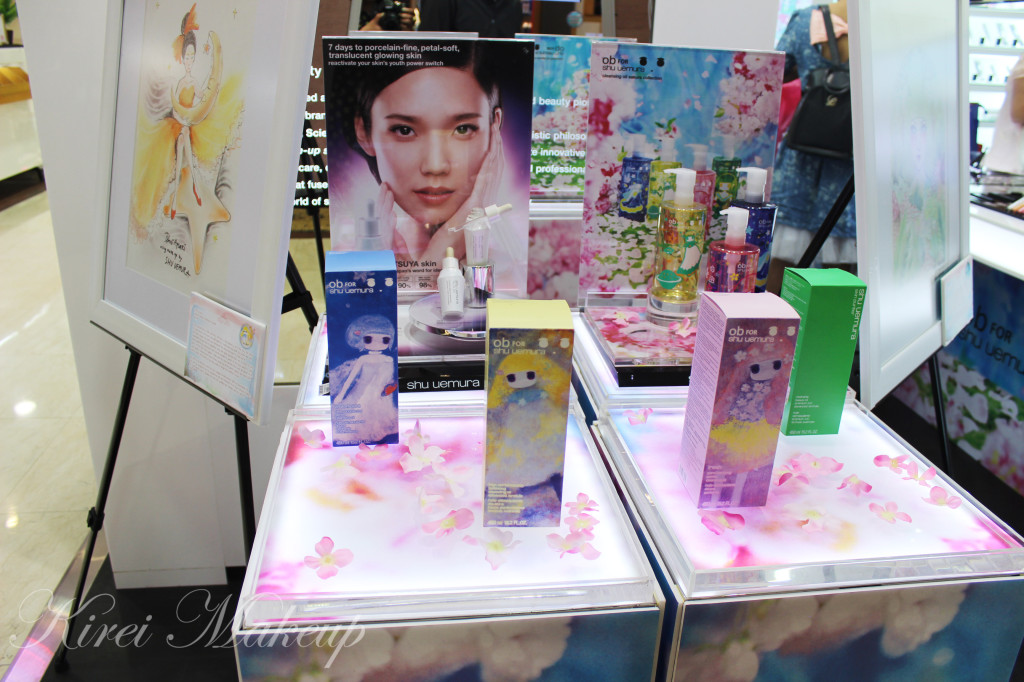
During the event, I did not see any eyeshadow collection. However, on display, there were UV Under Base Mousse, False Eyelashes, Rouge Unlimited Supreme Shine Ob Collection, and Compact Case (for eyeshadow) Ob Collection.

They also carried in the collection the 4 different cleansing oils with the 4 different princesses illustrated on each bottle.

  • Cherry Blossom Princess – Pore-less smooth skin as fresh petals of cherry blossom. This cleansing oil is catered for those with normal, oily and acne-prone skin type.
  • Moon Princess – Luminous soft skin as hazy moon in spring night. This cleansing oil is for all skin type.
  • Ocean Princess – Bright skin as completely transparent ocean. This cleansing is intended to brightened up your skin.
  • Forest Princess – Vitalized even-toned skin as fresh as the young leaves in early Spring. This cleansing oil is catered towards aging/mature skin.

All the cleansing oils above work as a makeup remover as well. I, personally owned the Fresh Pore Clarifying Gentle Cleansing Oil (the pink bottle), and have been using it since I was in makeup school.


28

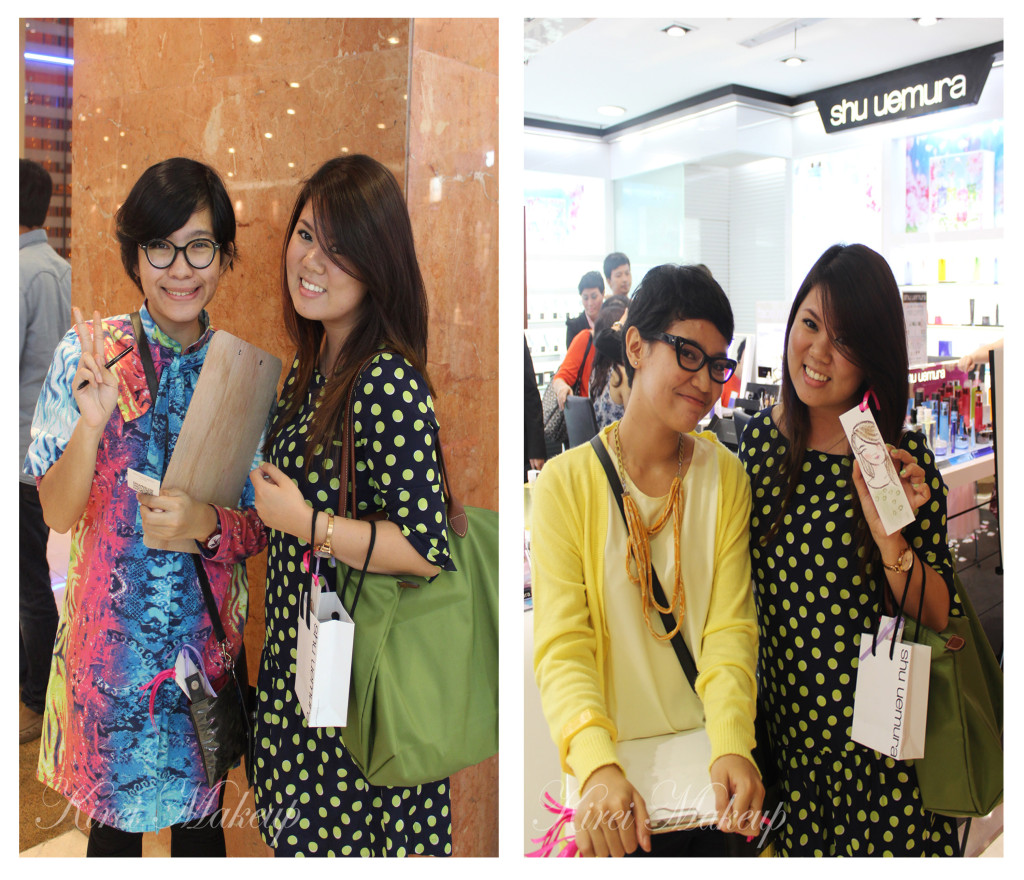
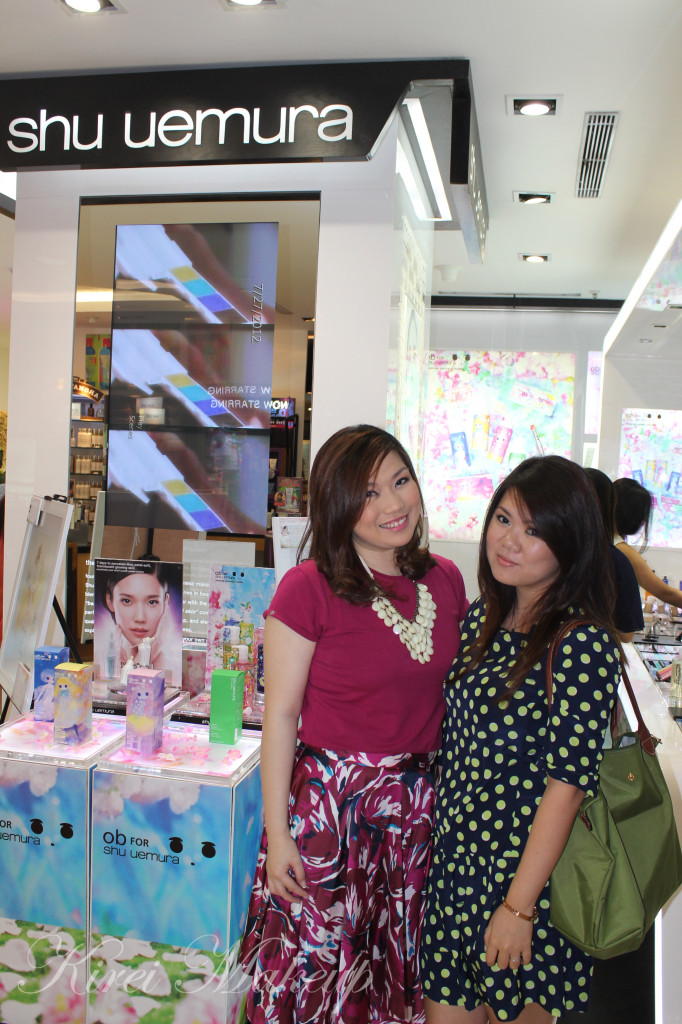
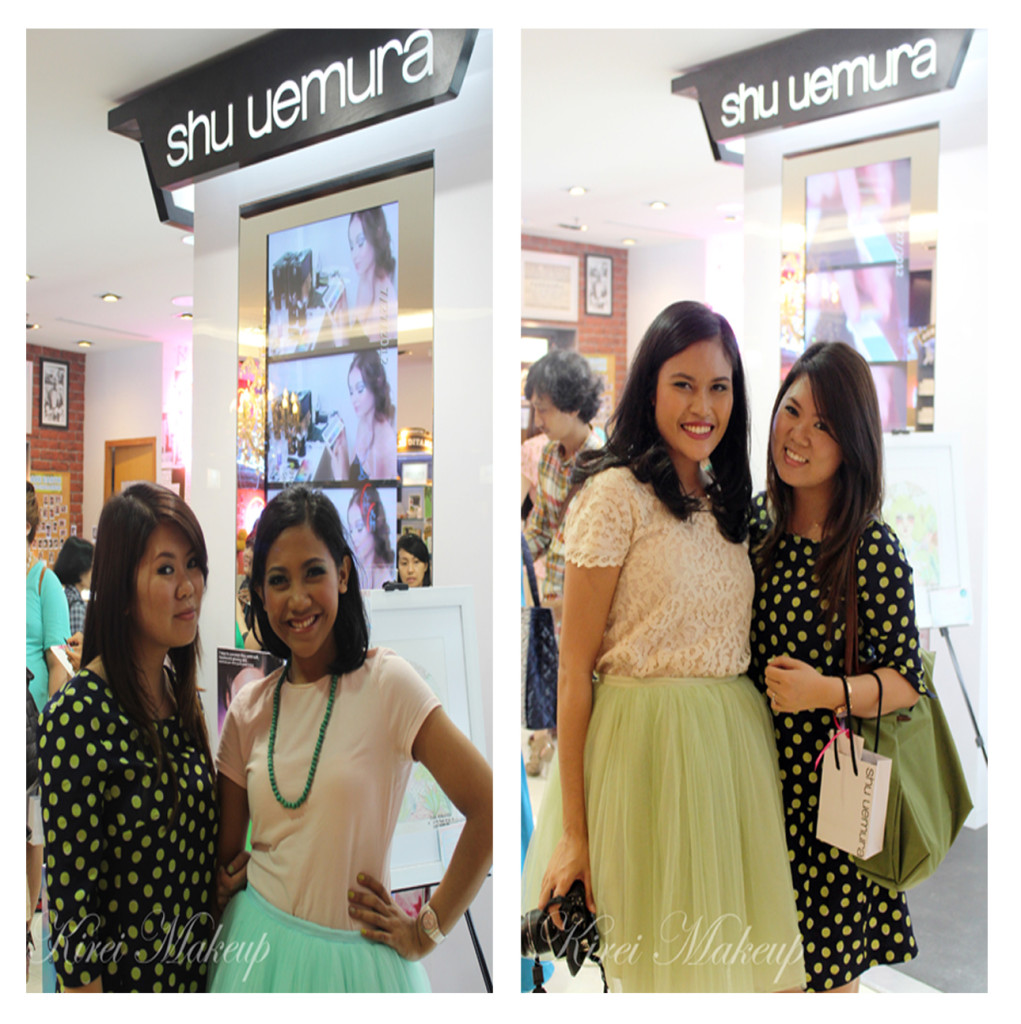
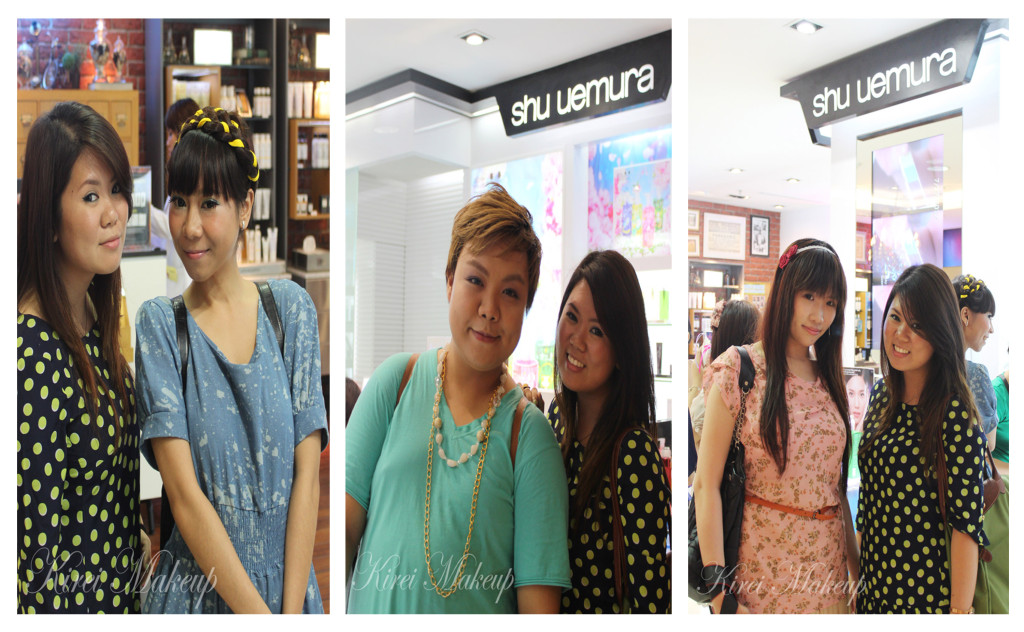
Of course, I’ve to take a picture with Regina, Shu Uemura (and Kiehl’s) Brand Manager for Indonesia. You might’ve seen her in my other Shu Uemura events. Doesn’t she look adorable in her outfit? I love her skirt! I think she’s going for the Cherry Blossom look, and nailed it! Tres chic! I also took pictures with Sesa and Dea who sent out the invitation, and were super duper extra kind and helpful with all my questions…they promised to go for a bubble tea with me, right girls? (hahaha hopefully they’ll read this :P)

I decided to dress up as Forest Princess. Since the inspiration for Forest Princess is green, I went with my navy blue with green polka dots dress is from GAP Canada. I also brought along my Longchamp green bag. I also applied Essie Navigate Her nail polish.

27

Shu Uemura Ob Collection

There were 4 illustrators for the event, however, only 2 drew during the live demo. Yes, people, they were sketching and drawing LIVE! You know what’s even more amazing? They were using MAKEUP provided by Shu Uemura to draw the model. Amazing, much?

Below you can see the illustrators were sketching using Shu Uemura Brow Pencil Hard Formula. This is the same brow pencil that I’ve been using to fill in my brows these couple tutorials. So, if you can’t find your pencil, you can use this brow pencil to draw or write..bahahahah :p

26

The illustrator in the photo below was using eyeshadow in which she has crushed into loose powder form to fill in the sketch with colors.

25

Look at that! I can’t even sketch anything if my life depends on it. But, I mean, come on! Live sketch in front of 30 something people in less than 30 mins. That’s super cool!

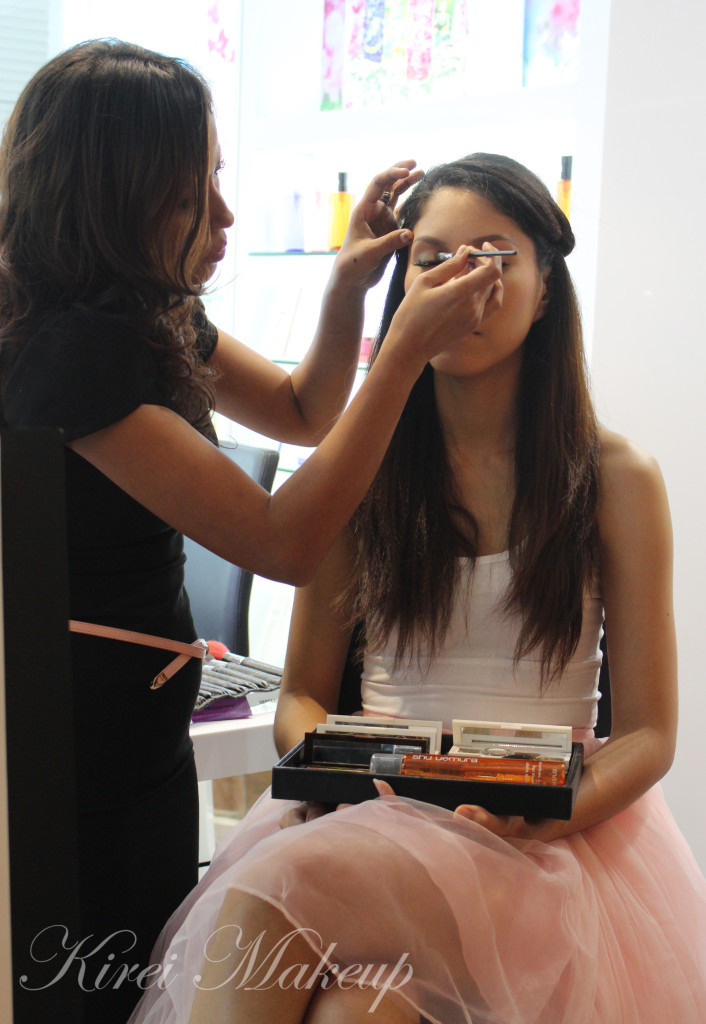
Shu Uemura Ob collectionOh, yes, at the same time of the live sketch, Shu Uemura makeup artist also did a live demo on the model. She applied Pink eyeshadow on the lid, brown on the crease. On the lower lid she applied a combination of green (inner third), yellow (middle) and blue (outer third).20

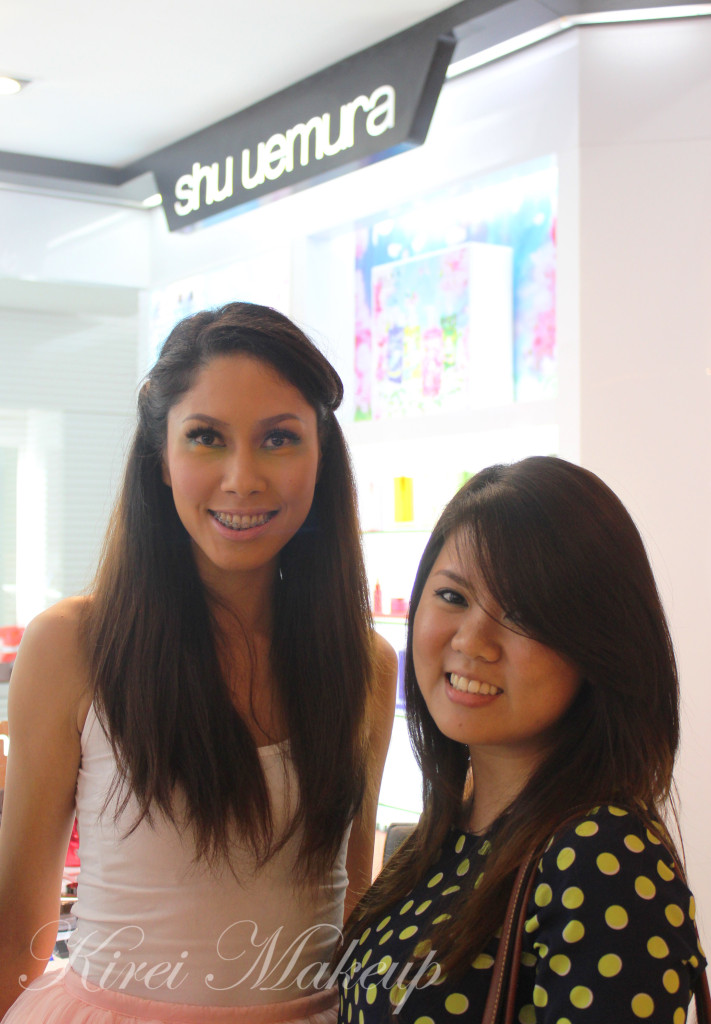
I took a picture with the model…she’s super tall and skinny…-___-lll…I feel like a fat midget beside her…

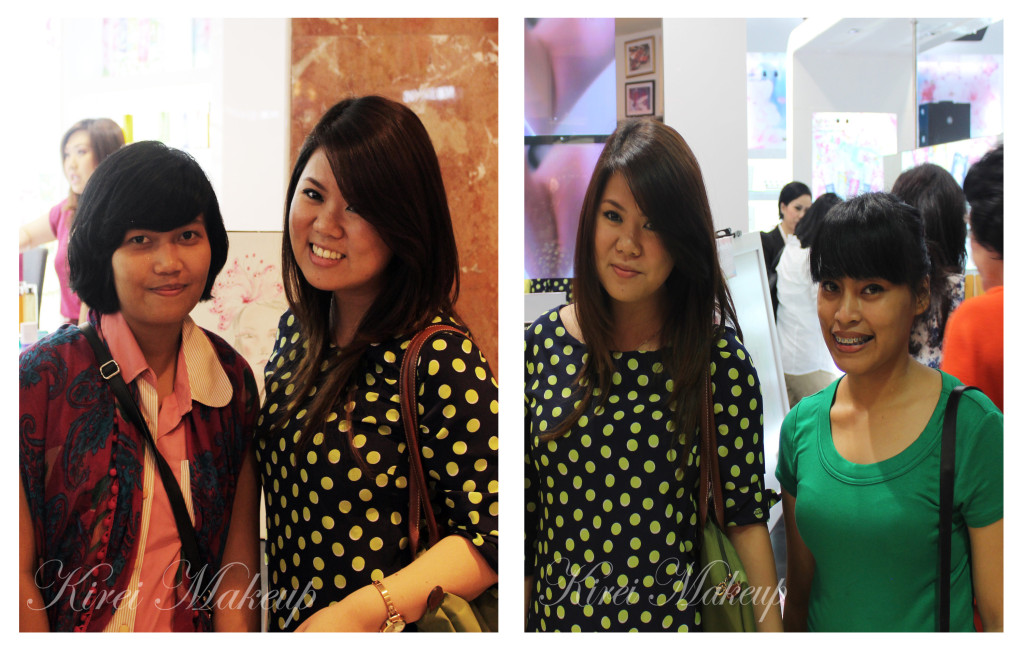
Anywaays! I also get the chance to take pictures with other bloggers (Endi, Ayu and Gaby)!

1

indonesian beauty bloggers

indonesian beauty bloggers

I’ll also post the 2nd part of this event tomorrow to talk more about the illustrators themselves and their works! I’ll include the goodie bag that we received on the event.

I’d like to thank Shu Uemura Indonesia, esp. Regina, Sesa and Dea for inviting me to join the lovely event!

Seafoam

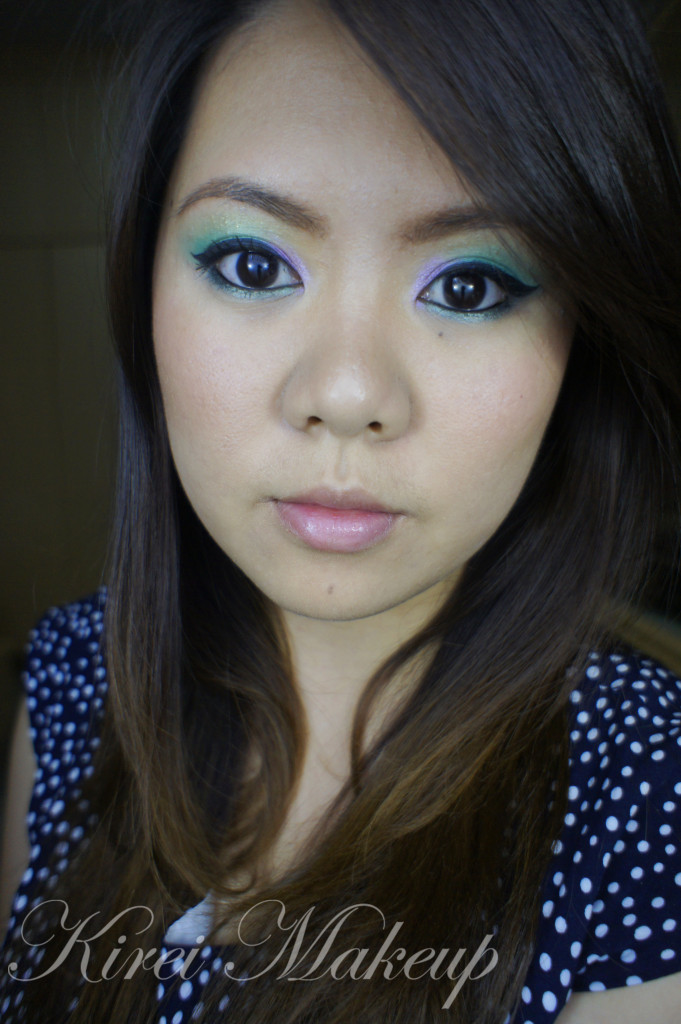
I’m sure by now you guys are probably tired of me using my Sleek Makeup Snapshot palette…but I can’t help it! It’s too gorgeous! Today’s look is very simple, no crease or outer V whatsoever…I’ve actually worn mascara the whole day, and didn’t take it off for the tutorial, so don’t mind the mascara on the step-by-step picture..

Let’s get on the tutorial! (I prepped my eyes using MAC Soft Ochre paint pot)

How-to:

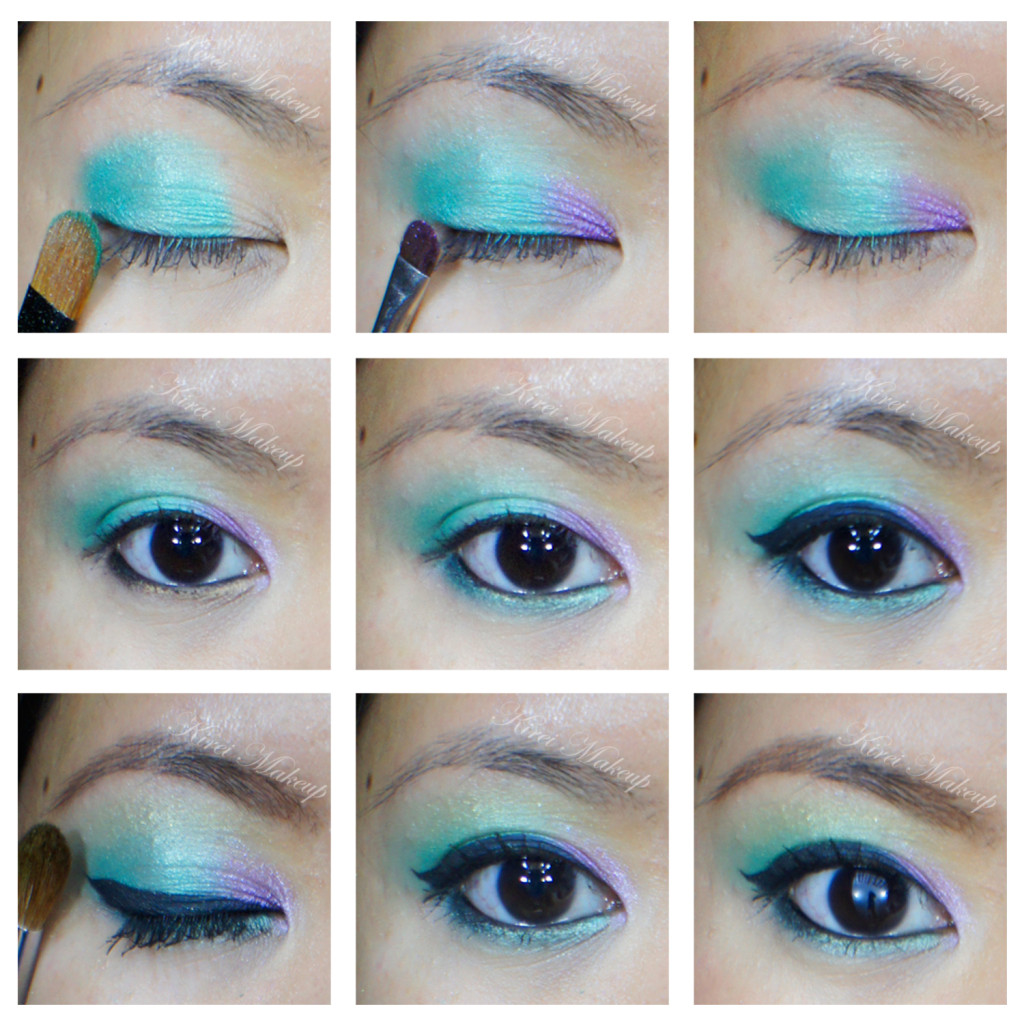
1. Using a flat eyeshadow brush, I applied Green Iguana from Sleek Makeup Snapshot palette on the eyelid, leaving the inner third of the lid empty.

2. (not in picture) I used a clean fluffy brush to blend the crease so there’s no harsh edge.

3. Using a small shader brush, I applied MAC Butterfly Party Crushed Metal Pigment on the inner third of the lid.

4. Using another clean small shader brush, I blended the edge where the 2 eyeshadows meet.

5. I lined my waterline using L’oreal Voluminous Smoldering eyeliner.

6. Using an angled eyeliner brush, I applied Green Iguana eyeshadow on the lower lid.

7. I lined the upper lash line using Clinique gel liner, creating a winged/cat-eyeliner.

8. Using a big clean fluffy brush, I applied Kiwi Flower just above the crease for an extra wash of color.

9. I applied Maybelline Volume Express Turbo Boost mascara on both upper and lower lashes.

10. I filled my brows in using Shu Uemura brow pencil.
sleek makeup snapshot

11. On the face, I applied MUFE HD Foundation using my fingers.

12. I contoured my cheeks using MAC Shadowy and NARS Ita Kabuki brush.

13. On the cheeks, I applied MAC Peaches blush.

14. On the lips, I applied Chanel Levres Scintillantes in Volupte.

green and purple makeup

Unboxing Beauty Treats Indonesia!

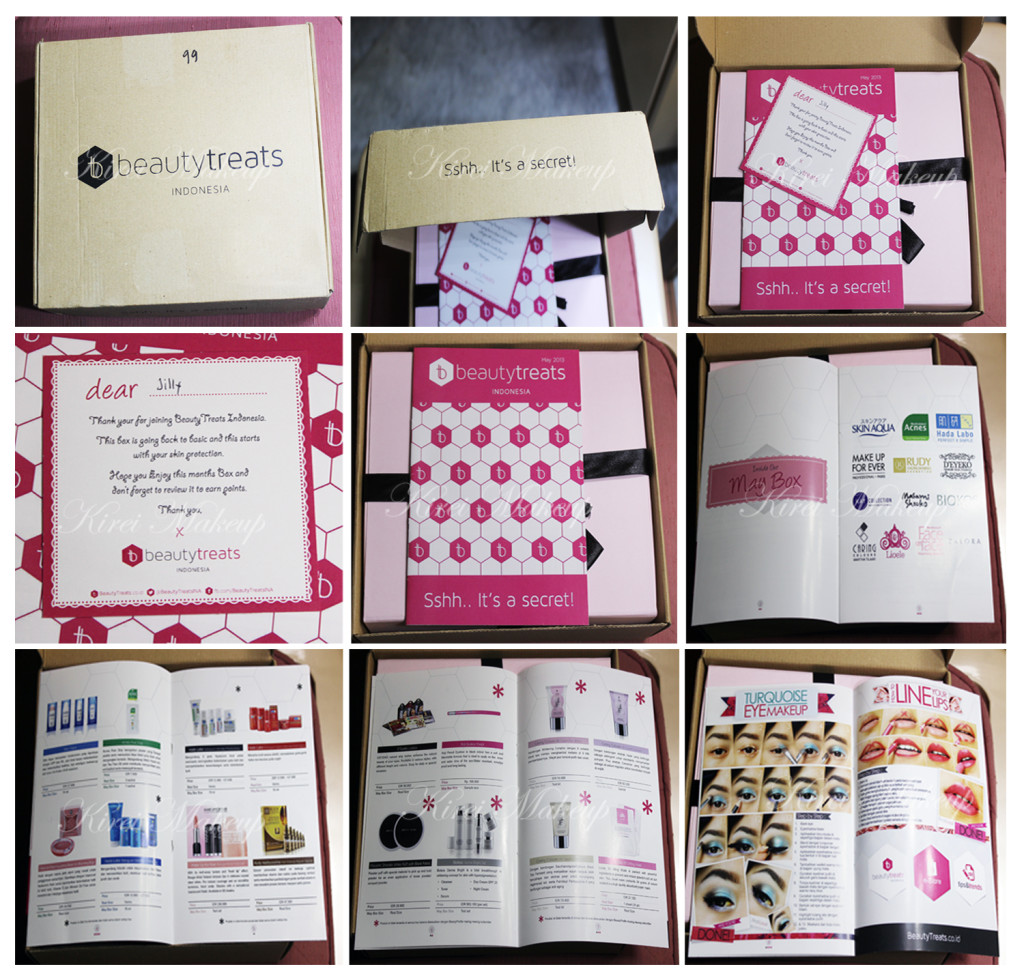
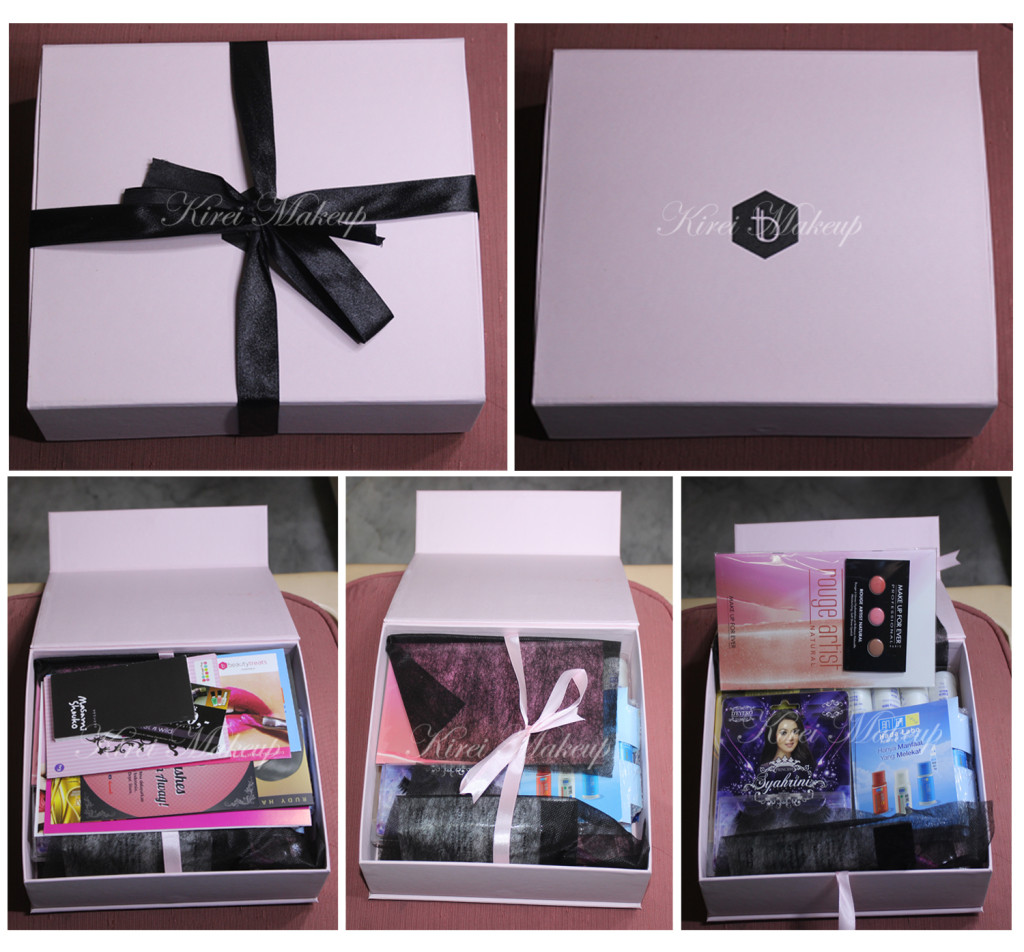
After a long wait for my first Beauty Treats package to arrive, I finally got my hands on it! Today’s box was quite late because apparently they were changing their courier service, so there was a delay. Also, just to let you guys know, if you did not input the special code given to you for payment confirmation, they will not notify you that there’s something wrong with your payment. You do have to contact them if you have issues with payment and subscription, don’t expect them to contact you.

Anyhooow, let’s get to the good stuffs! The package arrived safely. I love the little “sshh…it’s a secret!” slogan. I think it’s cute. Inside the package, there’s a little “thank-you” note, and I find it very lovely that they handwritten my name. I think it’s a nice personal touch.

Beautytreats indonesia

You will find a booklet explaining which brands and products are inside this month’s box. The booklet also contain the full description of each item and their original price should you be interested in buying the original size. I heard that they will be releasing a new section on their website where you can buy the full-size products online. On the last 2 pages, they included makeup tutorials, which you can also find on their Facebook page and website.

The beautytreats package comes in a pretty pink box, with black ribbon tied around it. I’m keeping the box, and probably will use it as an organizer or to keep my stuffs inside. It’s pretty sturdy! Inside the box you’ll find vouchers and booklets from the different brands that are partnered with beautytreats. Beautytreats indonesia

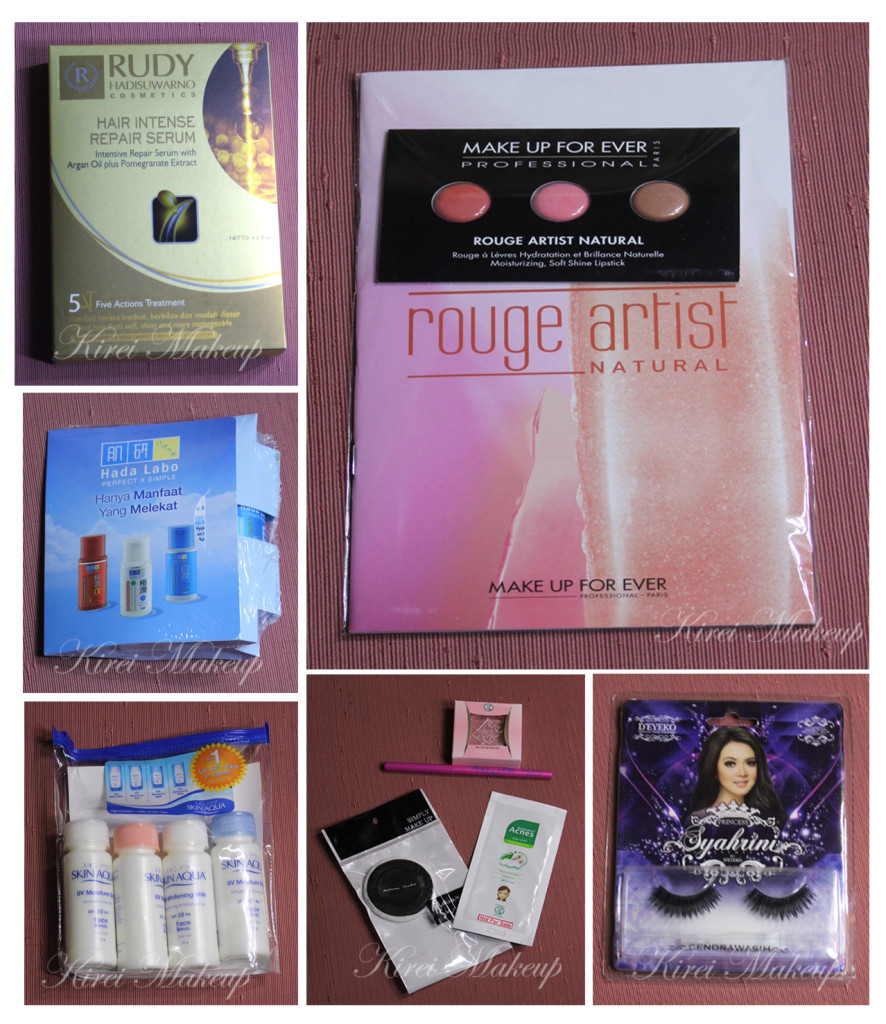
So, what’s inside this month’s box?

1. Make Up For Ever Rouge Artist Natural lipstick – test set.

2. Rudy Hadisuwarno Hair Intense Repair Serum – real size!

3. Hada Labo Gokujyun Alpha Ultimate Anti-aging, Shirojyun and Gokujyun Ultimate Whitening – 15ml/bottle.

4. Travel-size Skin Aqua moisturizers (super cute!) – 15ml/bottle.

5. Face on Face Nourishing Blush on Blooming Rose – real size! (as big as an eyeshadow..so adorable).

6. Acne Pore Strip – 1 sachet.

7. Masami Shouko White Puff with Black Fabric – real size.

8. Koji Eyeliner Pencil – sample size.

9. D’eyeko lashes – real size.

Other subscribers might receive the following products instead of the Masami Shouko White Puff:

  • Biokos Derma Bright Set, or
  • Caring Colors BB Cream Fair White, or
  • Caring Colours BB Cream Everlast, or
  • Caring Colours BB Cream Luminizing, or
  • Lioele 3D Lifting Mask.make up for ever indonesia

Update: as of July 2, 2013, I’m very disappointed with Beauty Treats Indonesia. The June box arrived in July 2, the products as well as the amount of products inside the box were not up to standard. 

Pearlescent

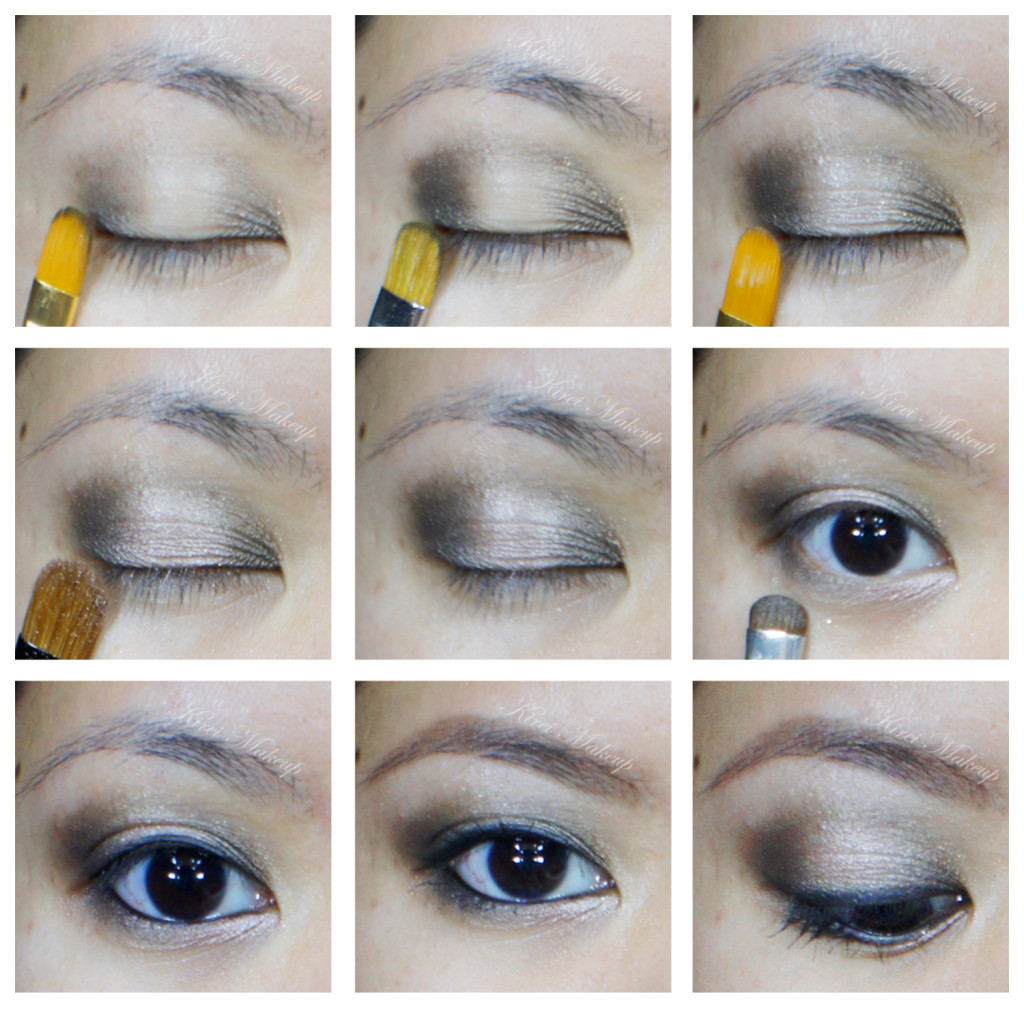
Another smoky tutorial! This time, I wanted to show you guys another way of doing a smoky eye. This look highlights the center of the eyelid, instead of the usual highlight on the inner corner. I like doing this smoky eyes more than the other ones since I find that the eyes catch the light when you blink or look down. It’s something different than the classic sooty, dark grey smoky eyes. Obviously, you can do this with any color. I’ve done this type of look using cranberry and blue eyeshadow in my Peek a Blue post.

How-to:

1. Using a synthetic art brush, I applied Smashbox Stone cream eyeshadow on the inner and outer corner of the eyes, leaving the center part of the lid bare.

2. Using a flat eyeshadow brush, I applied Urban Decay Dark Horse eyeshadow on top of the cream eyeshadow. Again, leave the middle part of the lid empty.

3. Using another clean synthetic art brush, I applied Chanel Illusion D’ombre in Emerveille in the middle of the lid.

4. Using a clean flat eyeshadow brush, I applied Urban Decay Sidecar eyeshadow on top of Chanel Emerveille cream shadow.

5. Using a clean small fluffy brush, I blended the edges where the dark and the light eyeshadow meet.

6. I applied UD Darkhorse on the outer half of the lower lid and UD Sidecar on the inner half.

7. I lined my waterline, tightline and upper lashline using L’oreal Voluminous Smoldering eyeliner.

8. I curled my lashes and applied Maybelline Express Volume Turbo boost mascara on my lashes.

9. I filled my brows in using Shu Uemura brow pencil.
asian smoky eyes

10. On my face, I applied MUFE HD foundation in 118 all over using IPKN Auto Wave makeup.

11. I contoured my cheeks using MAC Shadowy.

12. On the cheeks, I applied MAC Peaches blush.

13. On the lips I applied Chanel Confidentielle lipstick.

asian smoky eyes

Dahlia

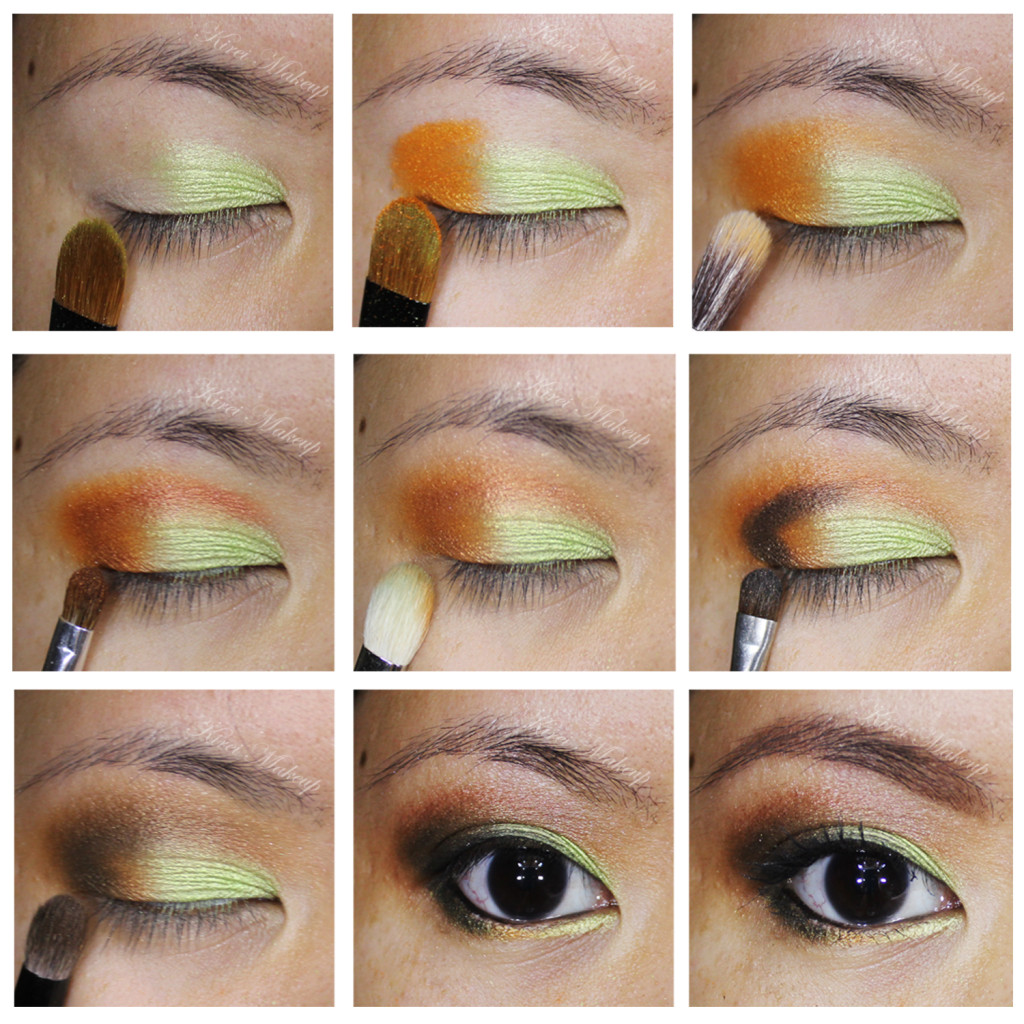
I love this combo! Green and orange are so pretty together. Anyways, I did not do a full face makeup for this tutorial since I was just playing with my Sleek Makeup iDivine Snapshot palette. However, I do thought it was pretty, so I decided to post this up.

My lid was prep using MAC Soft Ochre paint pot.

How-to:

1. I applied Kiwi Flower all over my eyelid using a flat eyeshadow brush.

2. I used the other side of the brush and applied Tequila Sunrise on the outer half.

3. Using a clean fluffy brush, I blended the orange just slightly above the crease.

4. I applied Sunset right on the crease using a small fluffy brush.

5. Using a clean blending brush, I blended the edge of the orange eyeshadow.

6. I use a small shader brush, I applied UD Blackout eyeshadow on the outer V.

7. I blended the black eyeshadow using a Smashbox Bullet brush.

8. I applied Kiwi Flower on the inner half of the lower lid, and Tequila Sunrise on the outer half using a small shader brush.

9. I also applied UD Blackout on the outer third of the lower lid using a small shader brush.

10. I lined my tightline and waterline using L’oreal Voluminous Smoldering eyeliner.

11. I filled my brows using Shu Uemura brow pencil.
12. I curled my lashes and applied L’oreal Double Extender Curl mascara on both top and bottom lashes.

orange and mint makeup