Etude House CC & BB Creams Review

I’m skipping this week’s installment of Product of the Week, in return, I’m posting this review. As you guys know, I received a CC cream and BB cream from Etude House Indonesia. The CC Cream is their latest product, and it’s the first CC Cream ever launched in Indonesia. You probably already know what BB cream is, right? So what is CC Cream? What’s the big deal?

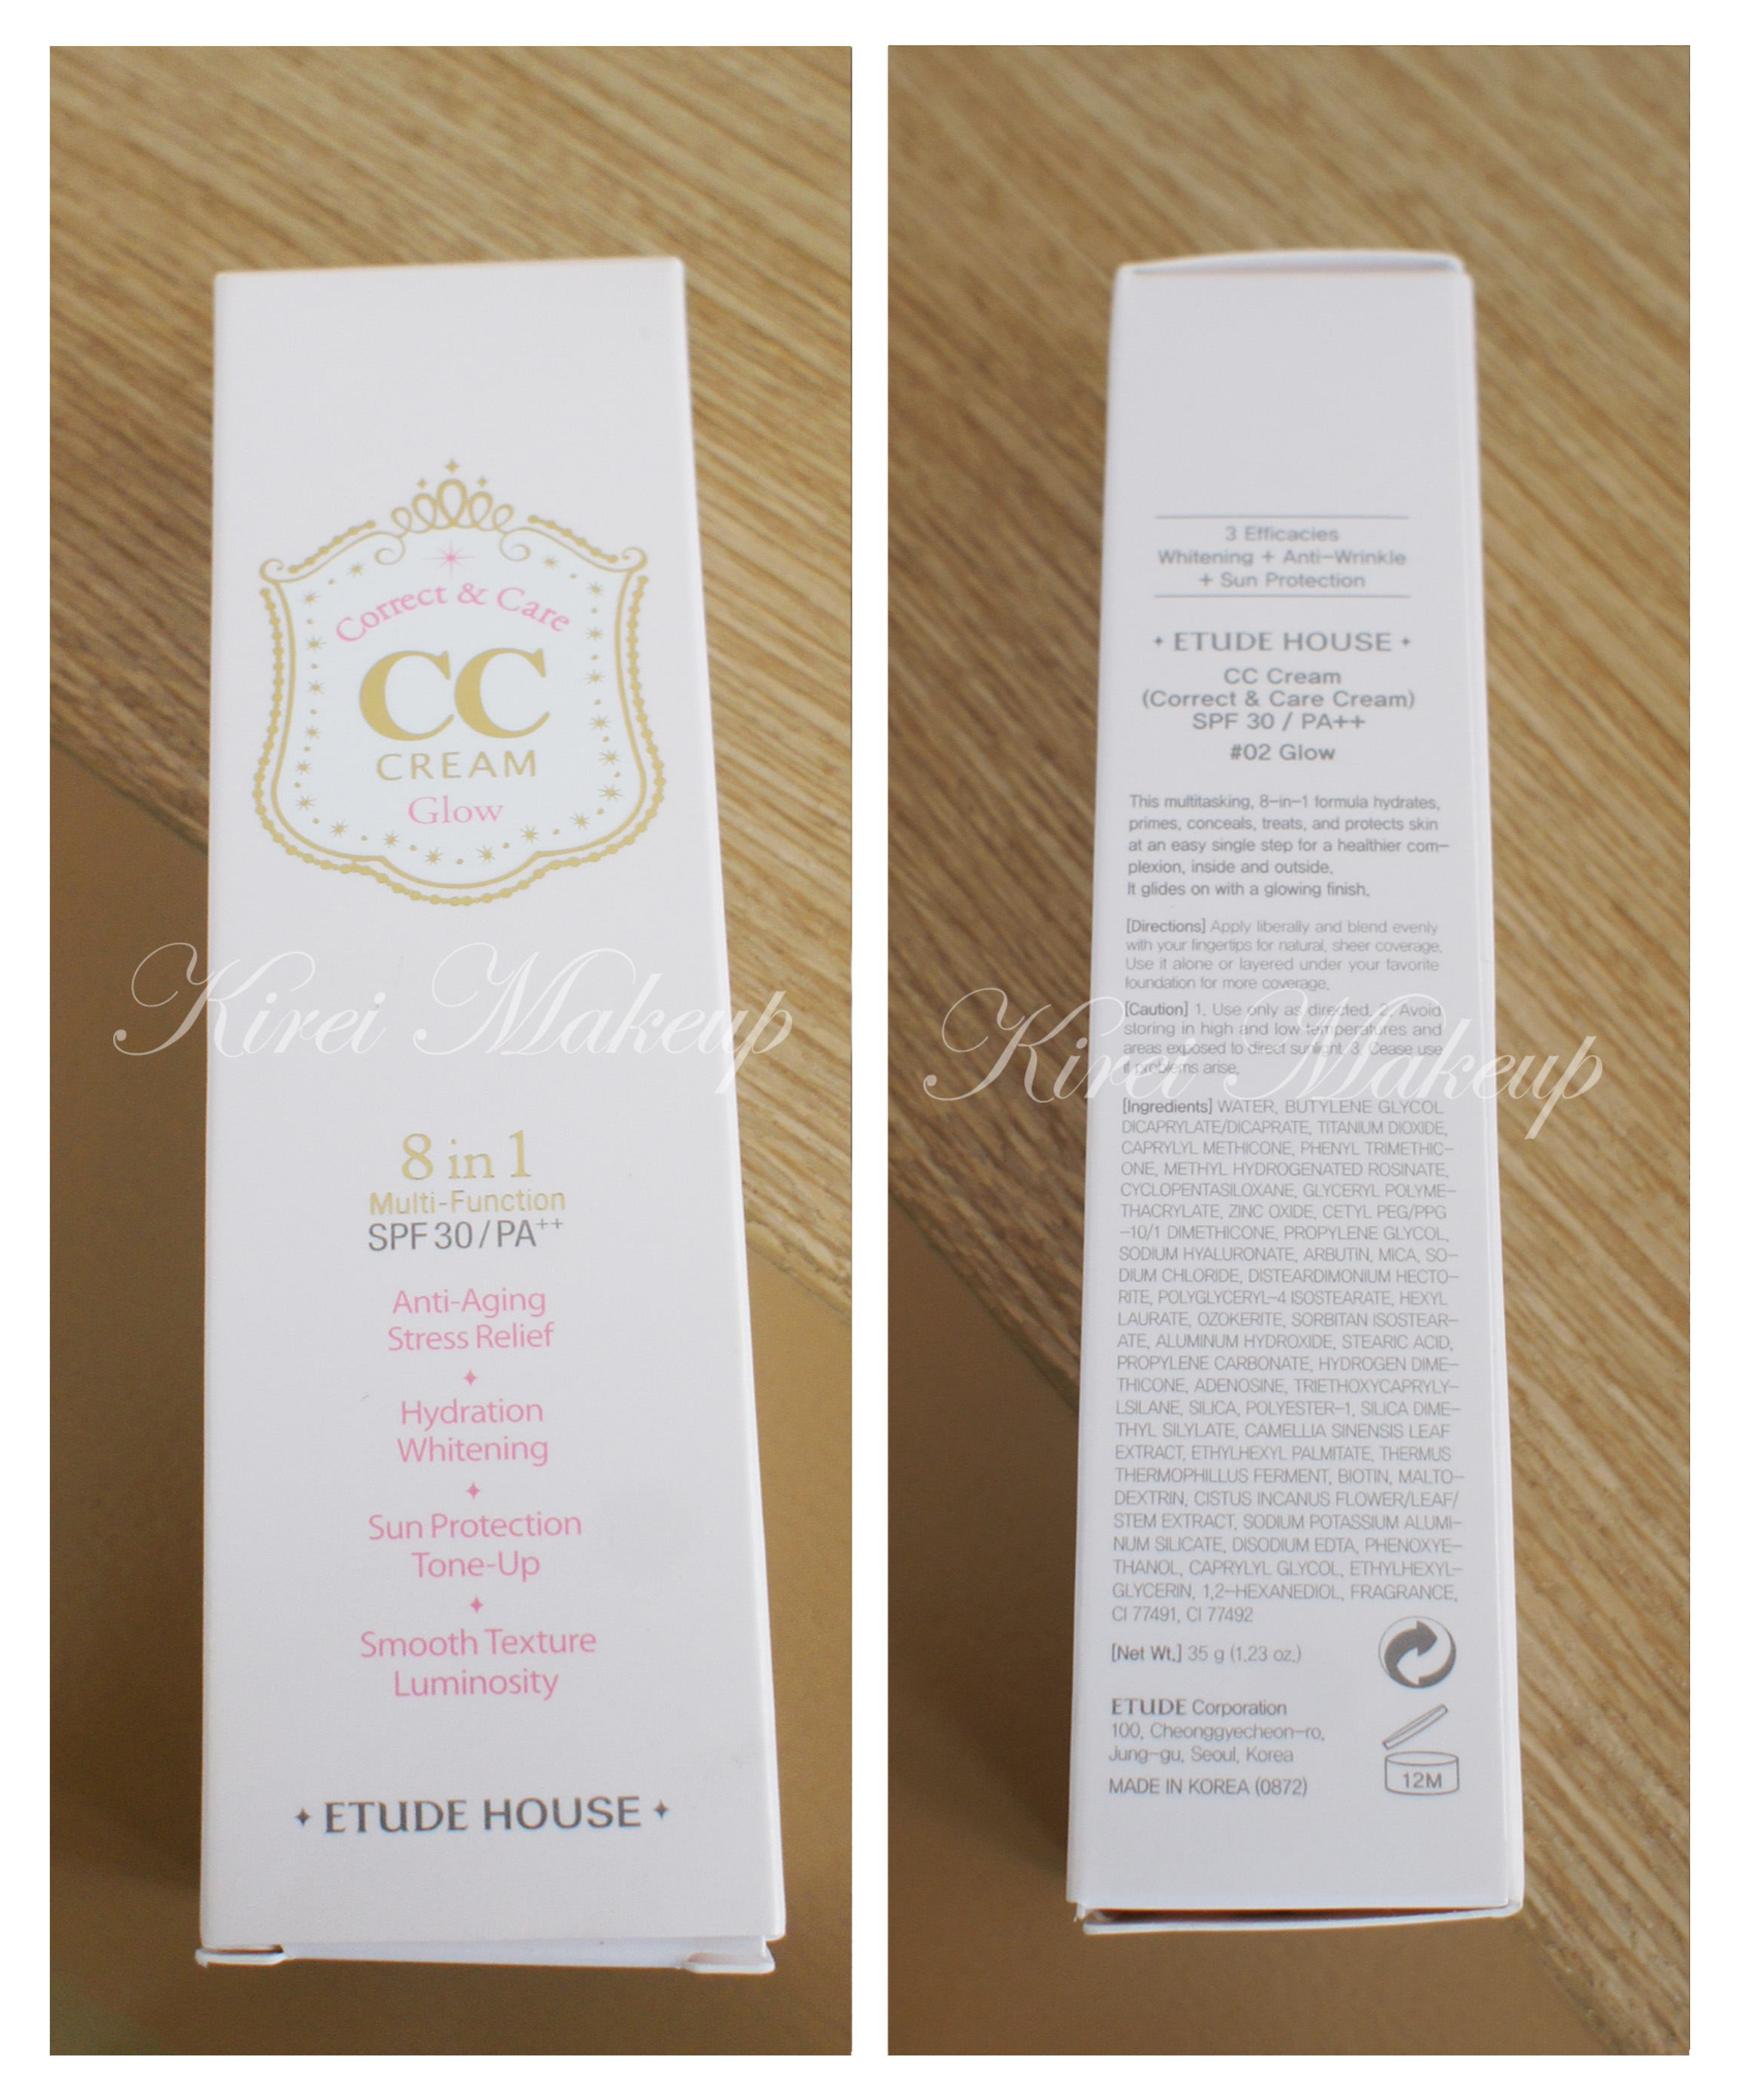
CC Cream is a sister of BB cream. CC (for Etude House) stands for Correct and Care. The main purpose of a CC cream is to color correct the skin. I guess, it’s like a primer for the BB cream. It is colorless and it has SPF. The CC cream from Etude House also provides hydration, it has anti-aging and stress relieving property, it gives the skin luminosity and smooth the texture of the skin.

Korean CC Cream review

Korean CC Cream
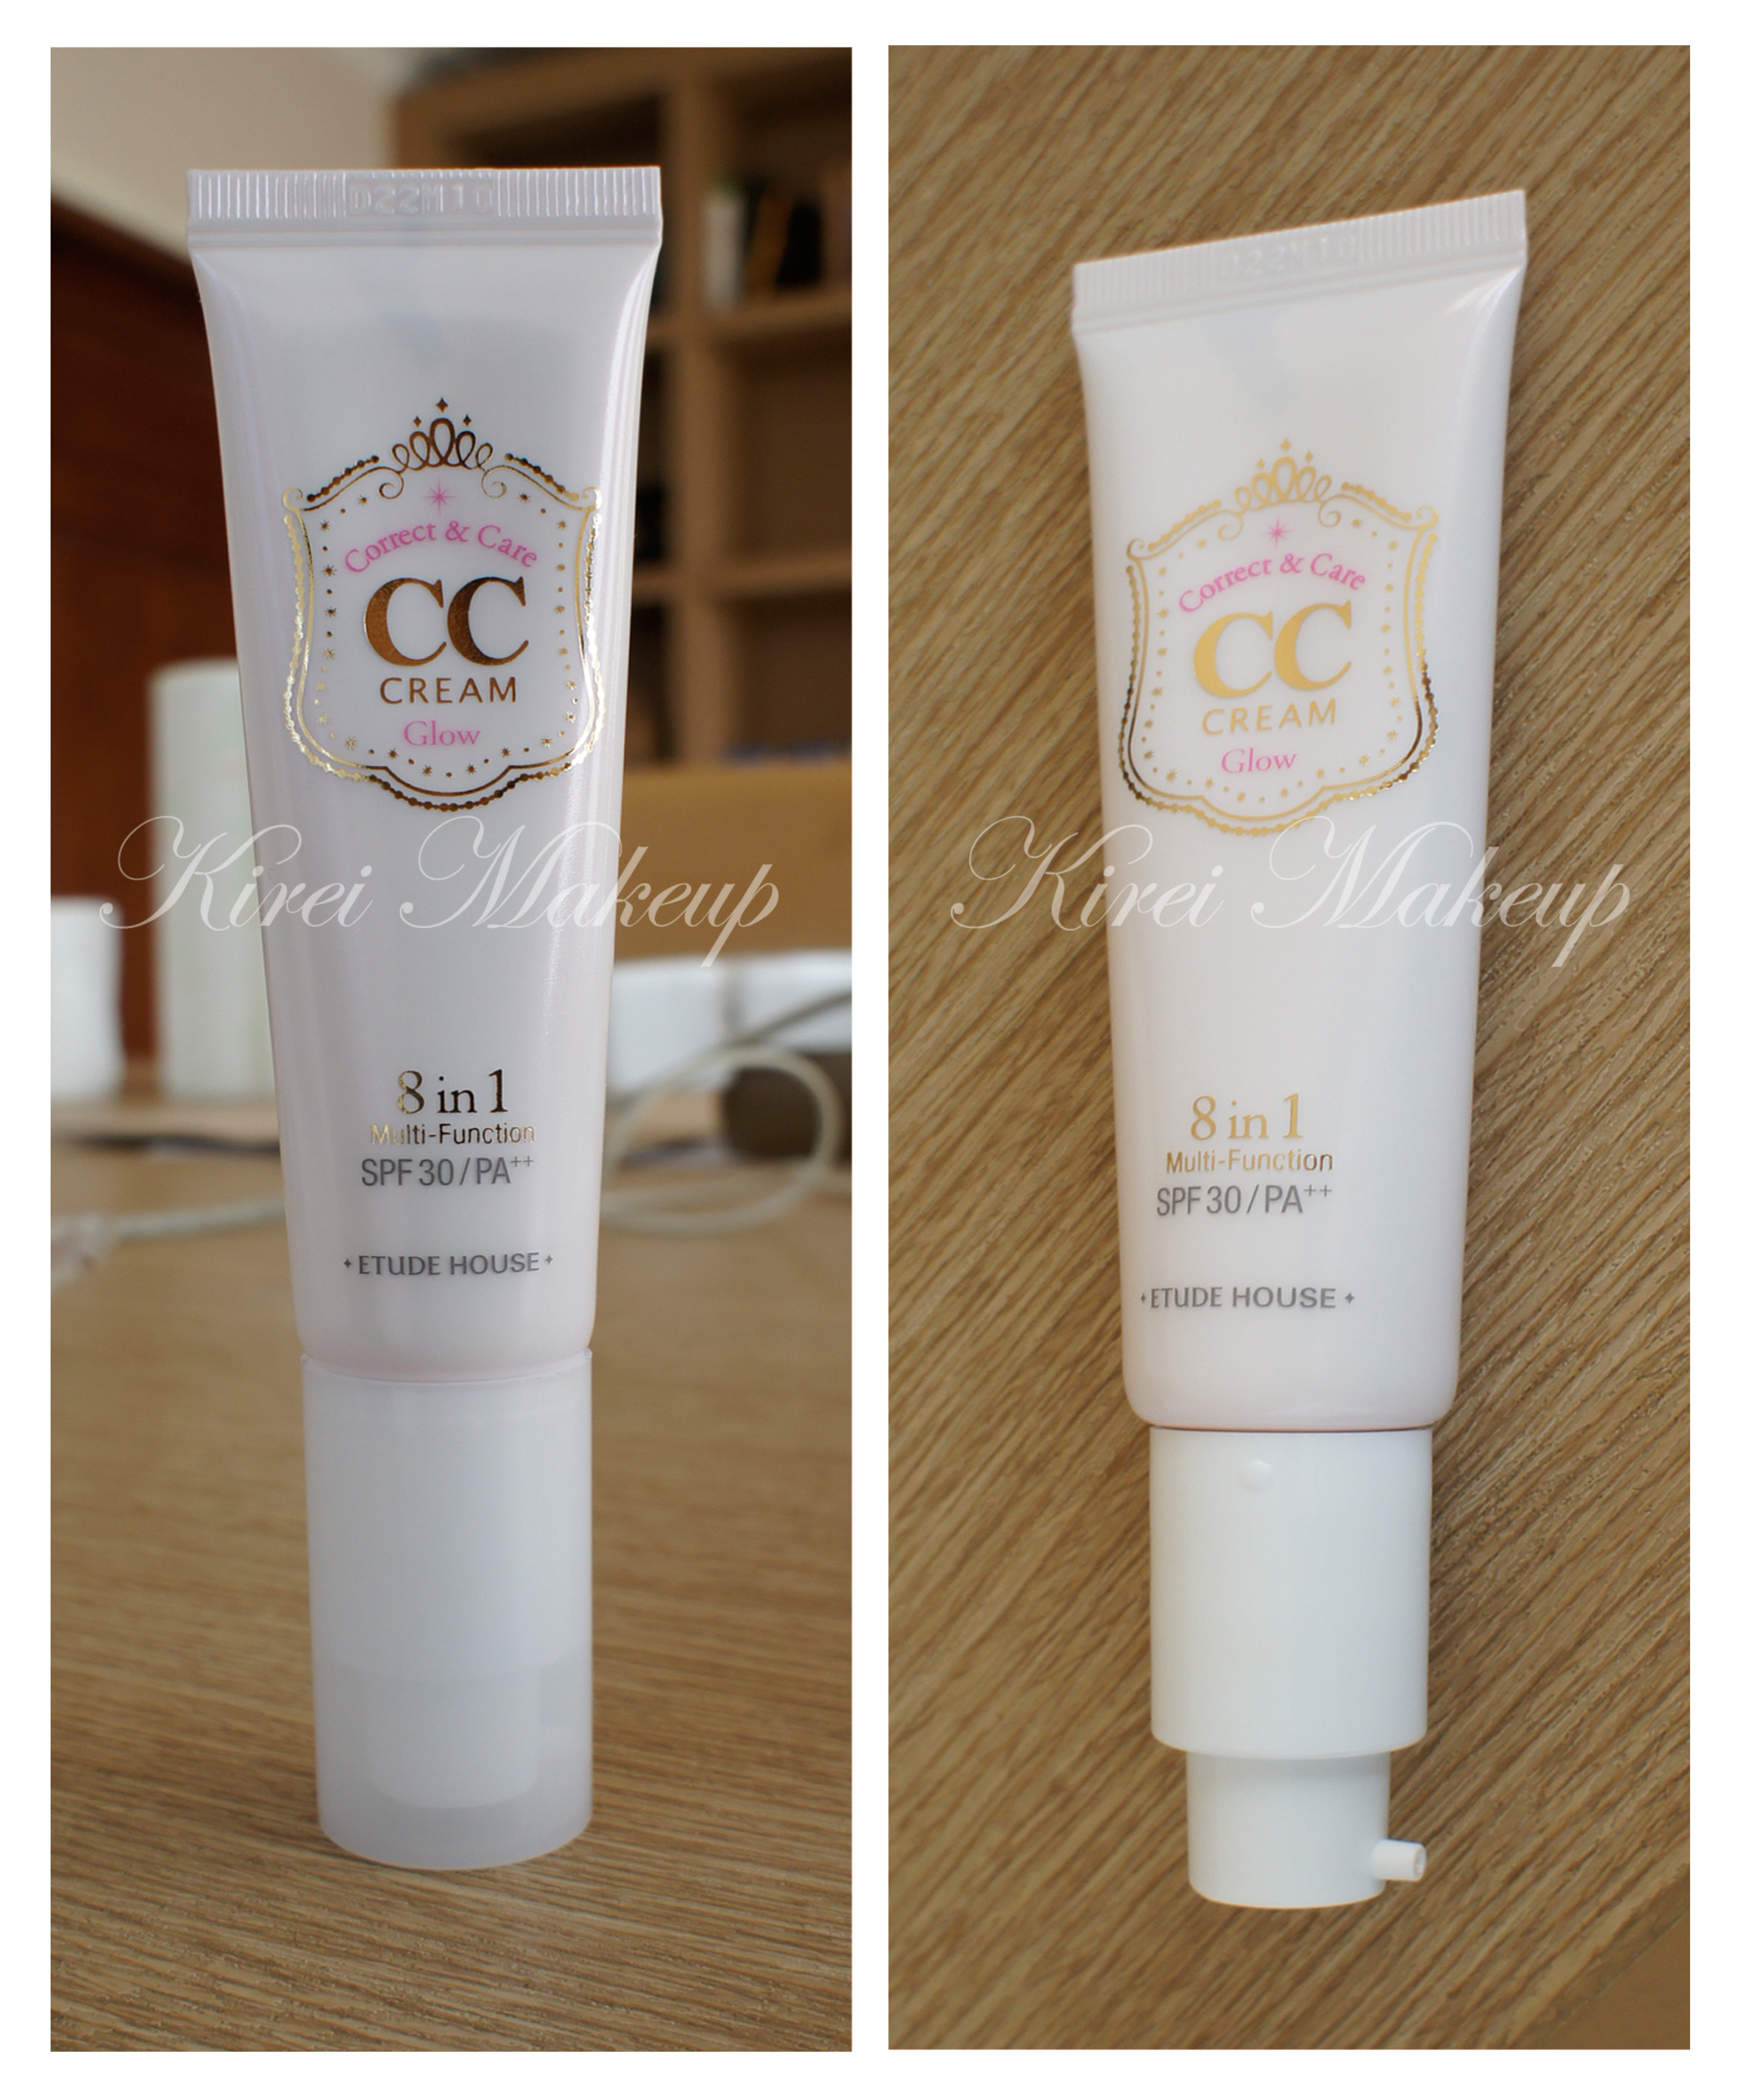
At first look, the packaging is really nice. I actually love this type of packaging. It’s made of a squeeze tube, but instead of squeezing it, there’s a pump for the product to be released. One or two squirts are enough for the whole face. The cream is white with a lot of fine golden particles in it (can’t be seen in picture).

The consistency of this cream is like a sunscreen. Very thick and creamy. It has quite a strong scent to it too. I’m not a fan of anything with strong scent, because that means it has perfume in it. The scent isn’t too bad, it actually smells pretty good, kinda floral-y.

CC Cream review

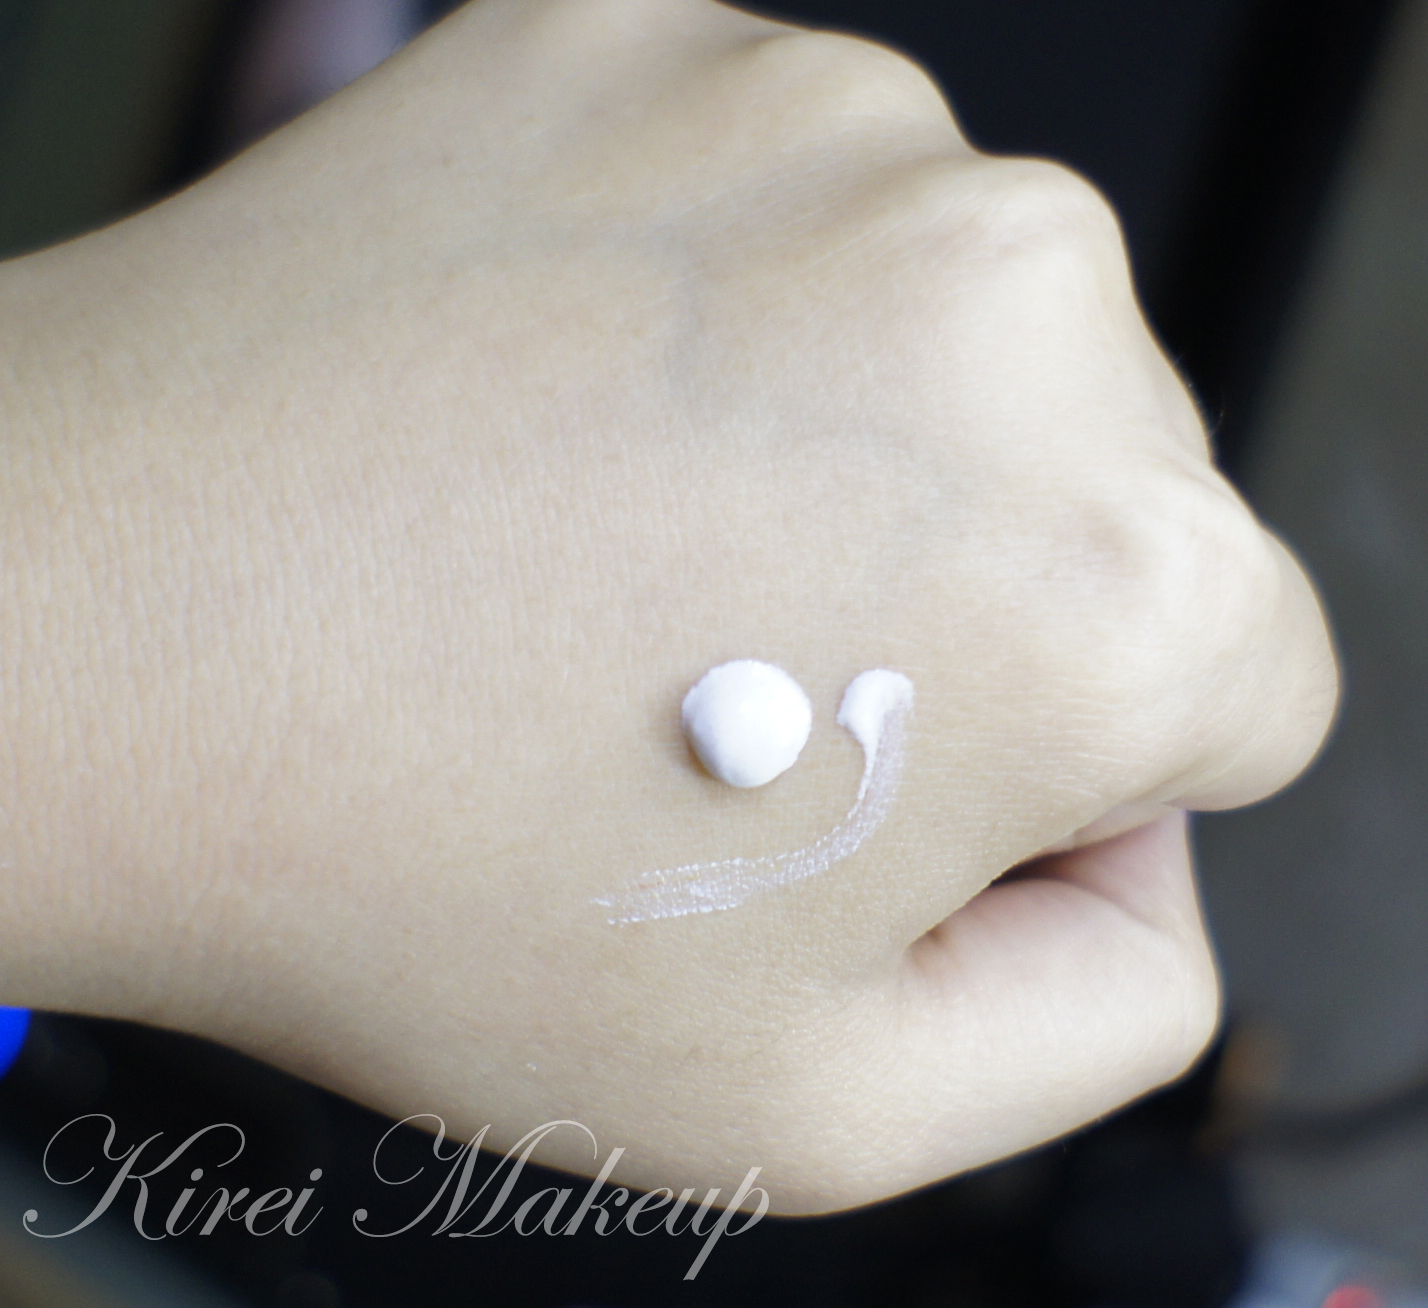
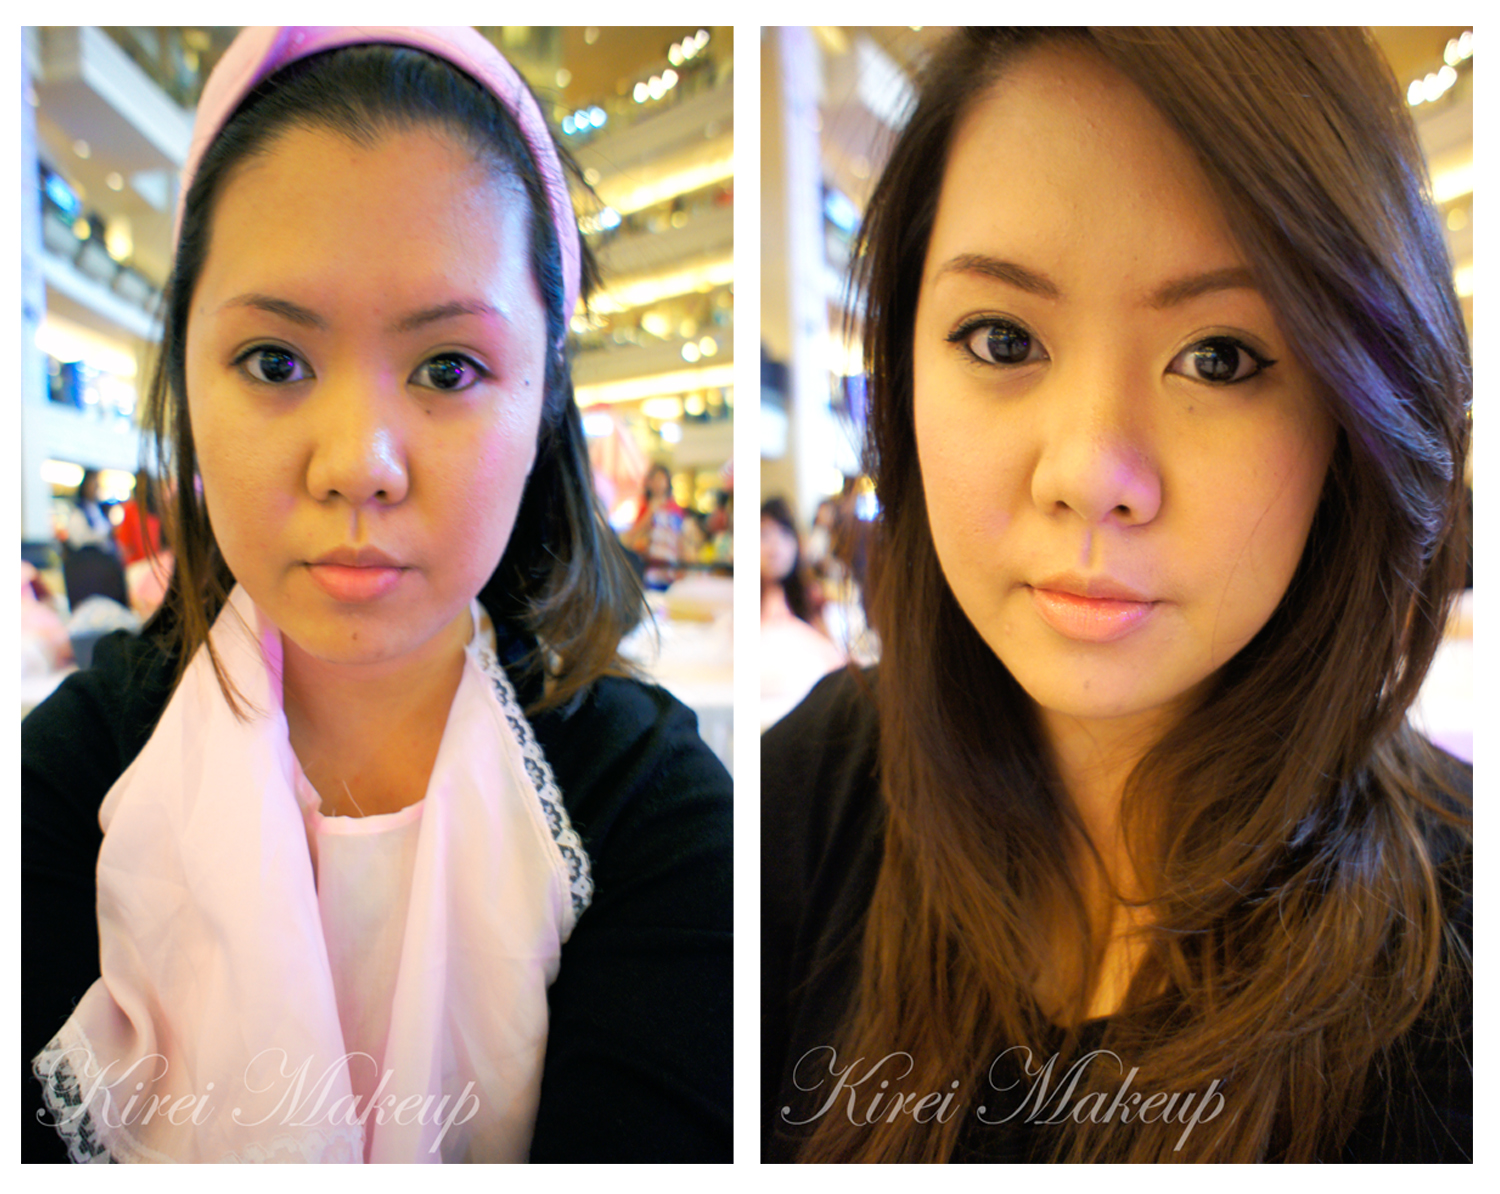
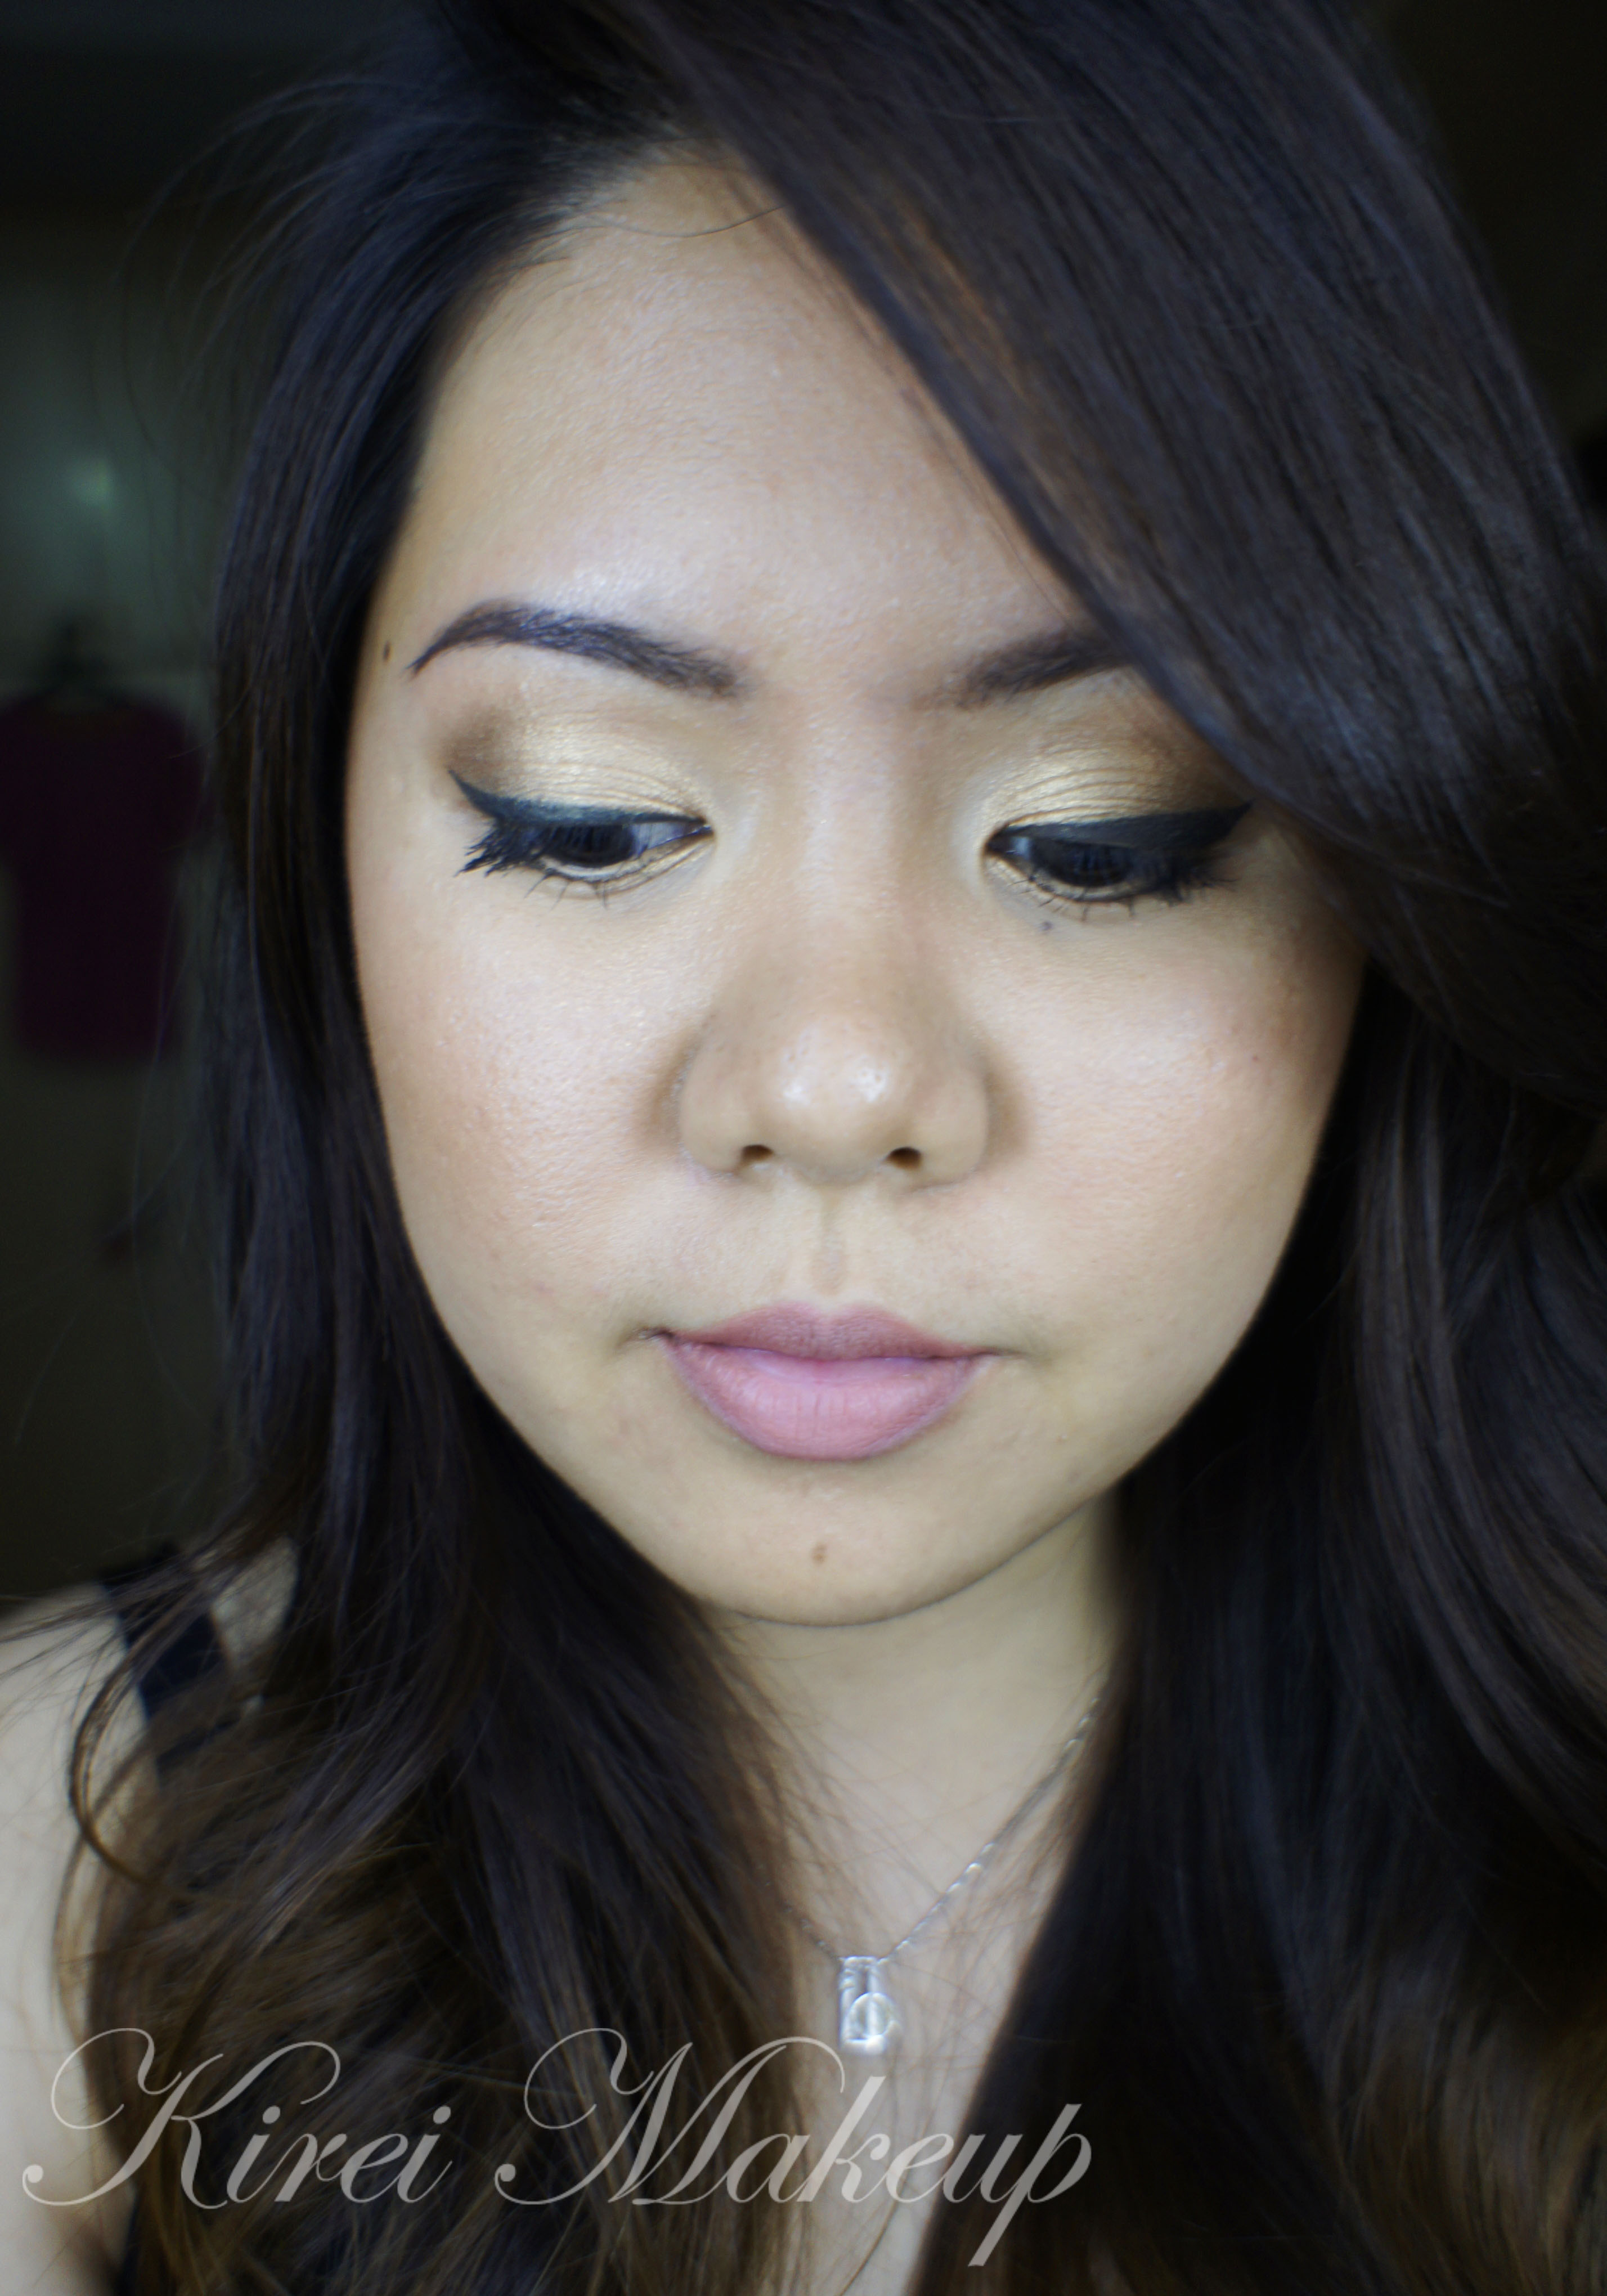
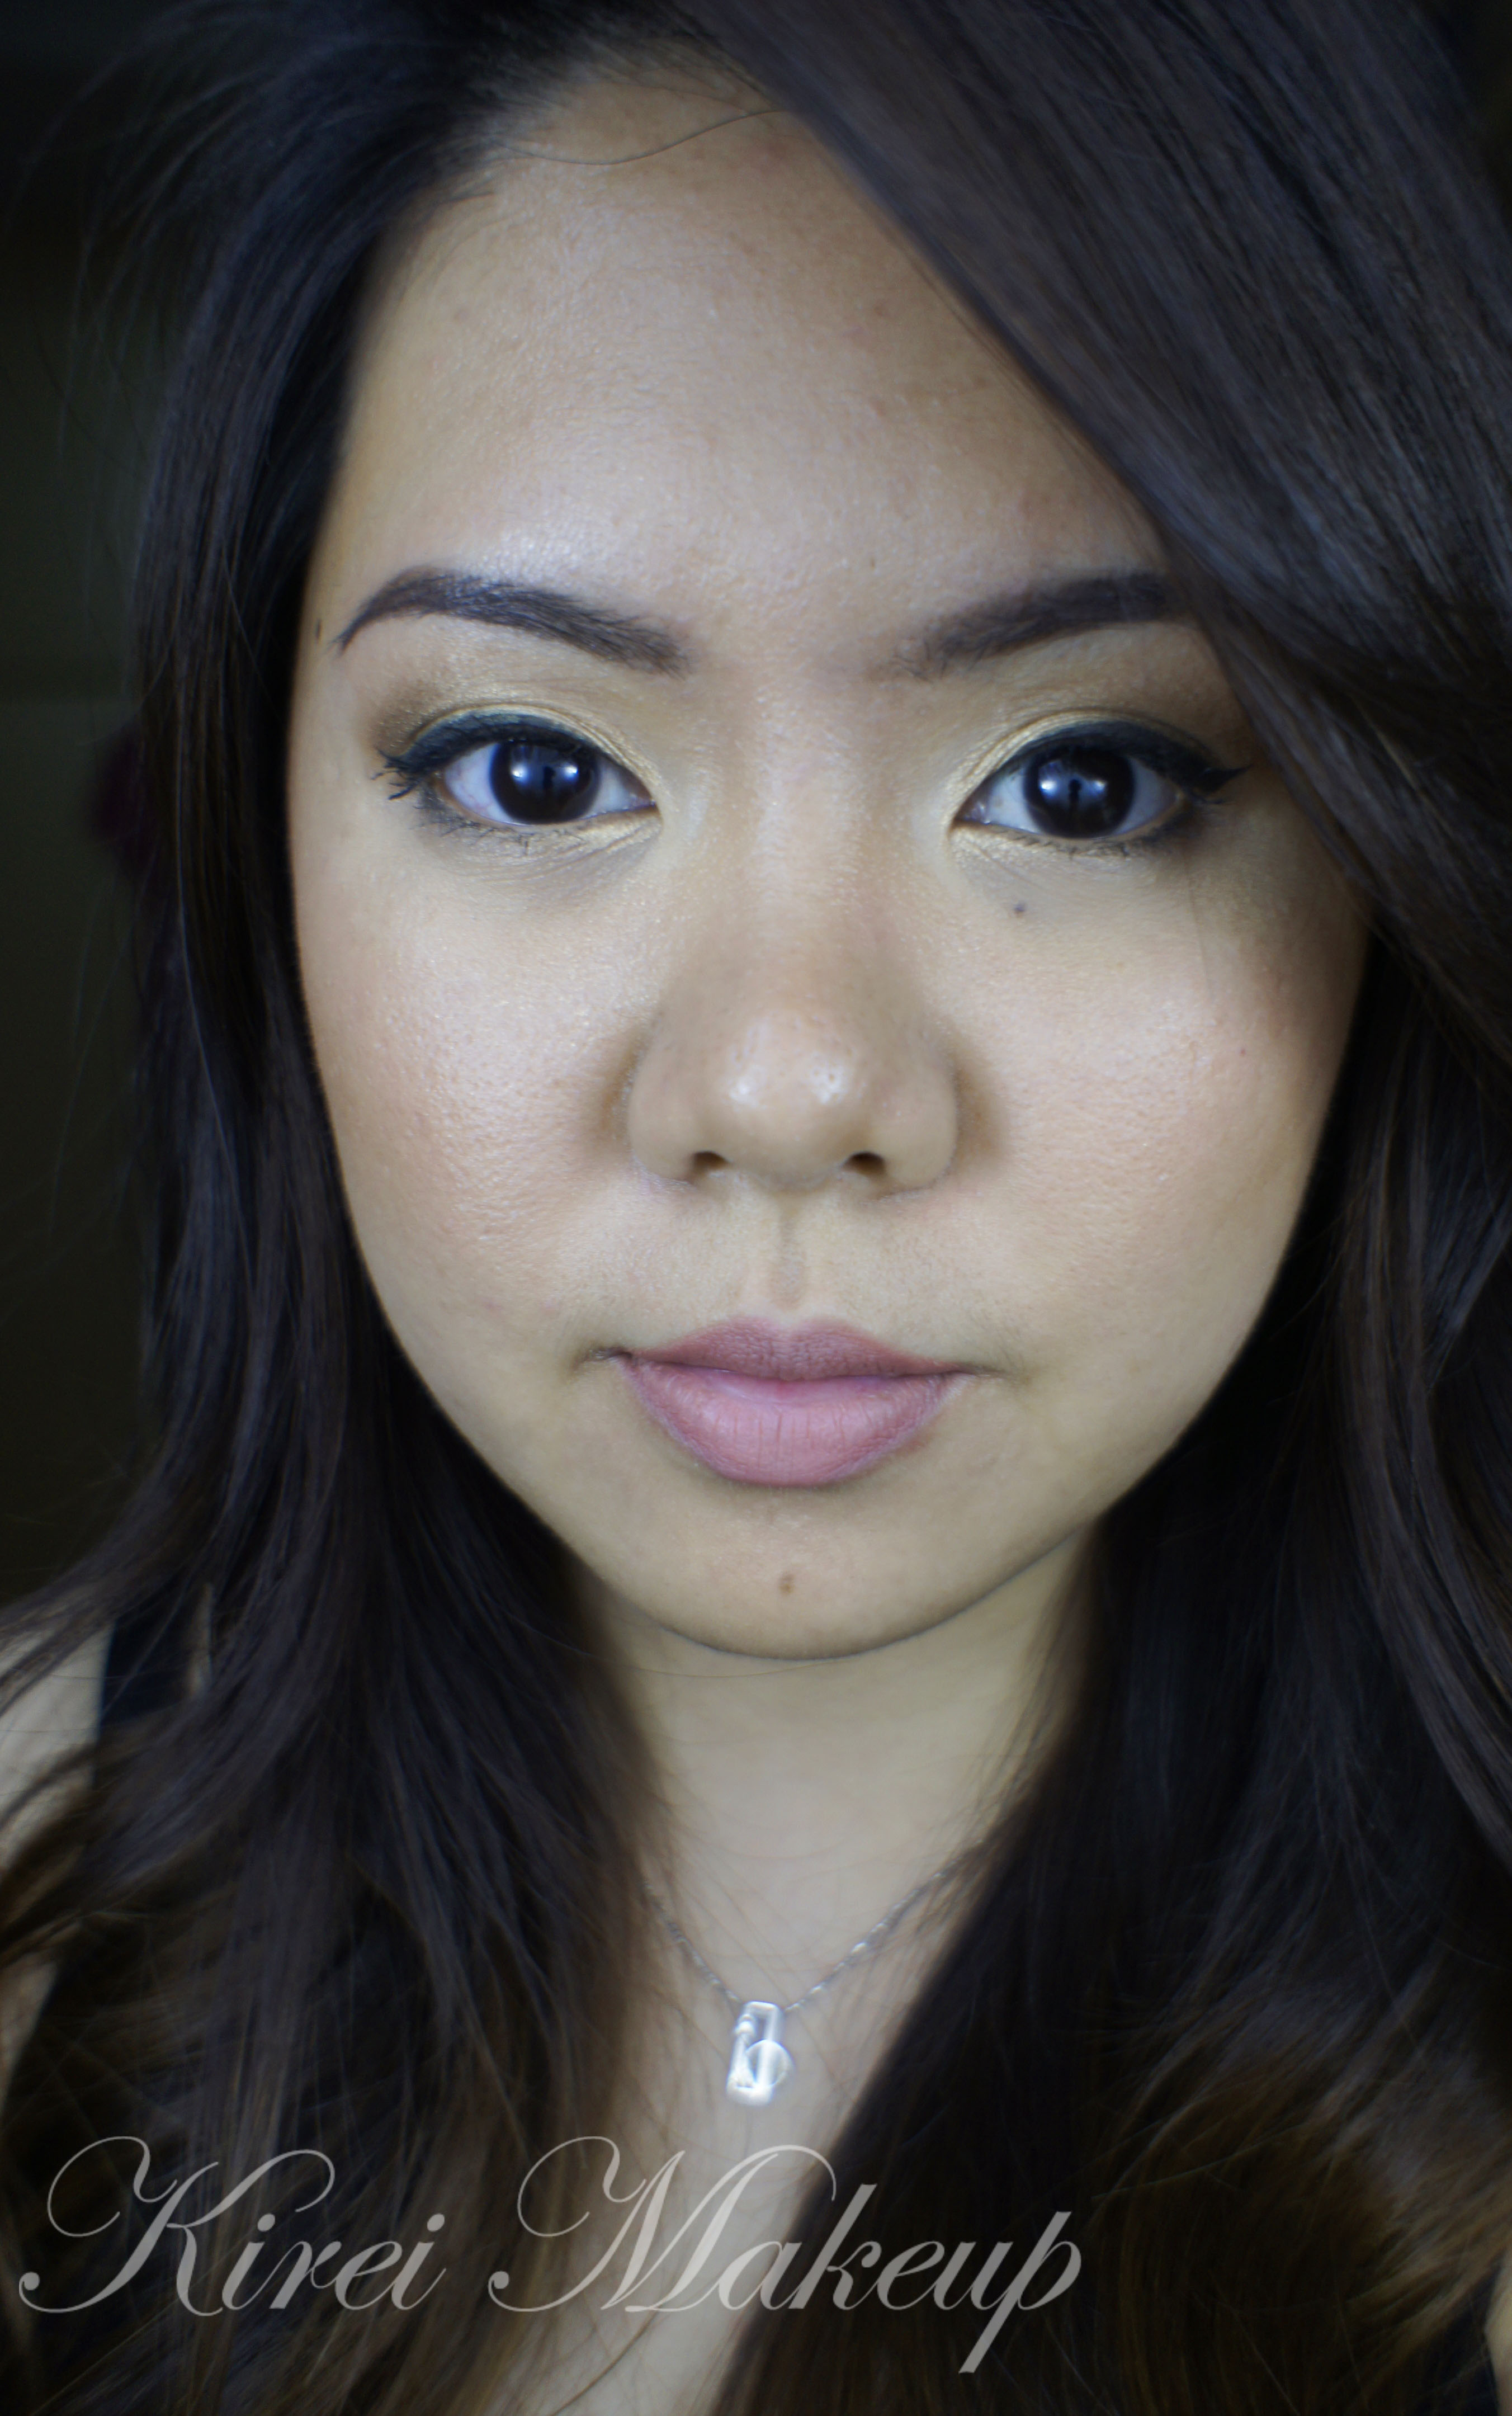
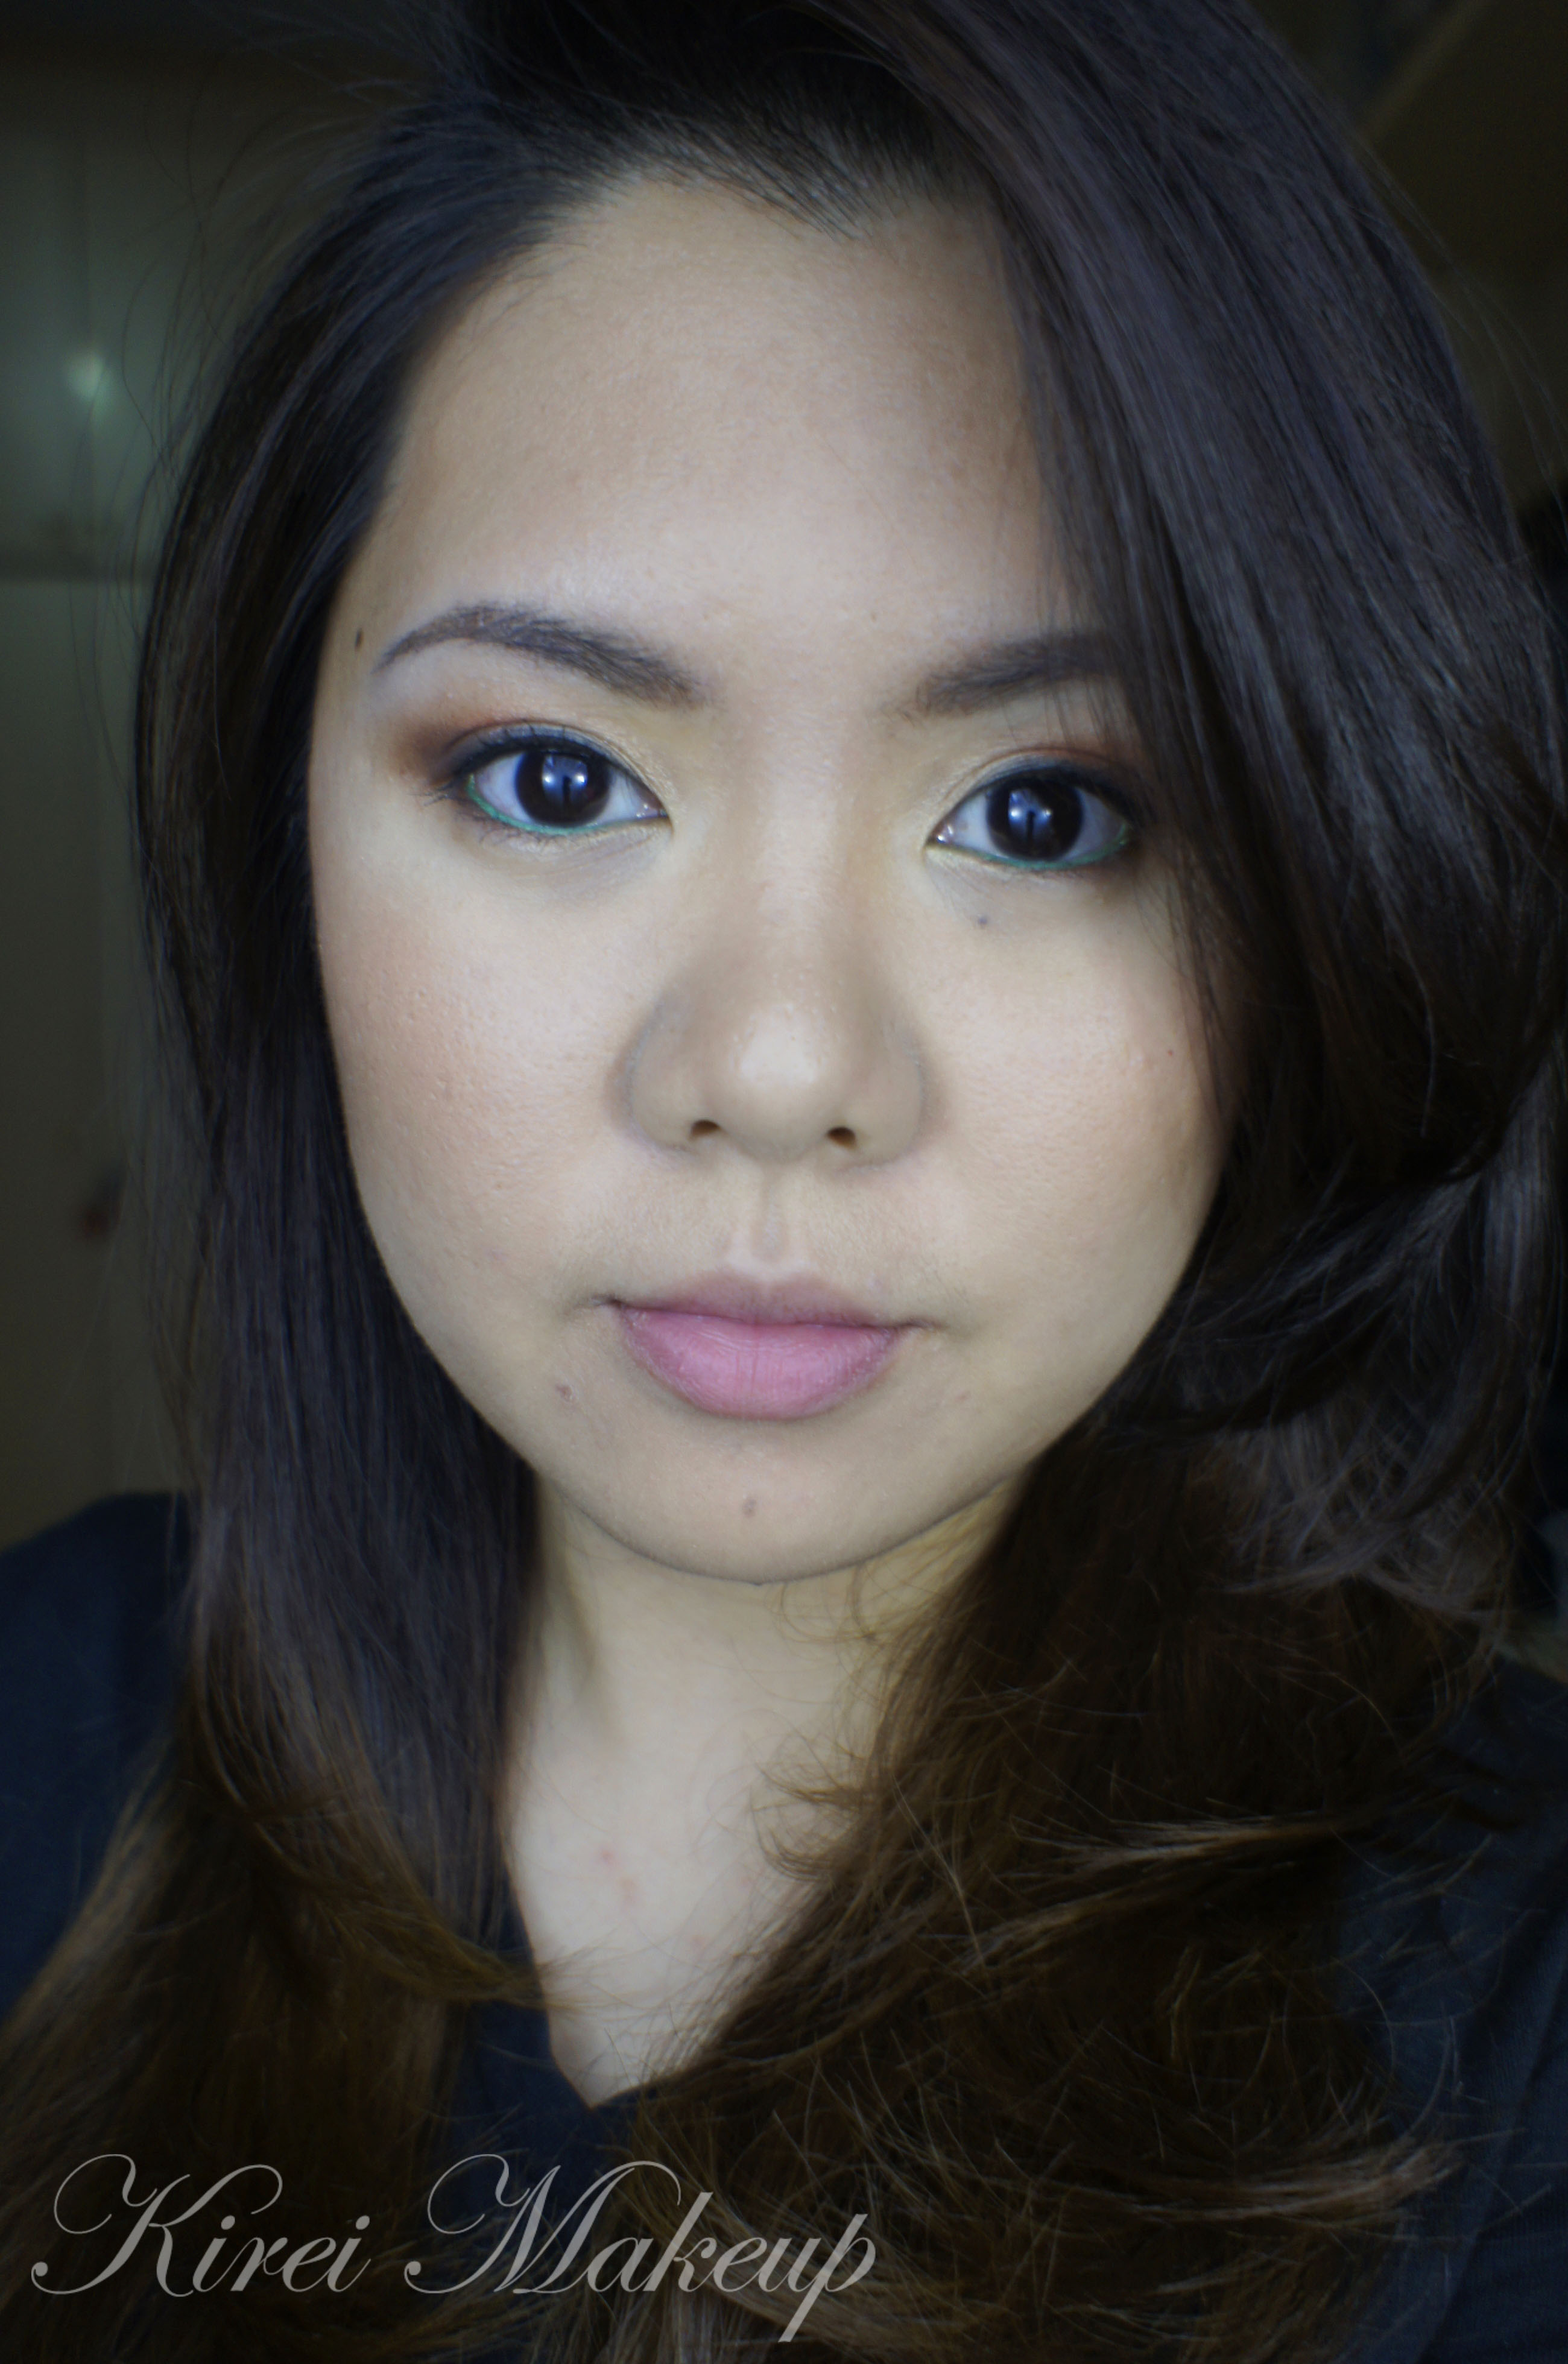
I applied the CC cream on my right side of the face (left on the picture). What do you guys think? I think it causes a slight white cast on my face. Let me also say I’m not a big fan of whitening product. I know a lot of Asians are quite obsessed with skin whitening, but I’m not of one of them.

Let me also mentioned that I feel that this cream seems to make my pores look bigger. On a positive note, it is very moisturizing, and the fact that it has SPF 30 means you can throw this product on your face and go. There’s no need for a separate sunscreen. I don’t like how it doesn’t actually “correct” anything on my face. You can still see the redness, and my skin texture doesn’t seem to have much of a difference.

It doesn’t really have much glow either. I’m not sure about the anti-aging property, but definitely doesn’t feel like it’s firming or tightening the skin either. It’s more like a sunscreen, really.

CC Cream review

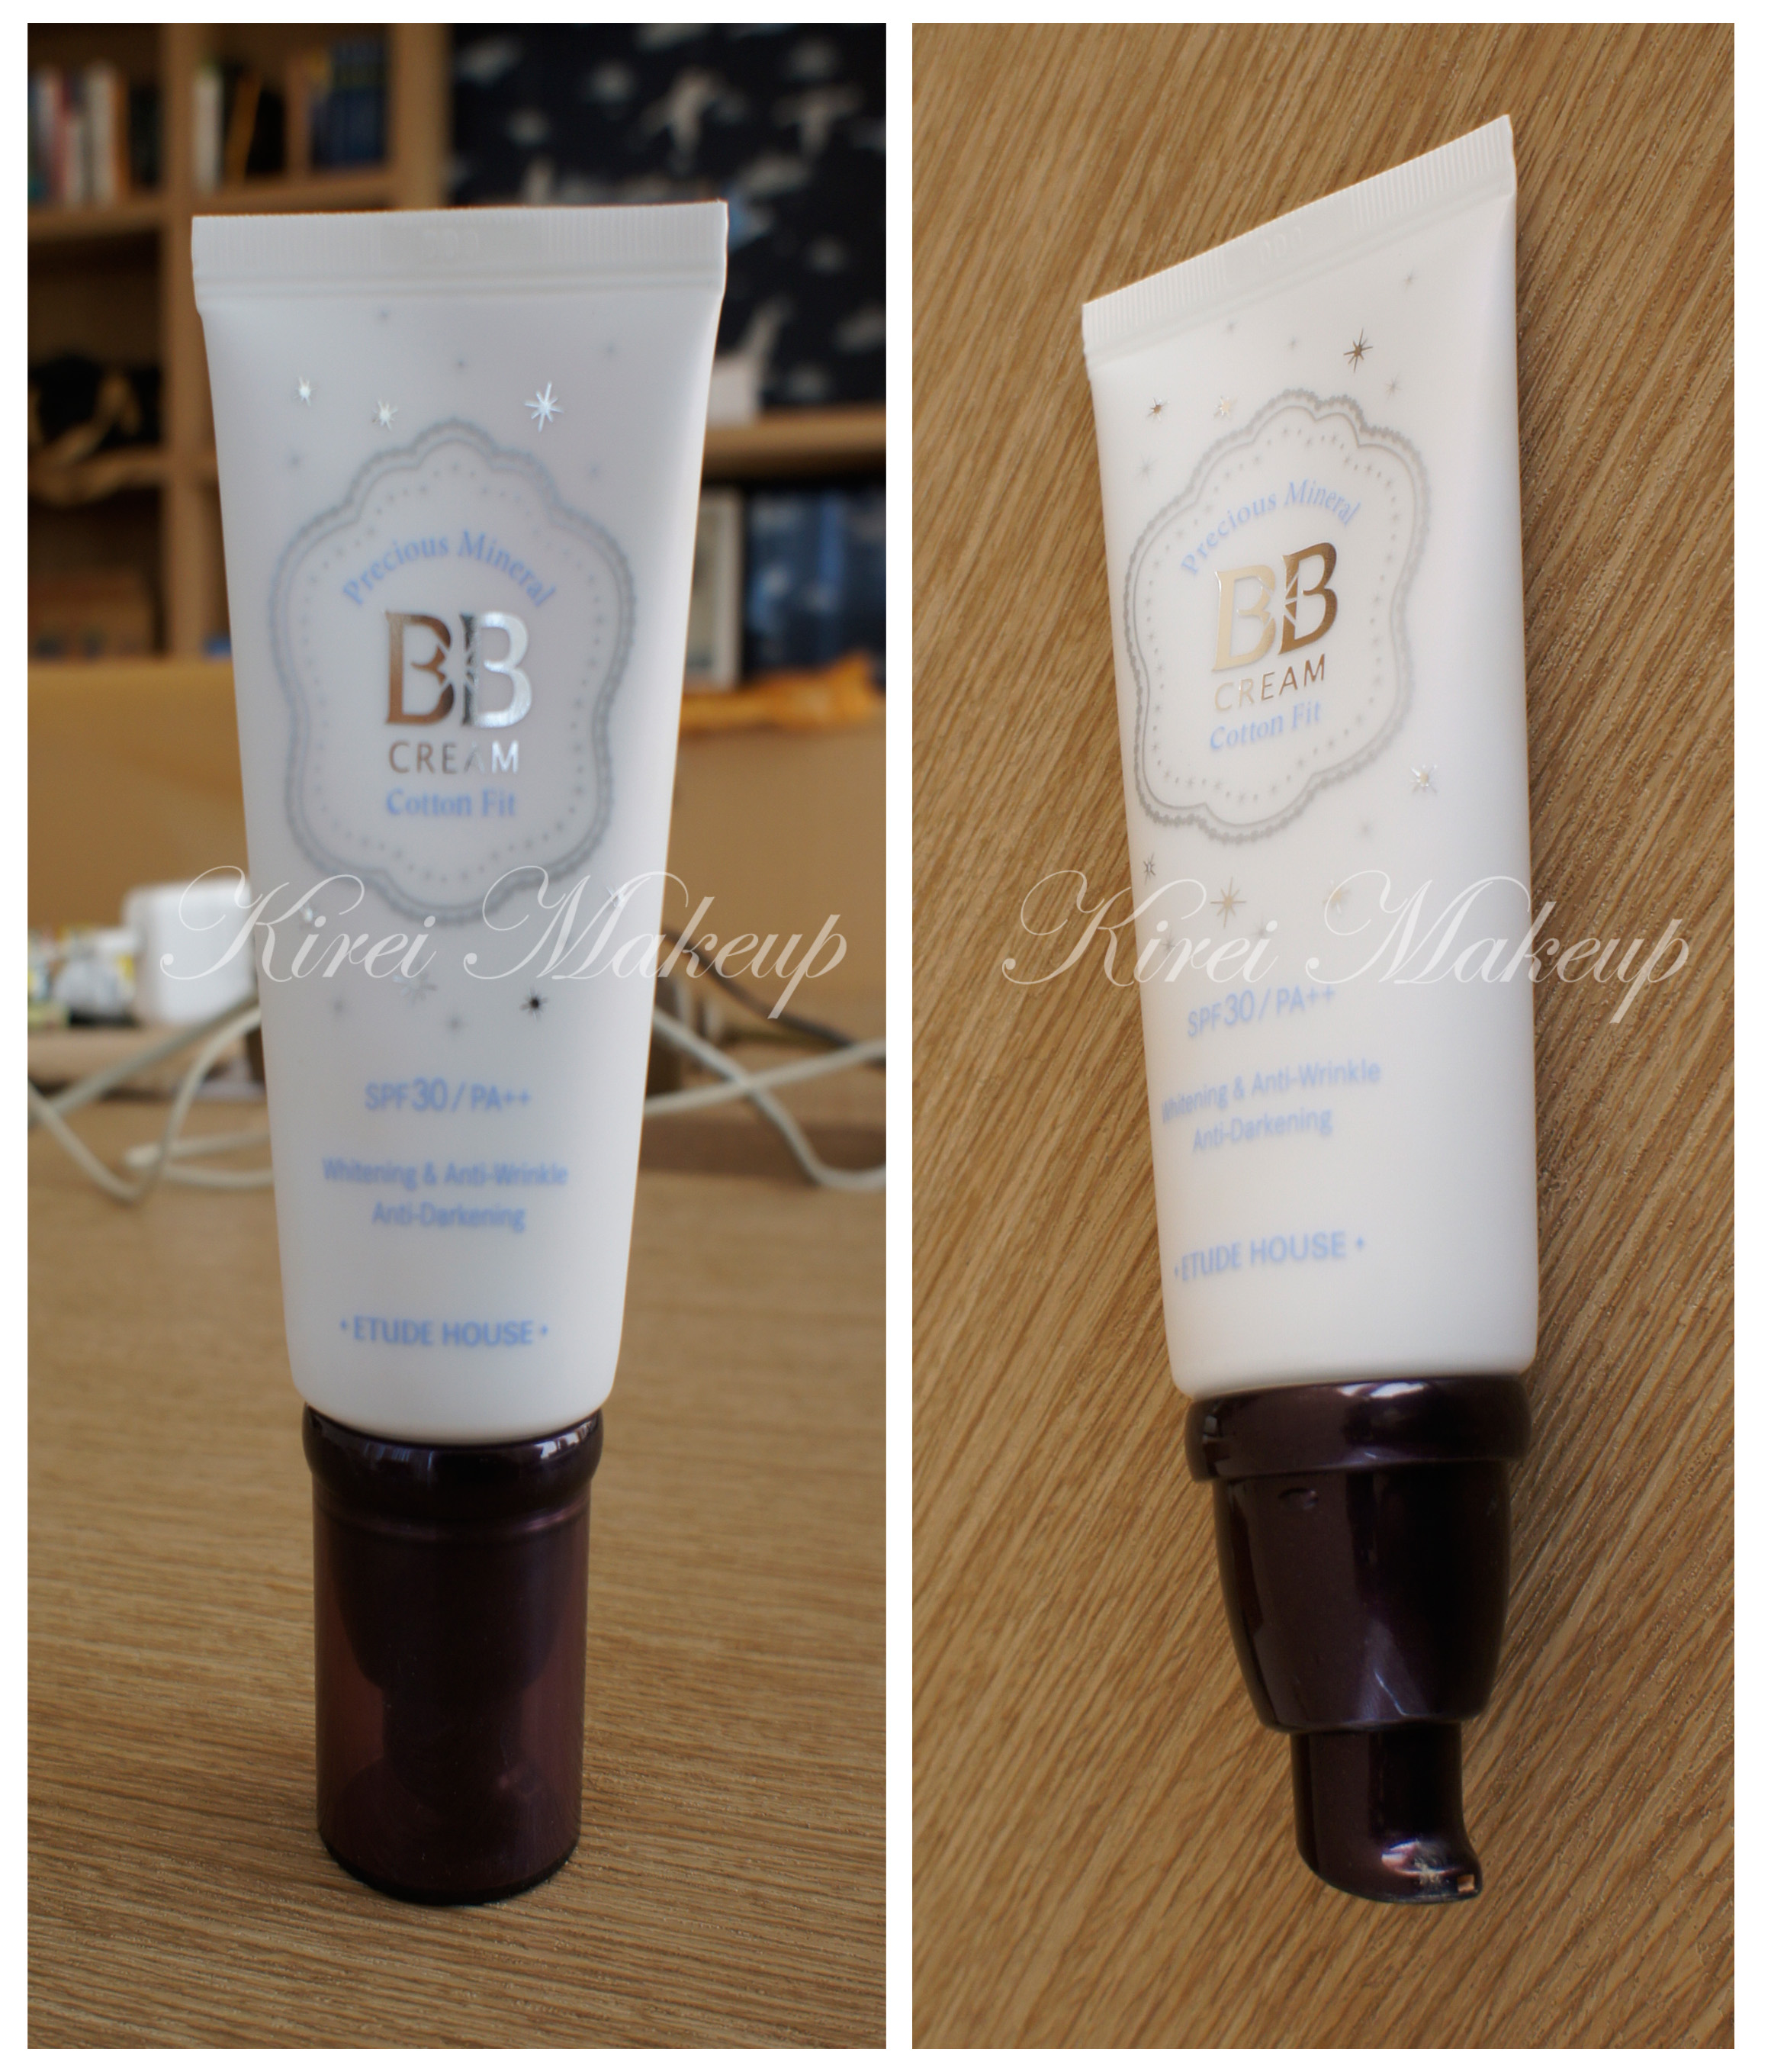
Now, let’s move on to the BB cream. The one that I received is called Precious Mineral BB Cream Cotton Fit. The shade that I received is Honey Beige W24. This one also comes in a squeeze tube, but with a pump! I love the packaging. I mean, it’s genius! I don’t have to worry about the product breaking when traveling, and it’s so convenient with the pump to get the cream out.

The BB cream contains SPF 30, it is also a whitening and anti-wrinkle, as well anti-darkening product. Again, I’m not a big fan of those anti-whitening, anti-darkening stuff. Like I said, there’s an obsession with being fair-skin here in Asia. I guess I wouldn’t mind if it brightens up my face using light-reflecting particle. However, anything that has to do with whitening, I’m quite wary.

Korean BB Cream

Etude House BB Cream

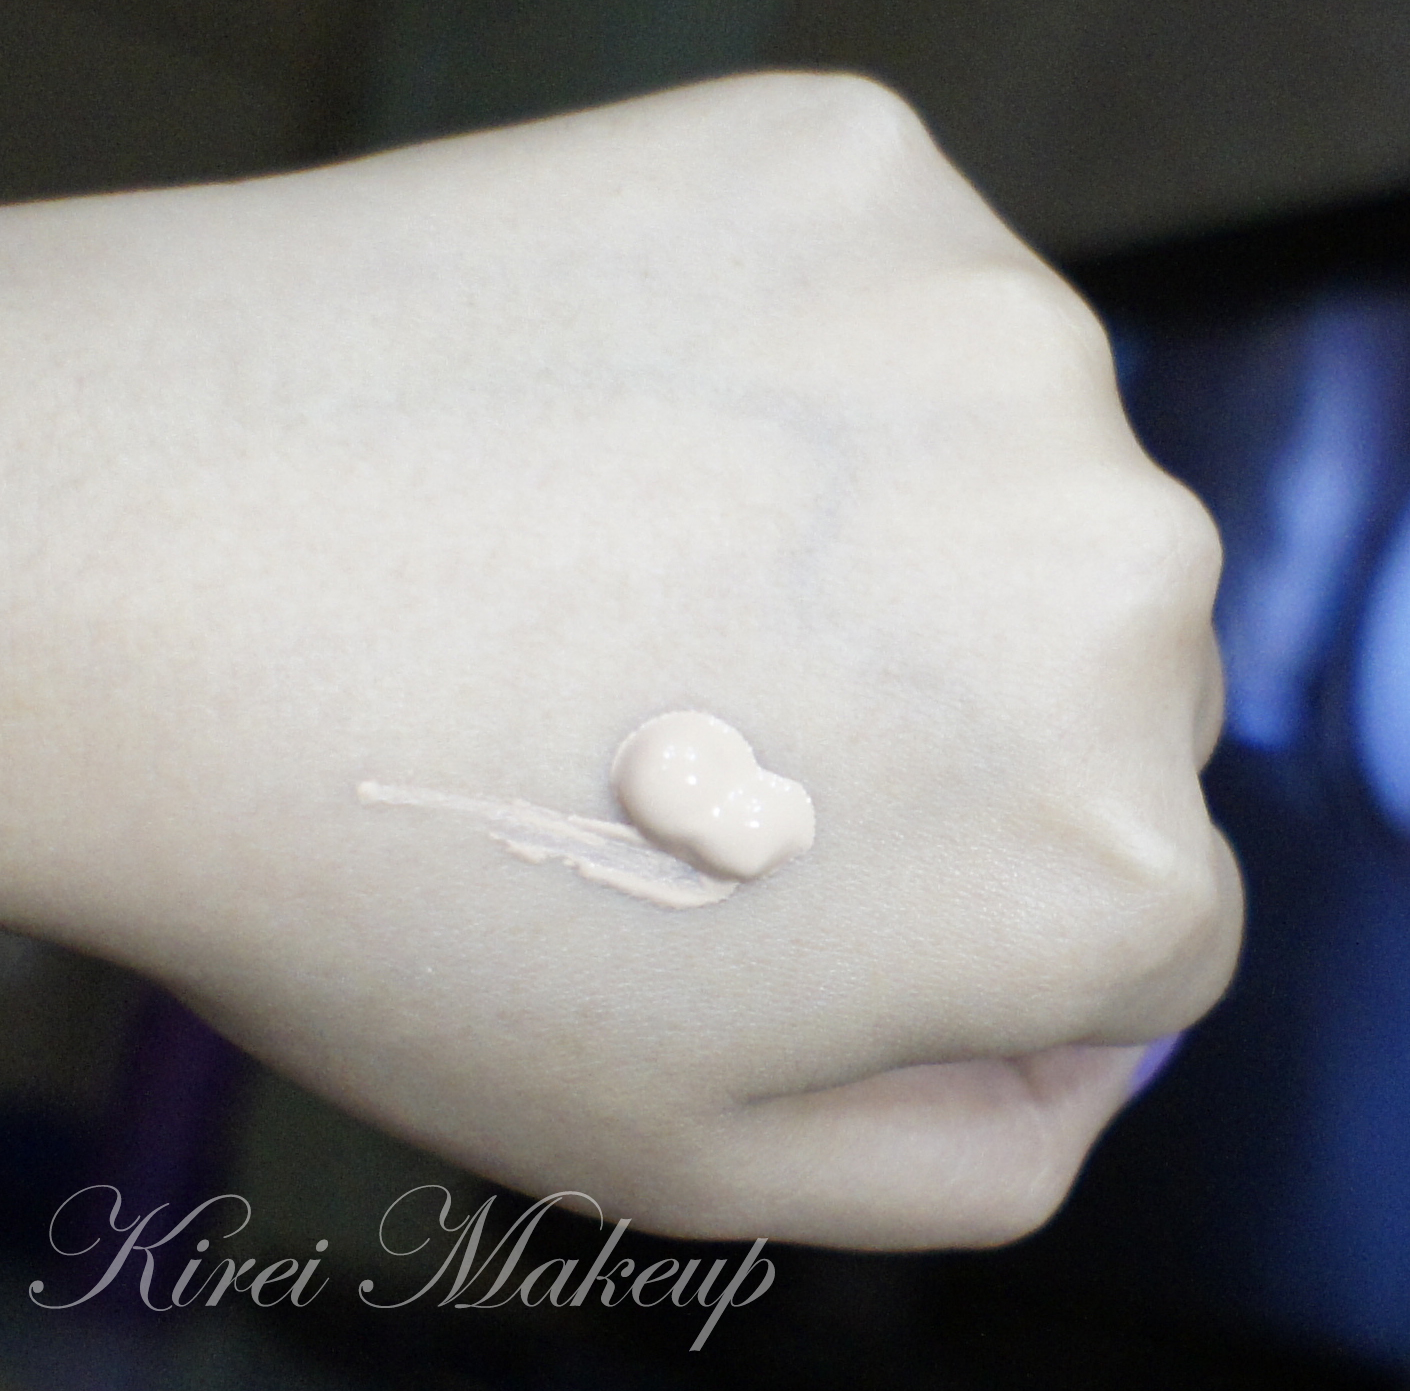
Be very careful when you pump out the product, might squeezed a bit too much (like me..-__-lll)…Anyways, with the amount of product you see on the picture below, I can cover my entire face, neck plus chest. The BB cream is very thick, which is quite unusual since most of the BB creams that I’ve used are pretty runny and light.

It has a fragrance similar to baby-powder, which I don’t really mind. The BB cream has a somewhat yellow undertone, but it does have a slight pink to it as well. I thought it was quite a good match for my skin (yes…i thought..continue reading to find out why). I believe this BB cream comes in 3 colors, Honey Beige being the darkest. So, if you are darker than me (I’m NC27-30), you might not be able to get a match. Just FYI, I didn’t get to pick the shade, it was picked for me by Etude House.

Etude House BB Cream

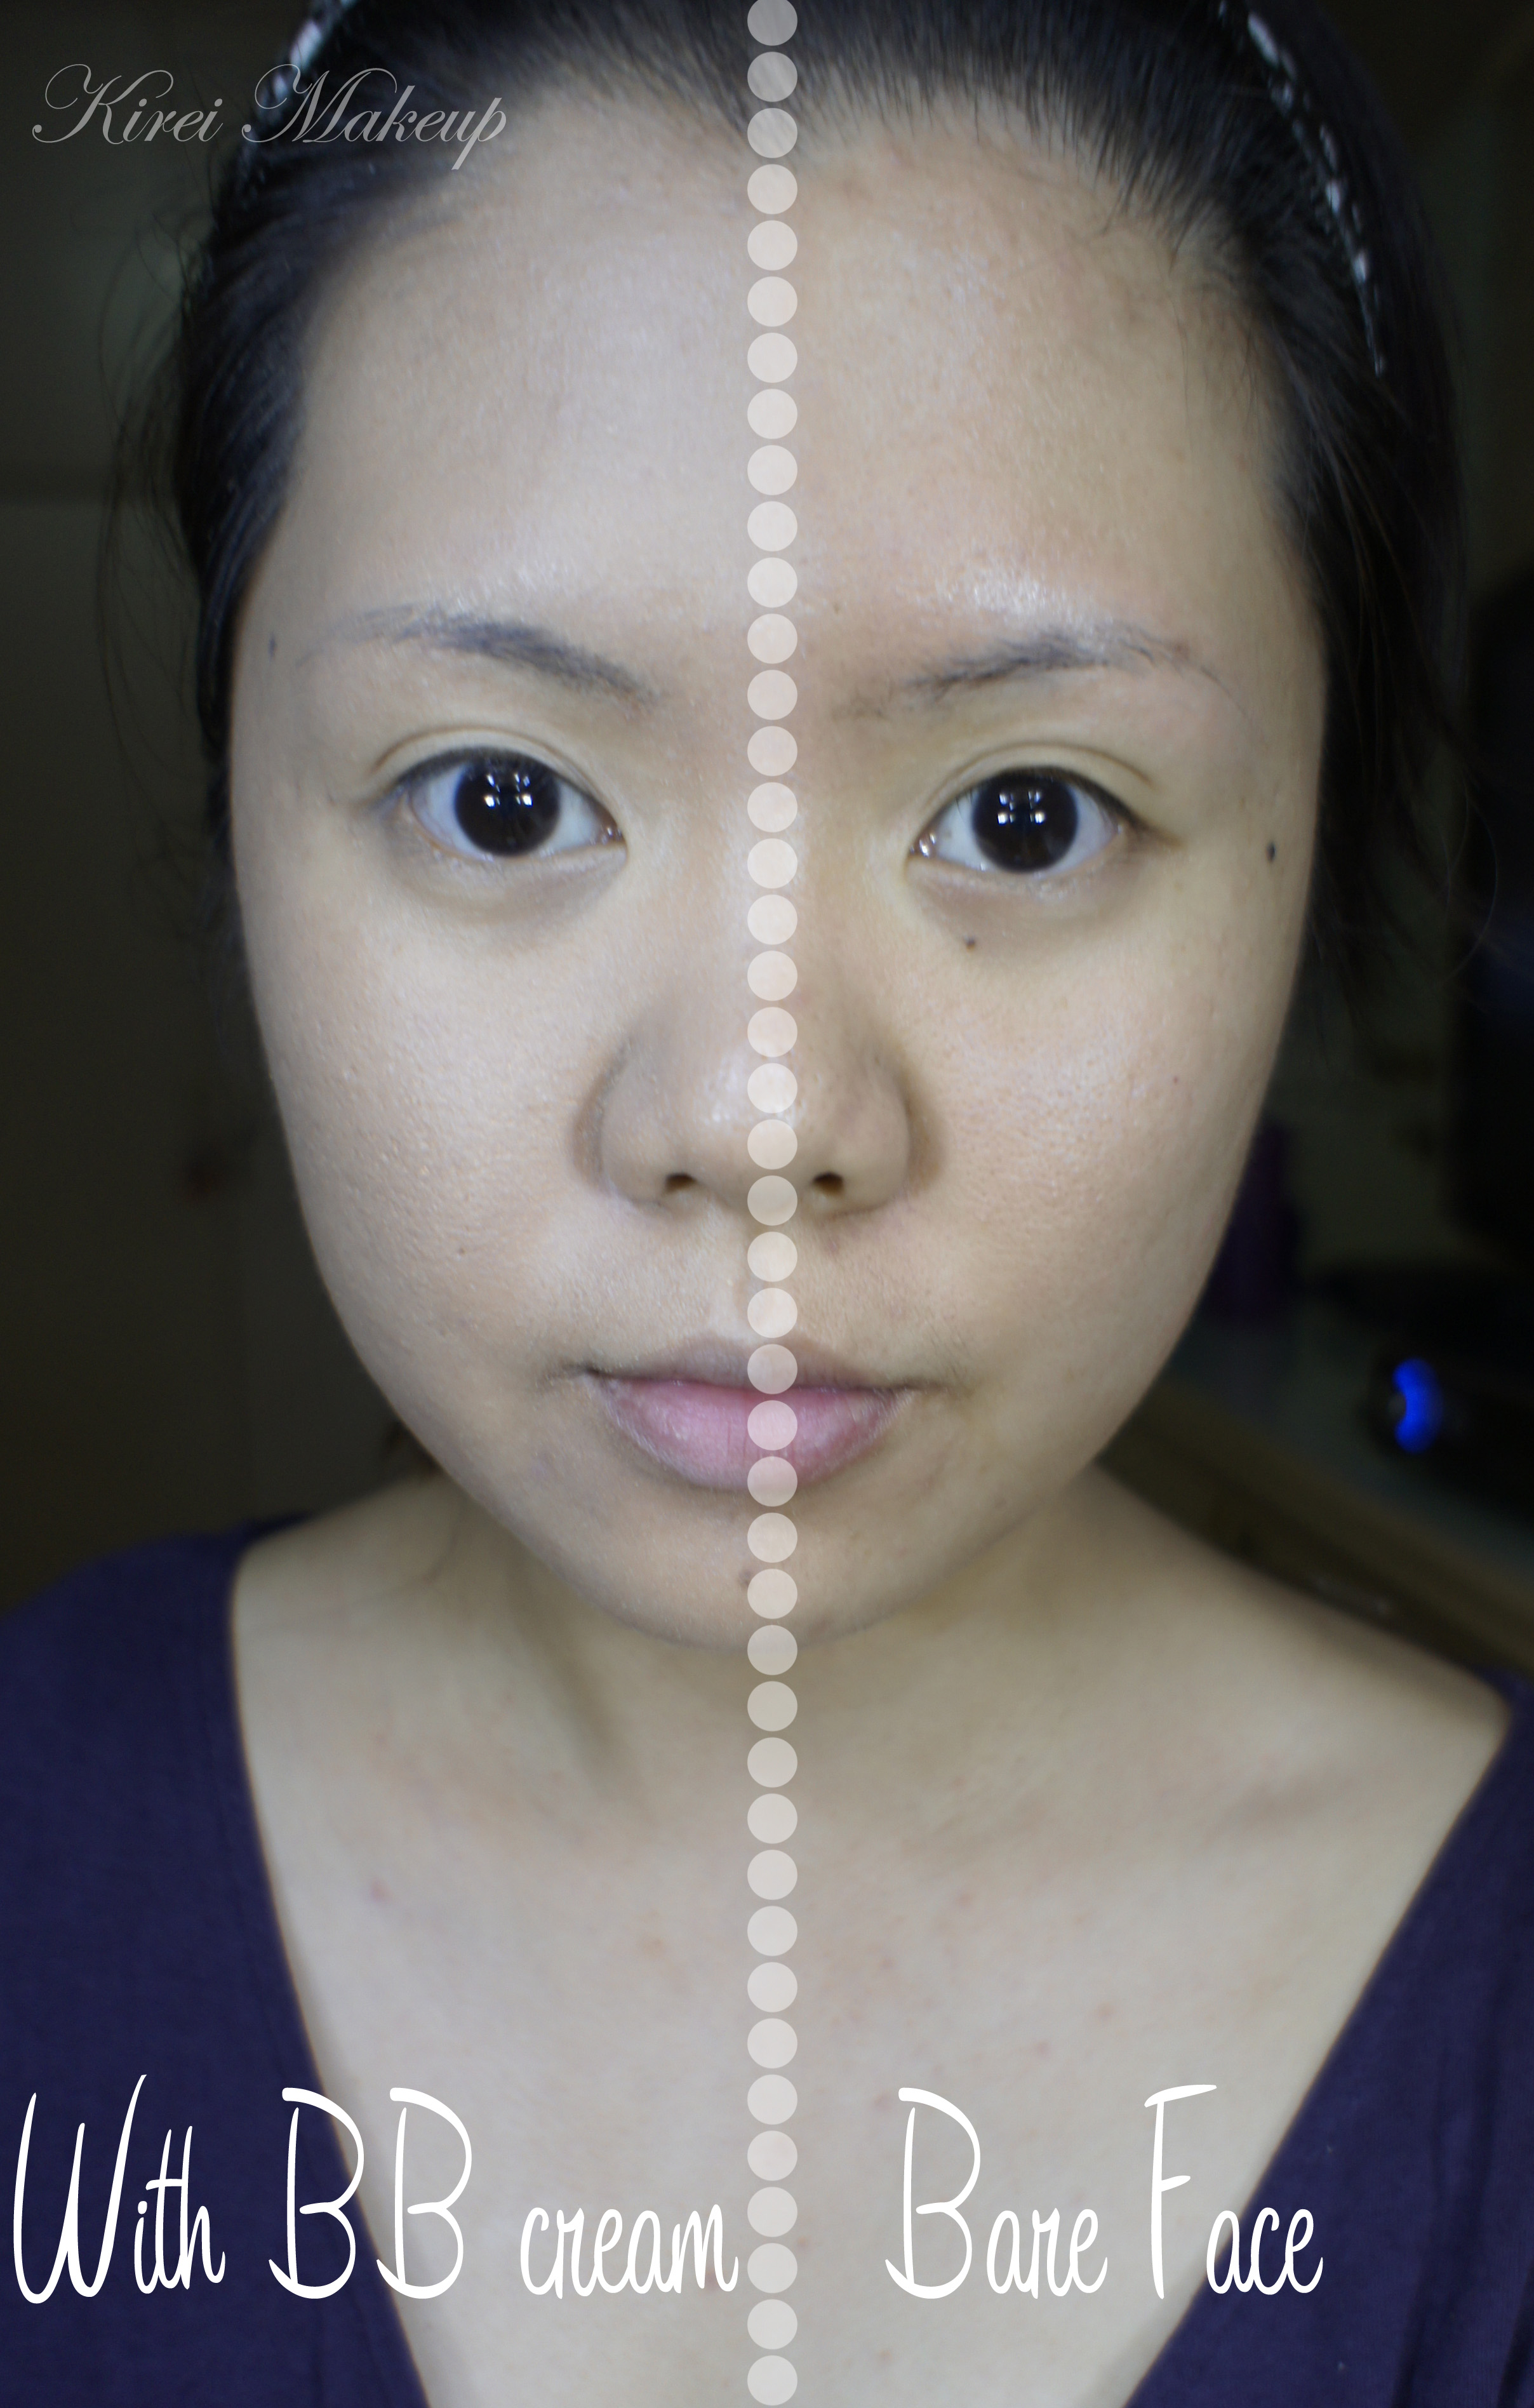
Ok, so I tested the BB cream on my right side of the face (left in the photo), and can you see how cray cray I looked like? I mean, I dotted the BB cream in certain area of my face, and blended it outwards (from center of the face) using my finger, and HOLY GUACAMOLE! I look ghastly! This BB cream is like a full on foundation. It has a medium to full coverage.

What surprised me even more is that the more I rubbed this to my face, the “whiter” it gets. I mean, yea it looks like it matches my chest perfectly, but let me tell you that my face actually looks a lot paler and did not match my chest and neck at all. It has a grey cast on my face, which means that this product is the wrong color.

I’m not sure why it looks very white on my face since it looks quite ok when you squirted the product out. I think it might be due to the SPF 30 ingredient in it. You know how when you use sunscreen your face might look like it has some whitish layer on it? It’s similar to what happened to my face here. If you follow me on twitter, I posted a picture of my makeup during the event, and you can see how much paler my face was compared to the neck.

The BB cream itself is not that easy to blend since it’s quite thick. If you use your fingers to blend, make sure you work it in. I find that using my fingers help to spread the product better. If you use a foundation brush, make sure there’s no streak on the face. It also sinks into the pores. If you have fine lines under the eyes, it will crease.

Another thing I have to mention is that even though I wore this product for a good 3-hour, I had to say I felt like I’m wearing a mask. It’s quite heavy on the skin, definitely different than other foundation/bb cream I’ve worn before.

Etude House BB Cream review

I’m not sure if these 2 products were targeted for any specific audience. I think if you have dry skin, you might have a hard time using the BB Cream, and if you have oily skin the CC Cream might be too slippery for you. If you have sensitive skin, you might want to do a test patch first before applying it all over your face. The reason I said this is because I broke out! Not as bad as I thought it might be, but I have several new breakouts on my jawline, near my ears and chin area. I’m not sure which product caused it, but it might be both. The CC and BB creams were the only new products that I put on my face before the breakout occurred.

Now, for the price, I wasn’t told any numbers by them so I don’t know.

How do I feel about these 2 products? If you’ve been following me for a while, you should know that I feel BB and CC creams are just a big marketing hype. Asian BB and CC creams don’t really carry a large range of color, so more often than not you’ll always end up with the wrong color. Not to mention, a lot of these Asian BB creams are too beige or too pink for our skin-tone.

I do, however like the fact that it contains higher SPF than the Western BB creams, but this also means that you’ll end up with a flash-back if you get your pictures taken.

I’m not sold at all about this idea of BB and CC creams in Asia. I say don’t waste your money, and go get a foundation that perfectly match your skin. Mix it with your moisturizer or primer to thin it out, so it’s not too thick. If you have a Western BB cream, or several like me, you’ll probably find that they are more like a tinted moisturizer which works great for the Summer or if you are traveling. I find that Asian BB creams are still a bit icky, esp. with the shade range and fragrance.

What do you guys think? Have you had any good experience with Asian BB Creams?

For other BB creams product review, please visit:

Etude House Indonesia BB cream

Who might benefit from the CC and BB creams?

To be honest, I’m not sure. I wouldn’t even recommend this product to anyone with sensitive skin. May be if you are a big fan of Korean makeup, and you are quite fair, looking for a medium coverage BB cream, the Etude House BB cream cotton fit might work for you.

For the CC cream, I guess it might work for anyone looking for a sunscreen. I don’t quite actually mind the CC cream, I just don’t see the big hype about it.

Again, those with sensitive skin please do a test patch before purchasing it. What’s a test patch? You apply the product in a certain area of the skin, like behind the ear or on the jaw to see if you have any reaction towards it.

Healthy Face Movement with Etude House Indonesia

If you guys followed my twitter account, you would know that I was kindly invited to join the Etude House Healthy Face Movement event last Saturday at Mall Taman Anggrek, Jakarta. I was happy to see the other beauty bloggers, especially since I met familiar faces as well as new bloggers. I was quite surprised to see that some of these bloggers actually know my face and my name.

Etude House Indonesia

For those who were there, and have been reading my blog, a big hug and thank you. I’m not one that’s good with faces and names, so a big apology!!! I know I kept asking some people their names, ’cause I can’t remember. Sorry sorry sorry..I’m just really really bad with memorizing names and faces in big events, esp. because there’s way too much things going on (i.e. loud music and people chattering). If you see me next time, just come up and say hi to me. I’d probably ask for your name again, but I promise I’ll try to remember! Or say hi to me on Twitter 😀

Indonesian Beauty Bloggers

Indonesian Beauty Bloggers

Back to the event itself. So, Etude House Indonesia created an Etude Carnival in the atrium of Mall Taman Anggrek. Pretty much, they’ve turned the mall Pink! Pink is the main colour of Etude House. They even have pink makeup case! Cute much?  Not only they turned the atrium into a Pink Carnival, they organized makeover booth, cosmetics stand, manicure stalls, photo booth and a big centre stage.

Pink Makeup Case
All bloggers were directed to the Beauty Workshop area where we were introduced to Yohanna and Ivonne. Yohanna, as the media relations staff, explained to us what Healthy Face Movement is. She mentioned about 3Me – my skincare, my makeup application and my makeup removal. This campaign is directed towards Indonesia women to care  and give extra attention to their skin using those 3 steps mentioned – cleaning face with skin care, using moisturizer or light primer and cleansing the skin after activity.

For this Healthy Face Movement Campaign, Etude House created a Video Competition for everyone! All you have to do is to create a video testimony and tutorial of the 3Me activity that you have done, and a Daily Makeup Look. For more info please visit Etude House Indonesia Facebook fan page.

etude house indonesia makeup class

Besides that Healthy Face Movement campaign, the event itself was created to officially released the first Korean CC Cream  in Indonesia. More on the CC cream on the next post.

So after Yohanna talked to us a little about the Healthy Face Movement, she introduced Ivonne who is an Etude House Indonesia makeup artist. She talked to us about the little makeup competition that we had to do using Etude’s products. She introduced Michin, Etude House Korea makeup artist, and Michin performed a demo to a model. We were supposed to create a similar look on ourselves using products provided to us on our table.
Etude House Indonesia

Etude House Indonesia
I just want to say this was the only time in the event that I felt grossed out. First of all, the products given to us were used testers. I’m not sure if these testers were well cleaned with alcohol or not, but the eyeshadows look quite dirty. If you guys don’t know me personally, let me just mention that I hate using testers on my own face. I think it’s nasty! Not to mention products like mascara should NEVER be shared around! Second of all, we were given no brushes, and some of the eyeshadow sponges were dirty, like used dirty with brown stuffs on it. Next, the products like the compact powder does not even match our skin tone. It was my worst nightmare!!! Ok, fine may be I was being a big baby, but anything that’s going to come close to my eyes better be clean! I do not want any eye infections! So I used the clean Q-tips given to us and my fingers to apply my makeup.

Etude House Indonesia

Nevertheless, I wanted to be a good sport and not a party pooper. Thank goodness I brought my own baby wipes. Ladies, please, regardless whether you have a baby or not, always carry baby wipes in your handbag, you never know how useful these things are. I used the wipes to wipe down some of the products, and cleaned my face with it. I was glad I had worn my own mascara before the event, so I avoided using mascara provided by them.

Korean makeup before and after
During this time, I get the chance to try on their CC and BB cream. I’m not sure how I feel about these 2 products just yet. You guys should know by now that I think CC and BB creams are just a big marketing hype. I’ll talk more about these 2 products this week.

The event ended when Michin chose 2 winners and that’s it. After our blogger event, the area was used for makeup classes. I walked around the atrium for a while and man, it was PACKED! I, especially, loved the nail corner. Since I had to go and meet a friend, I didn’t get the chance to shop around. Nevertheless, it was quite awesome.

Etude House Indonesia

Etude House Indonesia

Golden Bronze

This week is like my non-colorful week! Today’s look used Urban Decay Naked Palette, and it’s perfect for daytime and bridal makeup. It’s packed with bronze goodness. The colors are perfect for every eye-colors and skintones. Very flattering, very warm and it’s really easy to achieve this look.

I love wearing this look for the summer. It might look like it’s a lot, but once you complete the face, the eyes look pretty natural looking. It really do brighten up the face too. This is my fav. way of wearing bronze eyeshadow. You can immediately turn this makeup to a night look just by adding black liner along the upper lashline and waterline, turning it into a smoky look.

For tutorial on how to fill-in brows, please visit “Product of The Week: MUFE Aqua Brow“. For a smokier version of this look please visit “Baked It Up!

urban decay naked palette

How-to:

1. Using a flat eyeshadow brush, I applied UD Half-Baked all over the lid.

2. Using a flat fluffy brush, I applied UD Buck lightly on the crease and the outer V.

3. Using a fluffy blending brush, I applied a mixture of UD Smog + Snakebite on the outer half of the lid, blending in towards Half-Baked.

4. I applied UD Half-Baked on the inner corner of the lower lid, and UD Smog + Snakebite on the outer half using a small shader brush.

5. I created a winged liner along my upper lashline using Bobbi Brown Caviar Ink cream liner.

6. Using whatever is left on the brush, I applied the liner along the outer corner of the lower lid.

7. I curled my lashes and applied MUFE Smoky Lash mascara on both upper and lower lashes.

8. I filled my brows in using MUFE Aqua Brow.

urban decay naked palette

9. For my face, I applied Tarte Amazonian Clay BB Tinted Moisturizer.

10. I applied Benefit Dallas on my temples, the tip of my nose, my chin and my cheeks.

11. I also applied MAC Peaches on the cheeks.

12. For the lips, I applied L’oreal Colour Riche Lip Liner in Beyond Pink.urban decay naked palette

Product of The Week: MUFE Aqua Brow

As promised, I’ll be talking about MUFE Aqua Brow gel in this week’s installment of Product of The Week. I bought this a few weeks a go out of the blue. I actually didn’t look it up online or even read any reviews about it. I wanted to buy it just because I simply have never used a gel product for my brows. Usually it’s either pencil or powder since I really like a natural finish for the brows. If you want to get a natural finish, please visit my Shu Uemura Hard Formula post.

Let me just start by saying that this is not a beginner’s product. If you are not comfortable using pencil or powder for your brows, stay away from the gel! If you don’t use this properly, you might end up with crazy brows that are too thick. If you have a heavy-hand, stay away from this product!

Ok, so the brow set comes in a little MUFE pouch, which I find it to be very convenient! Inside the pouch, you’ll get 1 MUFE Aqua Brow, 1 spooly and 1 angled brush. I don’t use that brush, instead I used my MAC 266 brush. It gives a more define and precise brows.

Remember, a little product goes a long way! See that tiny teensy dot on my hand. That will do 1 of my brows. It’s better to use a little then add more, than to use too much and try to take it off.

mufe aqua brow

I tweezed and trimmed the brows myself. If you want to find out an easy way to shape your own brows, please check this post Brow 101. My own eyebrows have quite a lot of hair, but the hair has a very unflattering greyish shade to it. Not to mention, my left eyebrow (right in the picture) has a sparse eyebrow “head”. Filling my brows this way really frame my face and eyes nicely.

The pictures below showed how I filled my brows in. I think it’s pretty self explanatory. Oh, at the end of it, I also brushed out my eyebrows using the spooly that came with the set. This will remove some of the products, making it less harsh-looking.

Please comment below if you have any questions or if you want to see me do a video on how to fill in the brows.

mufe aqua brow gel

Back to the product itself!

What is MUFE Aqua Brow?

Aqua Brow is a waterproof eyebrow corrector that fills, defines and lengthens brows. Formulated with volatile oil and carnauba wax, its creamy gel texture gives an even, natural result with a long lasting hold. The result remains flawless throughout the day and holds up under all conditions (water, heat, etc).

Formula:

Volatile oil
Carnauba wax
Hydrophobic treated, concentrated pigments
Xanthan gum

(credit: Make Up For Ever, 2013)

Shades

Comes in 7 available shades – 10 Light Blonde, 15 Blonde, 20 Light Brown, 25 Ash, 30 Dark Brown, 35 Taupe and 40 Brown Black.

I was recommended by the MUFE Artist in the counter to buy no. 40, which is slightly too dark for me I think. I didn’t actually mind it at all since my ombre hair has quite a dark roots. It’s also a great addition to my makeup kit in case I’ve to do dark brows. However, I might get no. 10, 20 and 35 in the near future to be added to my kit.

If you are of medium-dark skin, no. 40 might be a good color for you. It’s a very cool brown.

Longevity

This product is waterproof, smudge-proof, and sweat-proof since it’s from the Aqua range. If you want to go swimming in this, go ahead, it’s completely waterproof. I’ve never worn this product for more than 4-6hrs, so I can’t really say if it stayed on the whole day. But, pretty much when it dries, it will not move until you remove it with makeup remover.

Price

CAD$24 in Sephora. Not sure how much it is in Jakarta. I did buy it in Jakarta, but I bought other stuffs with it and didn’t really pay much attention to it. I think it’s on the Rp. 300,000 range.

Pros:

  • 7 shades that cover every skin-tones.
  • Waterproof, smudge-proof and sweat-proof.
  • The set comes with brush and spooly which makes it very convenient for traveling.
  • Squeeze tube packaging makes it ideal for the kit. I don’t have to worry about it breaking or anything.
  • You can use the product to create a natural look or you can use it for a more precise application.
  • Can be used to darken any stubble or beard or side burns for men, or in creating character makeup.

Cons:

  • Might be too pricy than powder or pencil brow products.
  • If you are not used to working with gel/cream brow products, this might be hard to do.
  • If you apply too much, you might end up with harsh brows.
  • Difficult to remove once you make a mistake. Make sure you have waterproof makeup remover handy.

If you want to see a complete makeup look using MUFE Aqua Brow, please see my previous post “Neutral”.

how to shape brows

MUFE Aqua Brow Gel gets a 4.5 out of 5. It loses 0.5 point because of the difficulty level for beginners.

Neutral

I wanted to do a pretty makeup, something that will be good for brides, or prom goers, or just for anyone who wants an extra something something..bahahahaha..anyways! I love how it ended up and I think this look is perfect for brides, if they don’t want anything too smoky.

Anyways, I love how I’ve been using UD Naked palette more lately. I think I might do more tutorials using the Naked and Naked 2 palettes. Also, how do you like my brows? I managed to fix it today. Lately, I’ve played around with the MUFE Aqua Brow gel and I have to say, I’m loving it! More on that later on during the week.

How-to:

1. I applied UD Sin eyeshadow all over the lid using a flat eyeshadow brush.

2. On the crease, I applied UD Buck eyeshadow using a small blending brush.

3. Using the same brush, I applied MAC Brun on the outer V.

4. I clean the edge of the crease using a clean blending brush.

5. Using a small shader brush, I applied Sin on the inner corner of the lower lid and MAC Brun on the outer corner.

6. I created a winged liner along the upper lashline using MUFE Aqua Black gel liner and an angled eyeliner brush.

7. I lined my waterline using L’oreal Voluminous Smoldering eyeliner.

8. For my lashes, I applied MUFE Smoky Lash mascara on both top and lower lashes.

9. I filled my brows in using MUFE Aqua Brow.

natural makeup with urban decay naked palette

10. For the face, I applied UD Naked foundation using a foundation brush.

11. Under the eyes, I applied MAC Pro Conceal/Correct concealer in Medium.

12. I applied MAC Shadowy as a light contour and then MAC Cubic on my cheeks as blush.

13. For the lips, I filled it in using MAC Dervish lipliner.

asian bridal makeup

Gunmetal

How is everyone’s Monday going??? I apologize for M.I.A last week. If you follow me on twitter/instagram, you’d know that I burnt my fingers (because of steam)  on Tuesday. My ring and pinky fingers were burnt due to the steam from boiling water. Anyways, long story short, my ring finger didn’t get burnt as bad as my pinky. There were bubbles forming on my pinky finger! It hurt a lot, and well it’s red and purple now. Due to the burnt, I couldn’t really hold my makeup brushes properly since it hurt a lot. I have a very low tolerance of pain (exception for piercings..hahaha). Heck, I couldn’t even hold my chopsticks properly.

However, since the ring finger gotten better, I managed to do one tutorial. I wanted to play with the Gunmetal eyeshadow from Urban Decay Naked 1 Palette, so I created this smoky eyes look. Very simple and very easy. This will look great for party makeup, prom or wedding.

Also, ignore my brows, haven’t had time to get them trimmed or shaped because of the recent incident.

How-to:

1. I applied Chanel Illusion D’ombre in Emmervielle all over the lid using my finger.

2. Using a flat eyeshadow brush, I applied UD Gunmetal eyeshadow on the outer third of the lid.

3. I blended the edge of the shadow using a clean fluffy brush.

4. Using a bullet brush by Smashbox, I applied UD Creep eyeshadow from Naked palette on the outer V.

5. Using a small shader brush, I applied UD Gunmetal eyeshadow on the lower lid.

6. Using a flat eyeshadow brush, I applied L’oreal Infallible Hourglass Beige eyeshadow in on the inner half of the upper lid, and slightly on the inner corner of the lower lid.

7. I lined my upper lashline and waterline using L’oreal Voluminous Smoldering eyeliner.

8. I filled my brows using Shu Uemura brow pencil.

9. I curled my lashes using MUFE Smoky Lashes mascara.

asian smoky eyes

10. For the face, I used Giorgio Armani Silk foundation and a foundation brush.

11. Under the eyes, I applied MAC Pro Correct/Conceal yellow corrector.

12. I applied MAC Shadowy as contour and MAC Fleur Power on the cheeks.

13. For the lips, I applied Clinique Chubbystick in Heaping Hazelnut.

asian smoky eyes

Pastel Rainbow

Hi all! I apologize for missing 2 days of tutorials. To be honest, I had 1 tutorial but I wasn’t too happy with how it turned out. So, I rather postponed the post than posting a not-so-great tutorial.

Anyhow, I decided to use my Coastal Scents 88 Prism palette  (only $19.95!) for the look, so it’s easier for whoever wants to re-create this look. If you do decide to re-create the look, please link me up!

The reason why I wanted to use the Coastal Scents 88 Prism palette is to create a pastel finish to the look. I quite like how this turned out. I was quite skeptical cause I like a shimmery finish, but as I said I love how this turns out! I’ve labelled the colors that I used in the picture below, so please refer to the colors on the tutorial.

The steps are quite long, so please be patient reading it…the key to this tutorial is to have clean flat eyeshadow brushes (or you can clean in between steps). Make sure it’s clean so the colors don’t get muddy and mixed up.

coastal scent 88 prism palette

How-to:

1. I applied NYX Jumbo eyeshadow in Milk and blended it on my eyelid using my ring finger.

2. Using a flat eyeshadow brush, I applied eyeshadow A on the outer corner of the lid.

3. Using another clean eyeshadow brush, I applied eyeshadow C + D (mixed) on the middle lid.

4. I applied eyeshadow E on the inner corner of the lid using a clean eyeshadow brush.

5. Using another clean eyeshadow brush, I blended the line where the eyeshadow met.

pastel rainbow makeup

6. I applied eyeshadow F on the outer V using a small fluffy brush.

7. Using a clean fluffy brush, I blended the black eyeshadow so there’s no harsh edge.

8. Using a flat eyeshadow brush (from step 1), I applied eyeshadow B on the outer corner and on top of the black eyeshadow.

9. Using an angled eyebrow brush, I applied eyeshadow G+H on the inner corner of the lower lid, I in the middle and J on the outer corner.

10. I lined my waterline using L’oreal Voluminous Smoldering eyeliner.

11. I created a winged liner using Kat Von D Trooper liquid liner.

12. I curled my lashes and applied MUFE Smoky Lash mascara on both top and lower lashes.

13. I filled my brows in using MUFE Aqua Brow gel.

coastal scent 88 prism palette

14. On my face, I applied Urban Decay Naked foundation all over using Shiseido foundation brush.

15. I applied Benefit Benetint on my cheeks, and blended it out using a foundation brush.

16. I applied MUFE Rouge Artist Natural Lipstick in N39 (Soft Apricot).

17. Powdered my face using CoverFX translucent powder.

rainbow makeup

Color Crush

I have a crush on the MUFE Aqua Cream no. 52. The color is just so pretty! I just want to use it on every tutorial…Anyways, I did this look just to play around with colors. I think I might do another look with the green cream shadow. We’ll see. I had a lot of fun playing around with this color.

How-to:

1. Using a synthetic brush, I applied MUFE Aqua cream no. 52 Pearly Green Dragon on the outer half of my lid.

2. Using MUFE Aqua Shadow stick in Pearly Peach on the inner half of the lid. I used my finger to blend the colors.

3. I used a flat eyeshadow brush and applied Smashbox Admire Me Soft Shimmering Coral on the inner half of the lid and UD Kush on the outer half.

4. Using a small shader eyeshadow brush, I applied UD Perversion on the outer V and the crease.

5. I cleaned the small shader brush on a tissue and use the brush to blend the harsh line.

6. I applied MUFE no. 92 eyeshadow on the crease lightly using a blending brush.

7. Using wet wipe, I cleaned the outer edge of my eye to clean up and sharpen the edge.

8. I also applied UD Foxy eyeshadow under the brow.

9. Using an angled eyebrow brush, I applied MUFE no. 92 eyeshadow on the lower lid. I applied UD Bordello on the inner corner of the lower lid.

10. I lined my waterline using L’oreal Voluminous Smoldering eyeliner and lined the upper lashline using Kanebo Kate Super Sharp liner.

11. I curled my lashes and applied Dior Overcurl mascara.

12. I filled my brows using MUFE Aqua Brow gel no. 40 and an angled eyeliner brush.

13. I brushed my brows using a clean spooly.

mufe aqua cream 22

14. For the face, I applied MUFE HD Foundation using a foundation brush.

15. I applied MAC Cubic blush and MAC Bronzer on the cheeks.

16. I contoured the sides of my nose using MAC Shadowy.

17. On the lips, I applied Clinique Bountiful Blush chubby stick.

bright colorful makeup

orange and green makeup

OPI San-Tan-Tonio

As much as I love colors and dark colors on my nails, once in a blue moon I love something nude. I found myself reaching for this nail polish most of the time when I want a nude color on my nails. This is OPI Santantonio from the Spring/Summer 2011 Texas collection. I believe I bought this in Trade Secret, Canada for $9.99.

It has a creamy sandy-beige color to it, just slightly darker than my skintone. I’m looking for something lighter so it matched my skin better, but for now, this nail polish will do. If you’re darker than me, you’ll probably find this polish to suit you better. If you are lighter than me (anyone above NC30), you might find this polish to be too dark for your skin.

I don’t mind this color at all on my skin to be honest. I love wearing this nude polish to work, esp. back when I was working as a counselor in a private high school since bright (and red) nail polish colors are frowned upon. This color makes your nails look polish and at the same time professional.

OPI Santantonio

A Hint of Emerald

Hello everyone! If you guys follow my Instagram, you’d know that I’ve just recently purchased another aqua cream last weekend. I just bought no. 22 to be added into my collection (which is shown as a little twist in the tutorial below). Just to let you know, MUFE Indonesia has just increased the price of their aqua creams to Rp. 300,000/each. Also, if you purchase anything from them this week for anything above Rp. 1,300,000 you’ll receive a free pouch along with a few goodies inside. I think this promo will only last until they finish their stock. So go to the nearest MUFE Indonesia stores and check them out if you’re interested.

Anyways, just a brief story about this tutorial. I wanted to use my Sariayu Petikan Sitar eyeshadow since I bought it quite a while back at Carrefour. Similar to my Sariayu K. Karimunjawa trio eyeshadow, this one is very pigmented and easily blendable as well.

How-to:

1. I applied the brown eyeshadow from Sariayu Petikan Sitar on the outer corner of the lid using a flat eyeshadow brush.

2. Using another clean eyeshadow brush, I applied the orange shadow from Sariayu Petikan Sitar in the center.

3. I used a clean blending brush to blend the edge where the 2 shadows meet, and also the crease.

4. Using a flat eyeshadow brush, I applied the champagne shadow from Sariayu Petikan Sita on the inner corner of the lid.

5. Using an angled eyeliner brush, I applied the brown eyeshadow along the lower lashline.

6. I lined my waterline using MUFE Aqua Cream no. 22 and an angled eyeliner brush.

7. For the upper lashline, I applied L’oreal Voluminous Smoldering eyeliner.

8. I curled my lashes and applied MUFE Smoky Lash mascara on both top and bottom lashes.

9. I filled my brows in using MUFE Brow Gel and angled eyebrow brush.

10. Under the eyebrow, I applied L’oreal Super Blendable concealer crayon in W1/2 and blended it out using my finger.

Sariayu eyeshadow

11. I applied Estee Lauder Double Wear Light foundation on my face using my fingers.

12. On the cheeks, I applied MAC Peaches blush.

13. I contoured the side of my nose using MAC Shadowy contour powder.

14. On the lips, I applied Becca Beach Tint in Dragonfruit.

sariayu petikan sitar