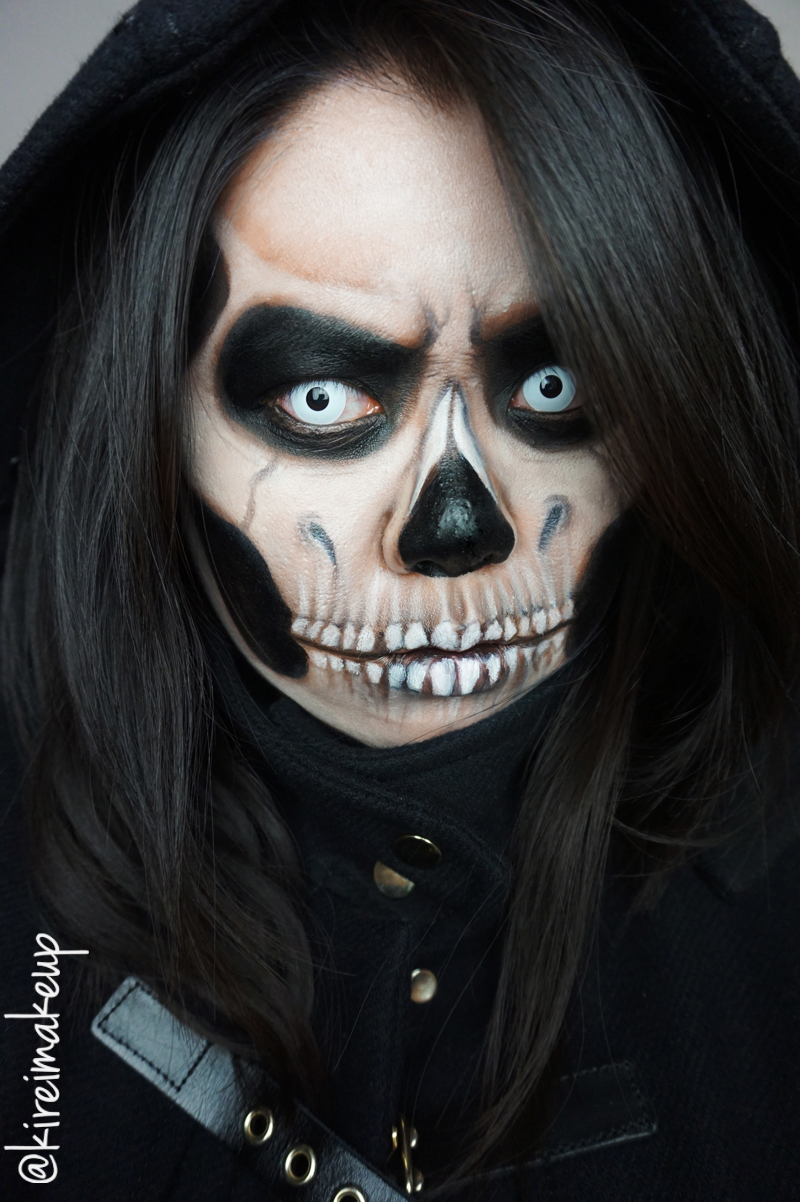
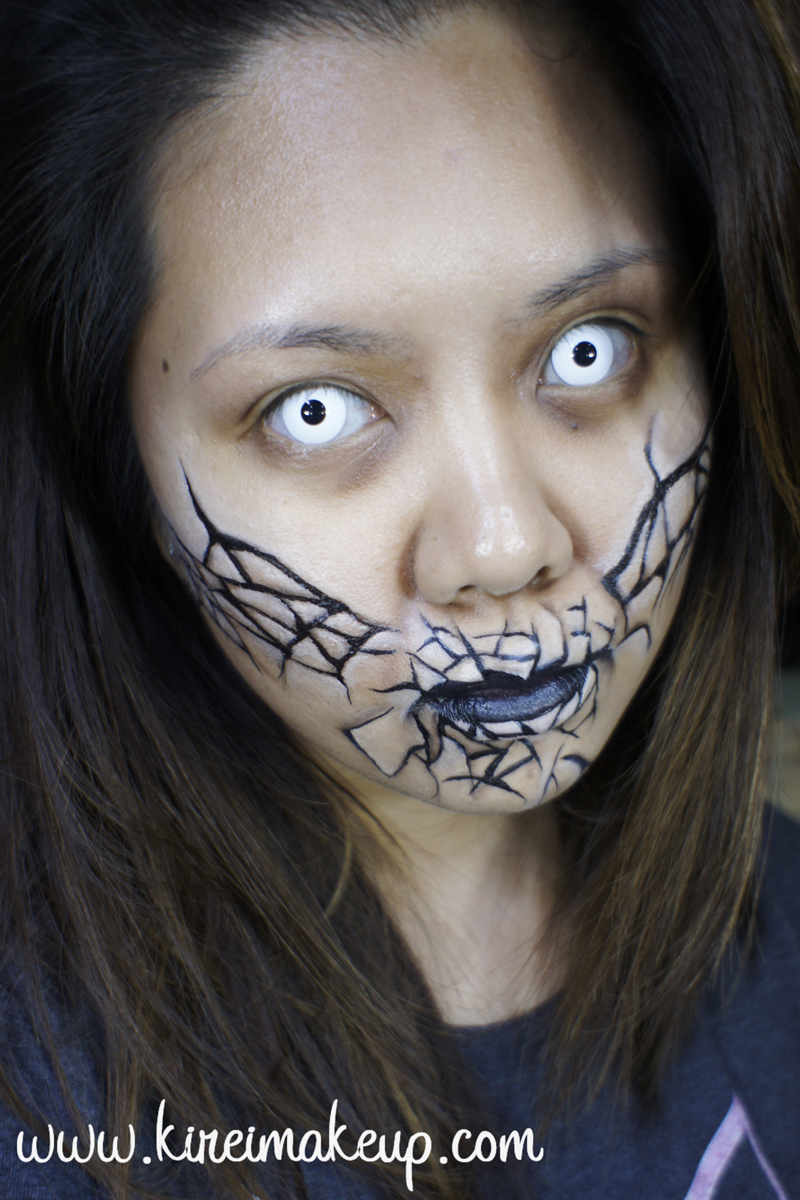
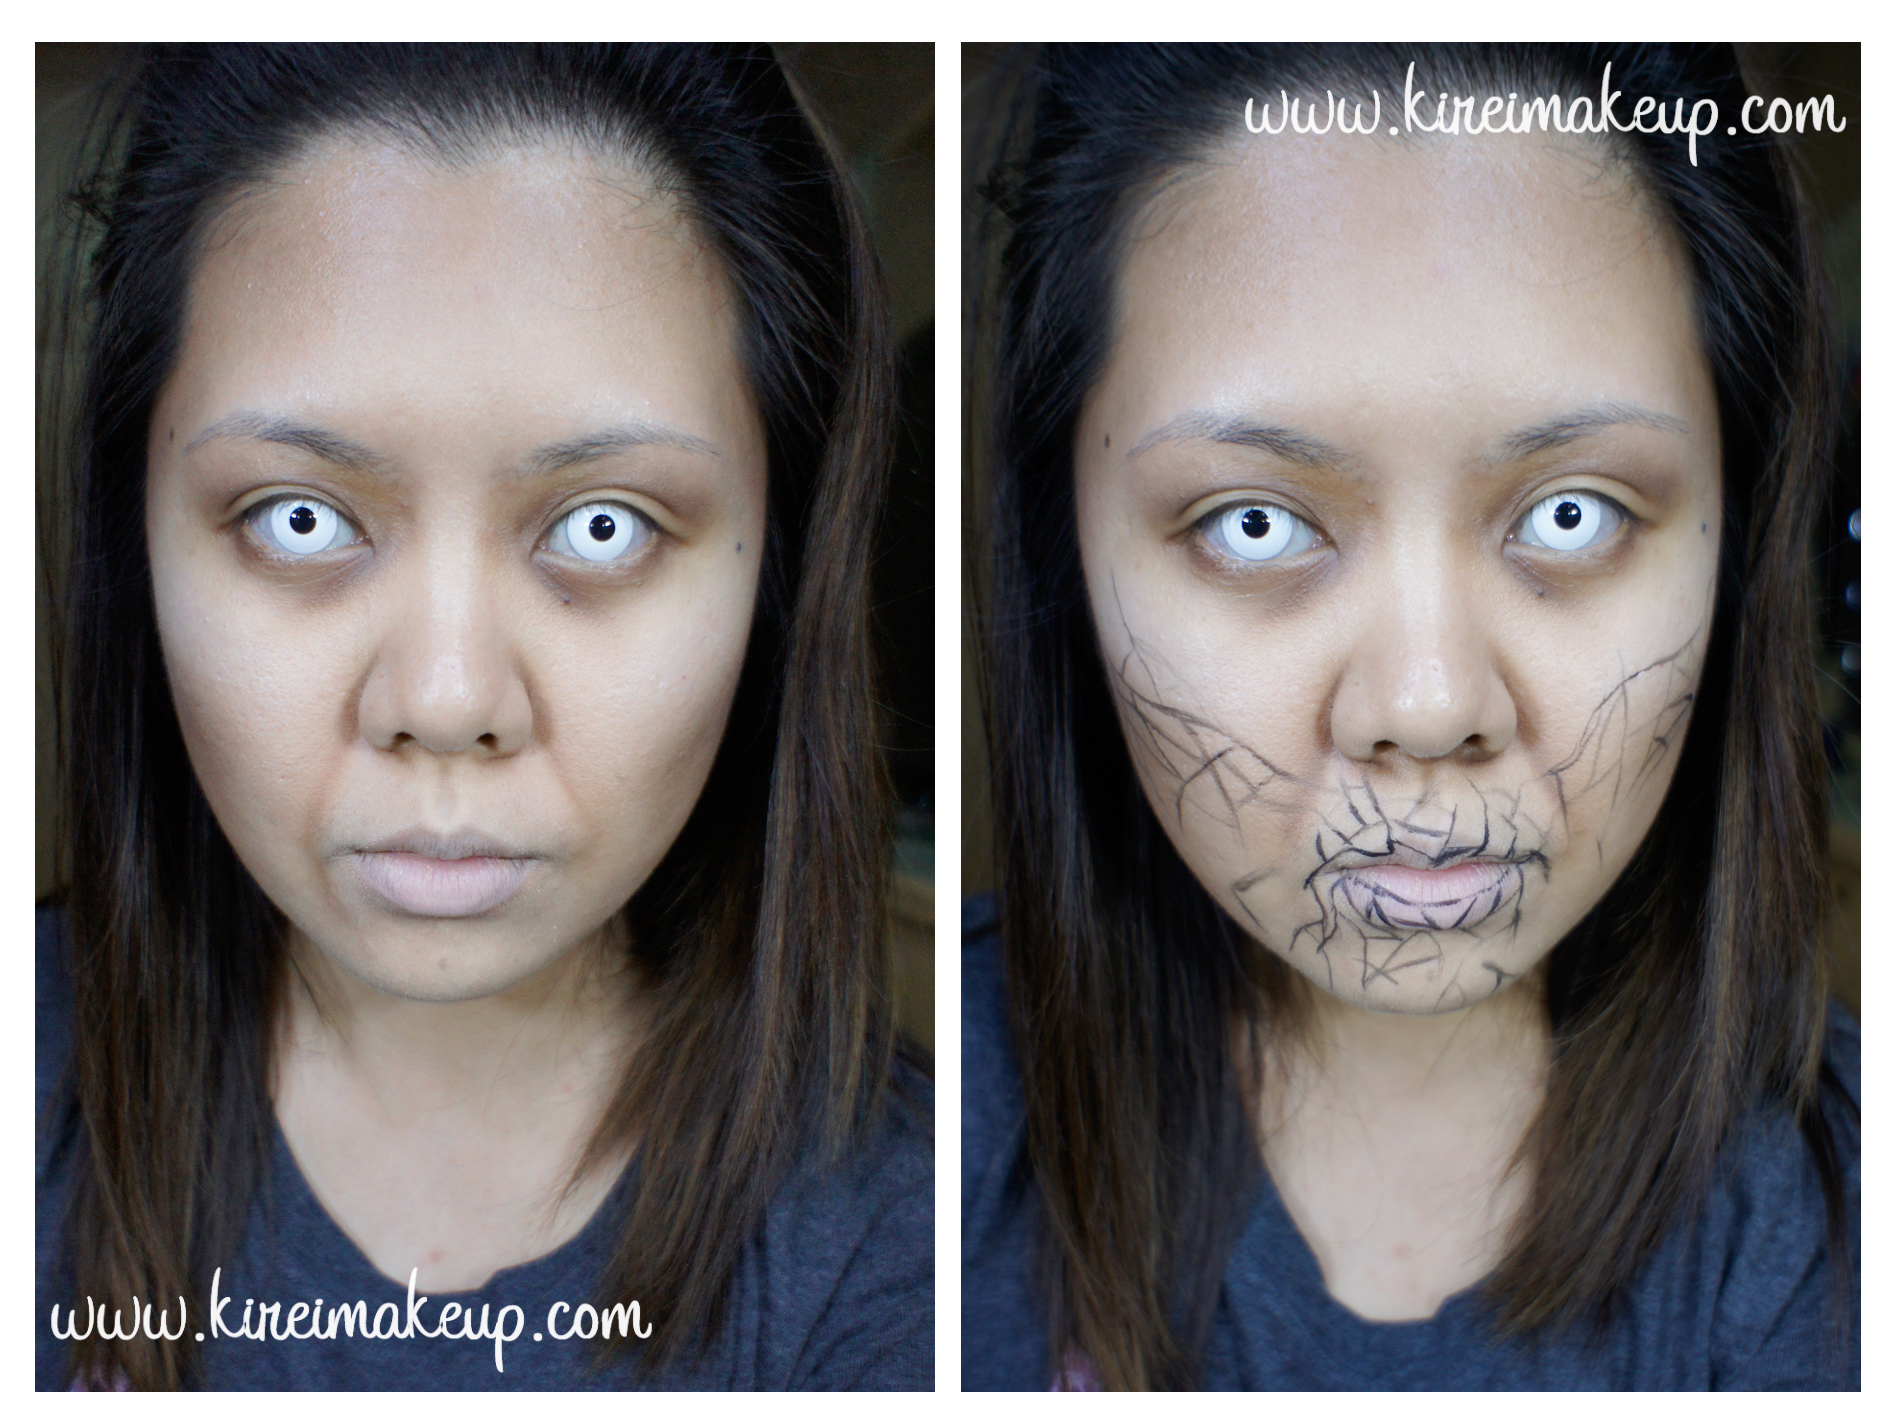
Alright! So, another quick Halloween makeup tutorial for those who don’t feel like buying overpriced costumes, or have time to make one! I was actually running out of ideas on what kind of last minute Halloween makeup looks I should do, so I asked N for advice and since he’s a Whovian, I knew he was going to say Weeping Angels. Instead, he surprised me and told me to check out Dr. Who The Waters of Mars makeup on Google. I did an image search and I absolutely love it!
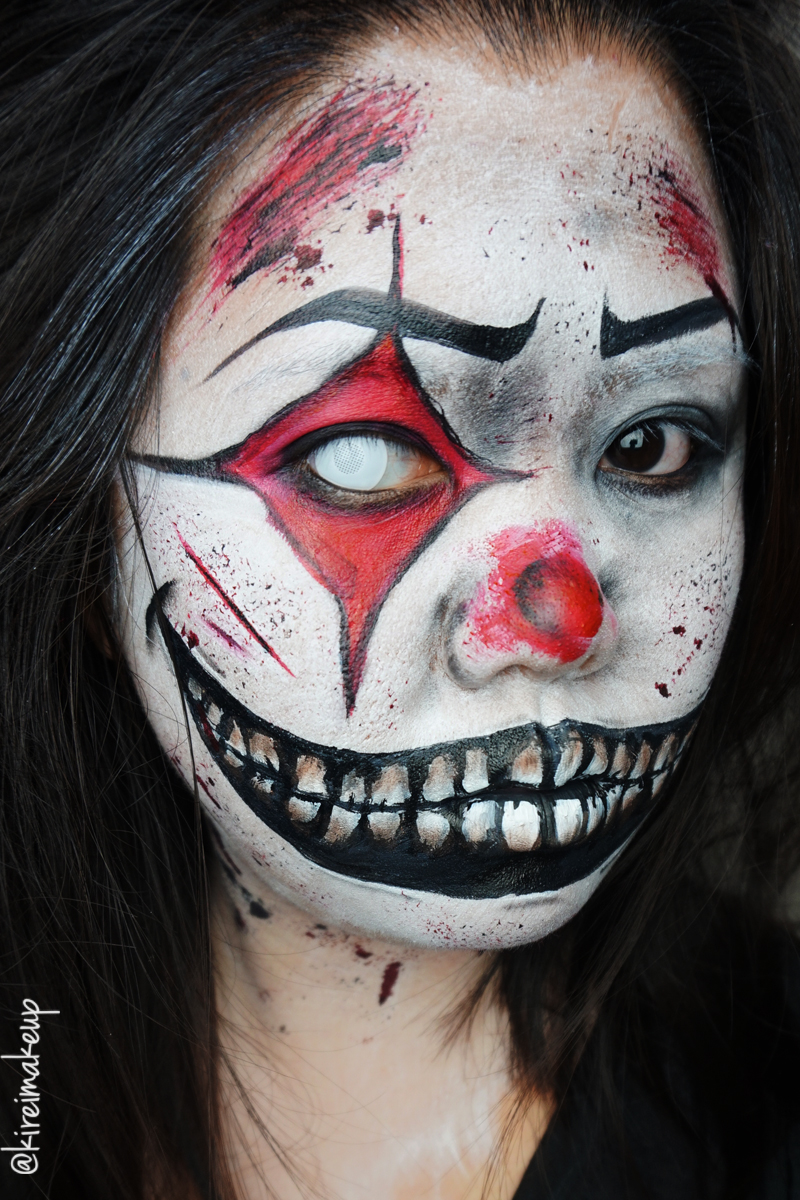
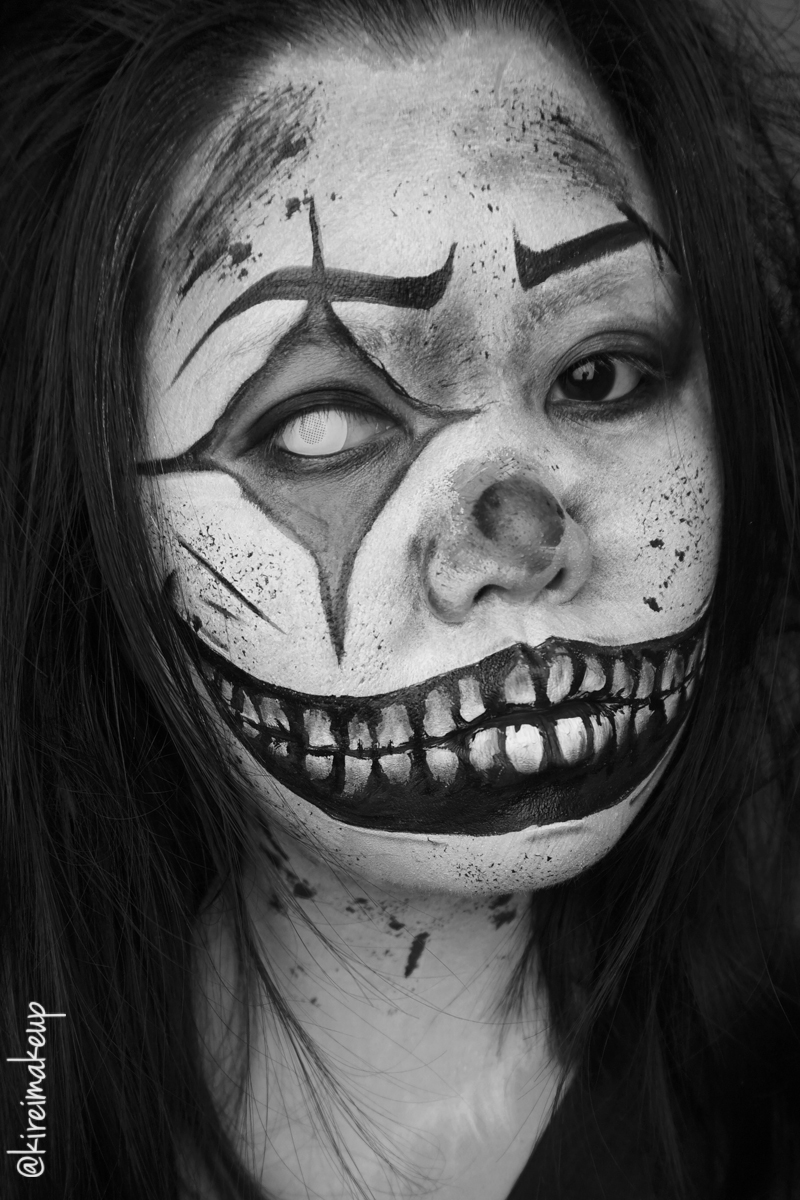
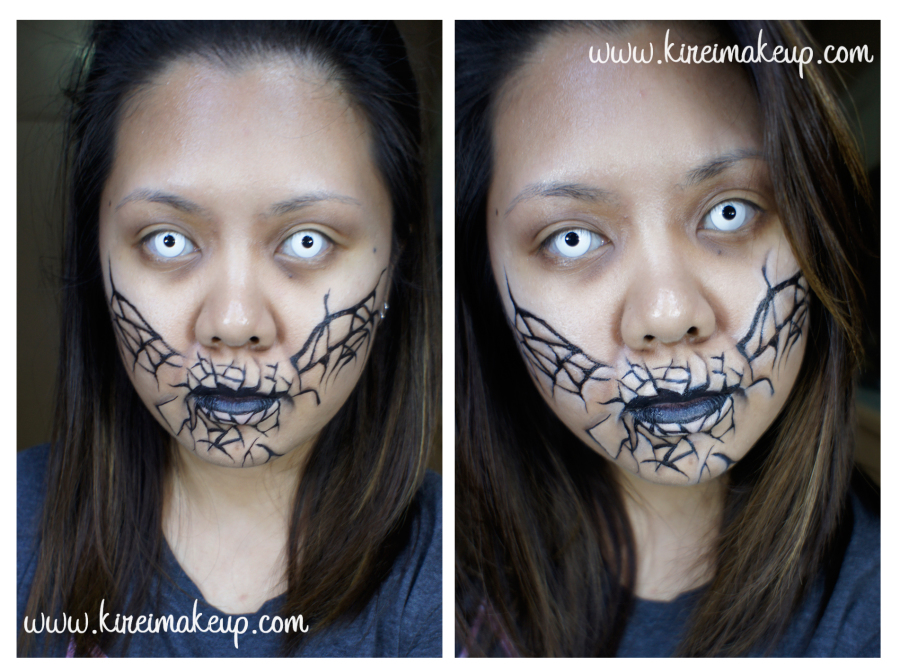
By no means the Waters of Mars virus makeup was easy if you want to replicate the exact look since they used prosthetic piece in the show. I used a picture I found on the Tardis Wiki and Bleeding Cool websites as references. Again, let me repeat myself by saying I could not replicate the makeup exactly on how the photos look like – I couldn’t really figured out how to get those super thin line using face paint, but still create an illusion of the skin sunken in or risen. I ended up creating depth on the cracks by creating a thicker line. Nevertheless, I was quite happy with the result!
If you’re a Whovian, and don’t think this looks like the makeup on the show, I do sincerely apologize! I wish I can recreate to look exactly like the pictures just by face painting, but alas I couldn’t. Anyways, I hope everyone does enjoy this tutorial! Even if you don’t know the show, you can still recreate this look into a “Cracked skin” look or “broken doll” since it’s a similar concept!
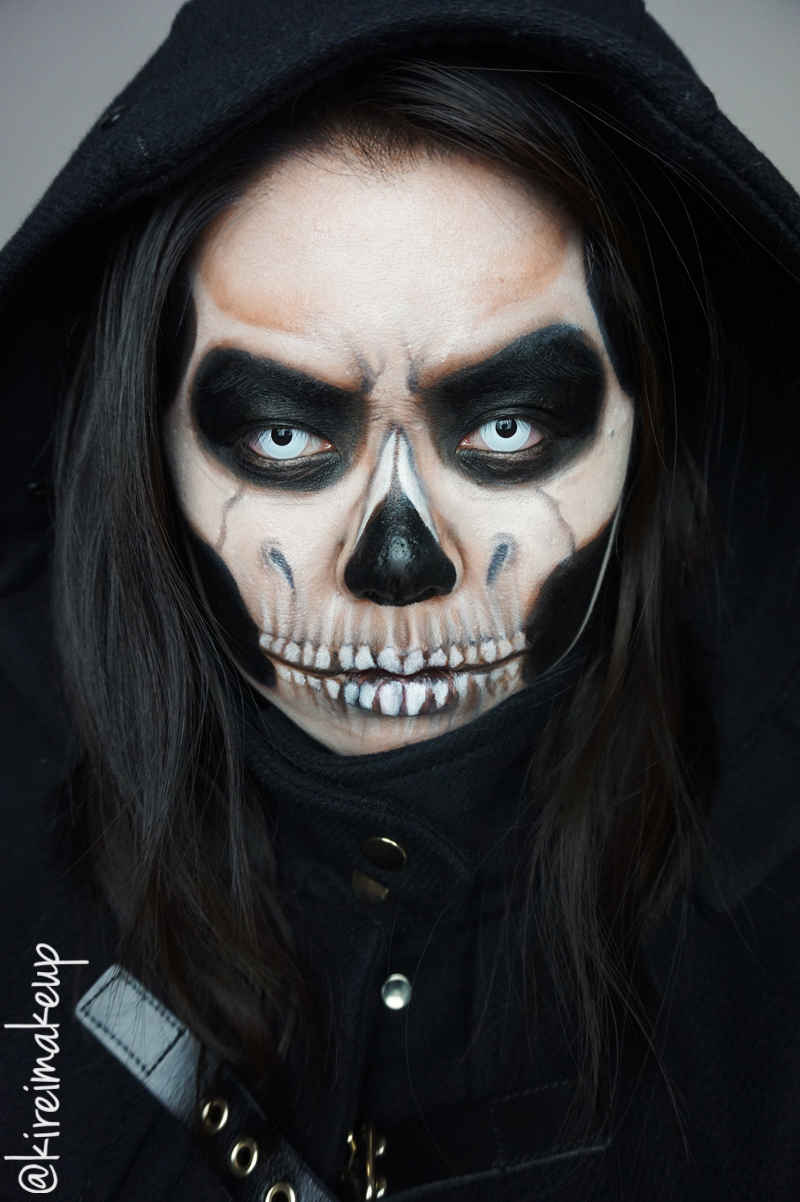
*Don’t forget to check out my other Halloween tutorials!*

I’m going to list all the products you need below, and all the brands I used at the bottom of the page.
What you need for this tutorial:
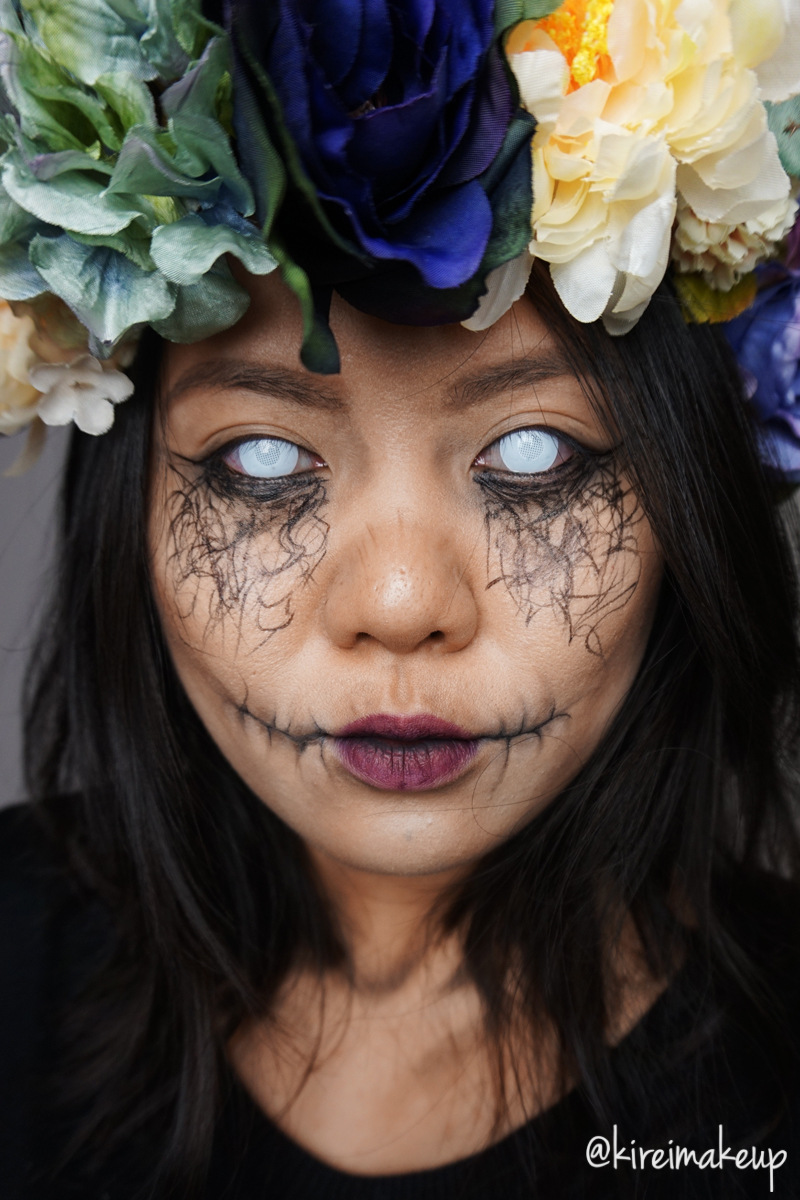
- White contact lenses – optional
- Foundation, preferably a matte finish.
- Setting powder.
- Eyeshadows – light & dark brown, purple, and grey eyeshadows.
- Black face paint – it can be cream or water-based, or even a liquid eyeliner.
- Beige face paint or a light-colored (a few shades lighter than your skin) foundation/concealer as highlight.
- Brushes
- Foundation – Sigma Angled Kabuki brush.
- Eyes – Sigma Blending brush.
- Face contour – Sigma angled brush.
- Lines – Sigma Eyeliner brush.
- Contour – flat eyeshadow brush.
- Highlight – Sigma Pencil Eyeliner brush.
- Lips – lipstick brush (unnamed – similar to Sigma Lip Brush).
*You can substitute all the brushes mentioned above to any art brushes you can find in bookstores or art stores.
*Don’t forget to check out my other Halloween tutorials!*

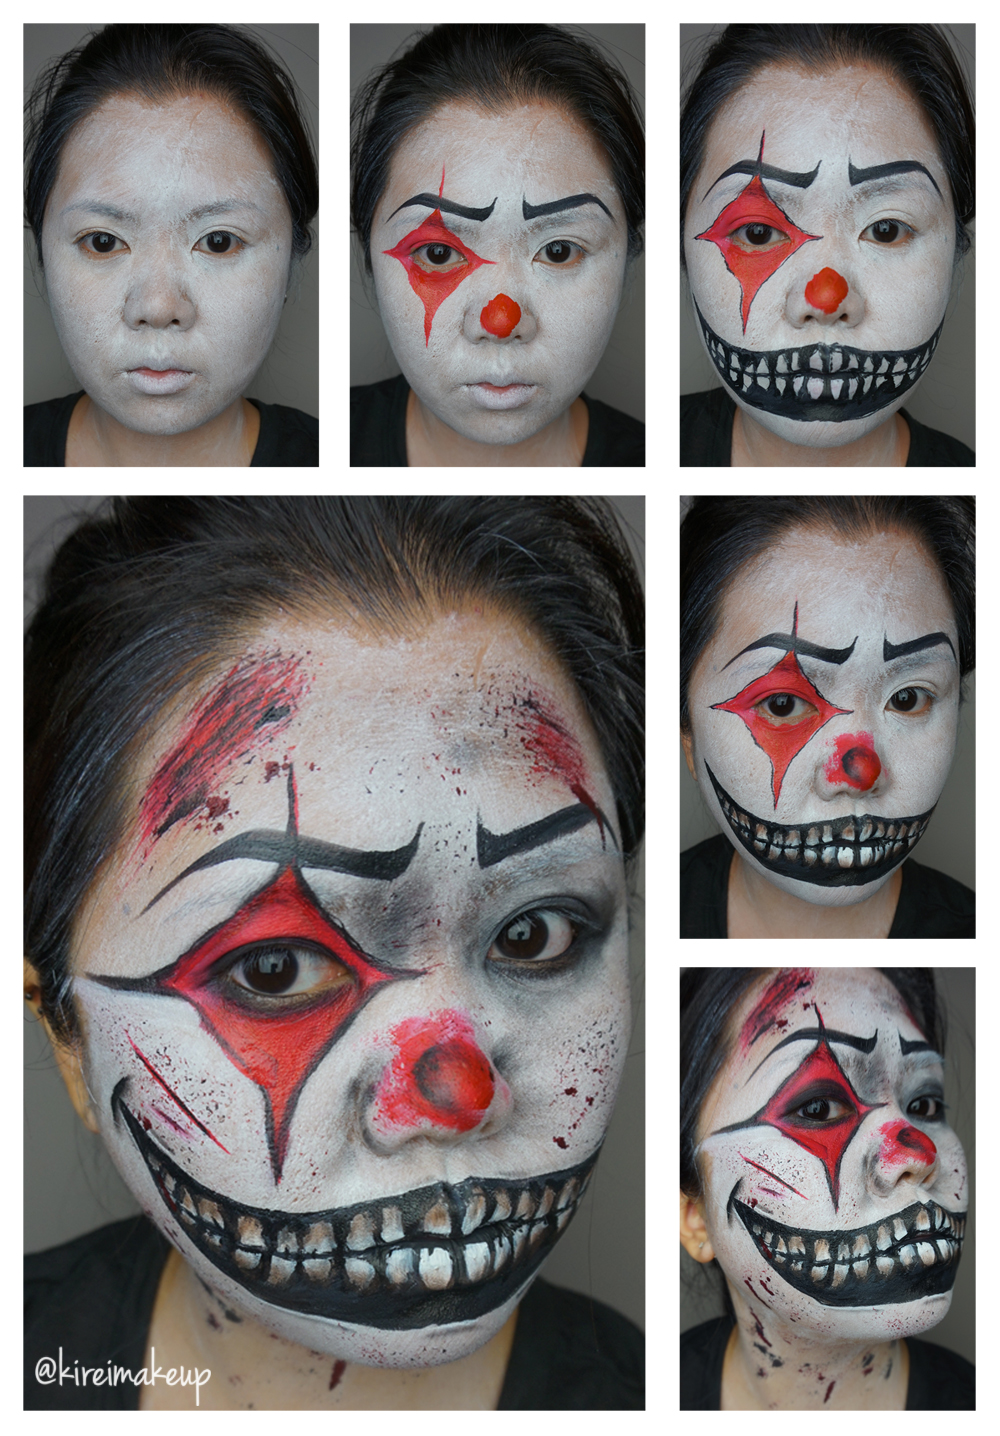
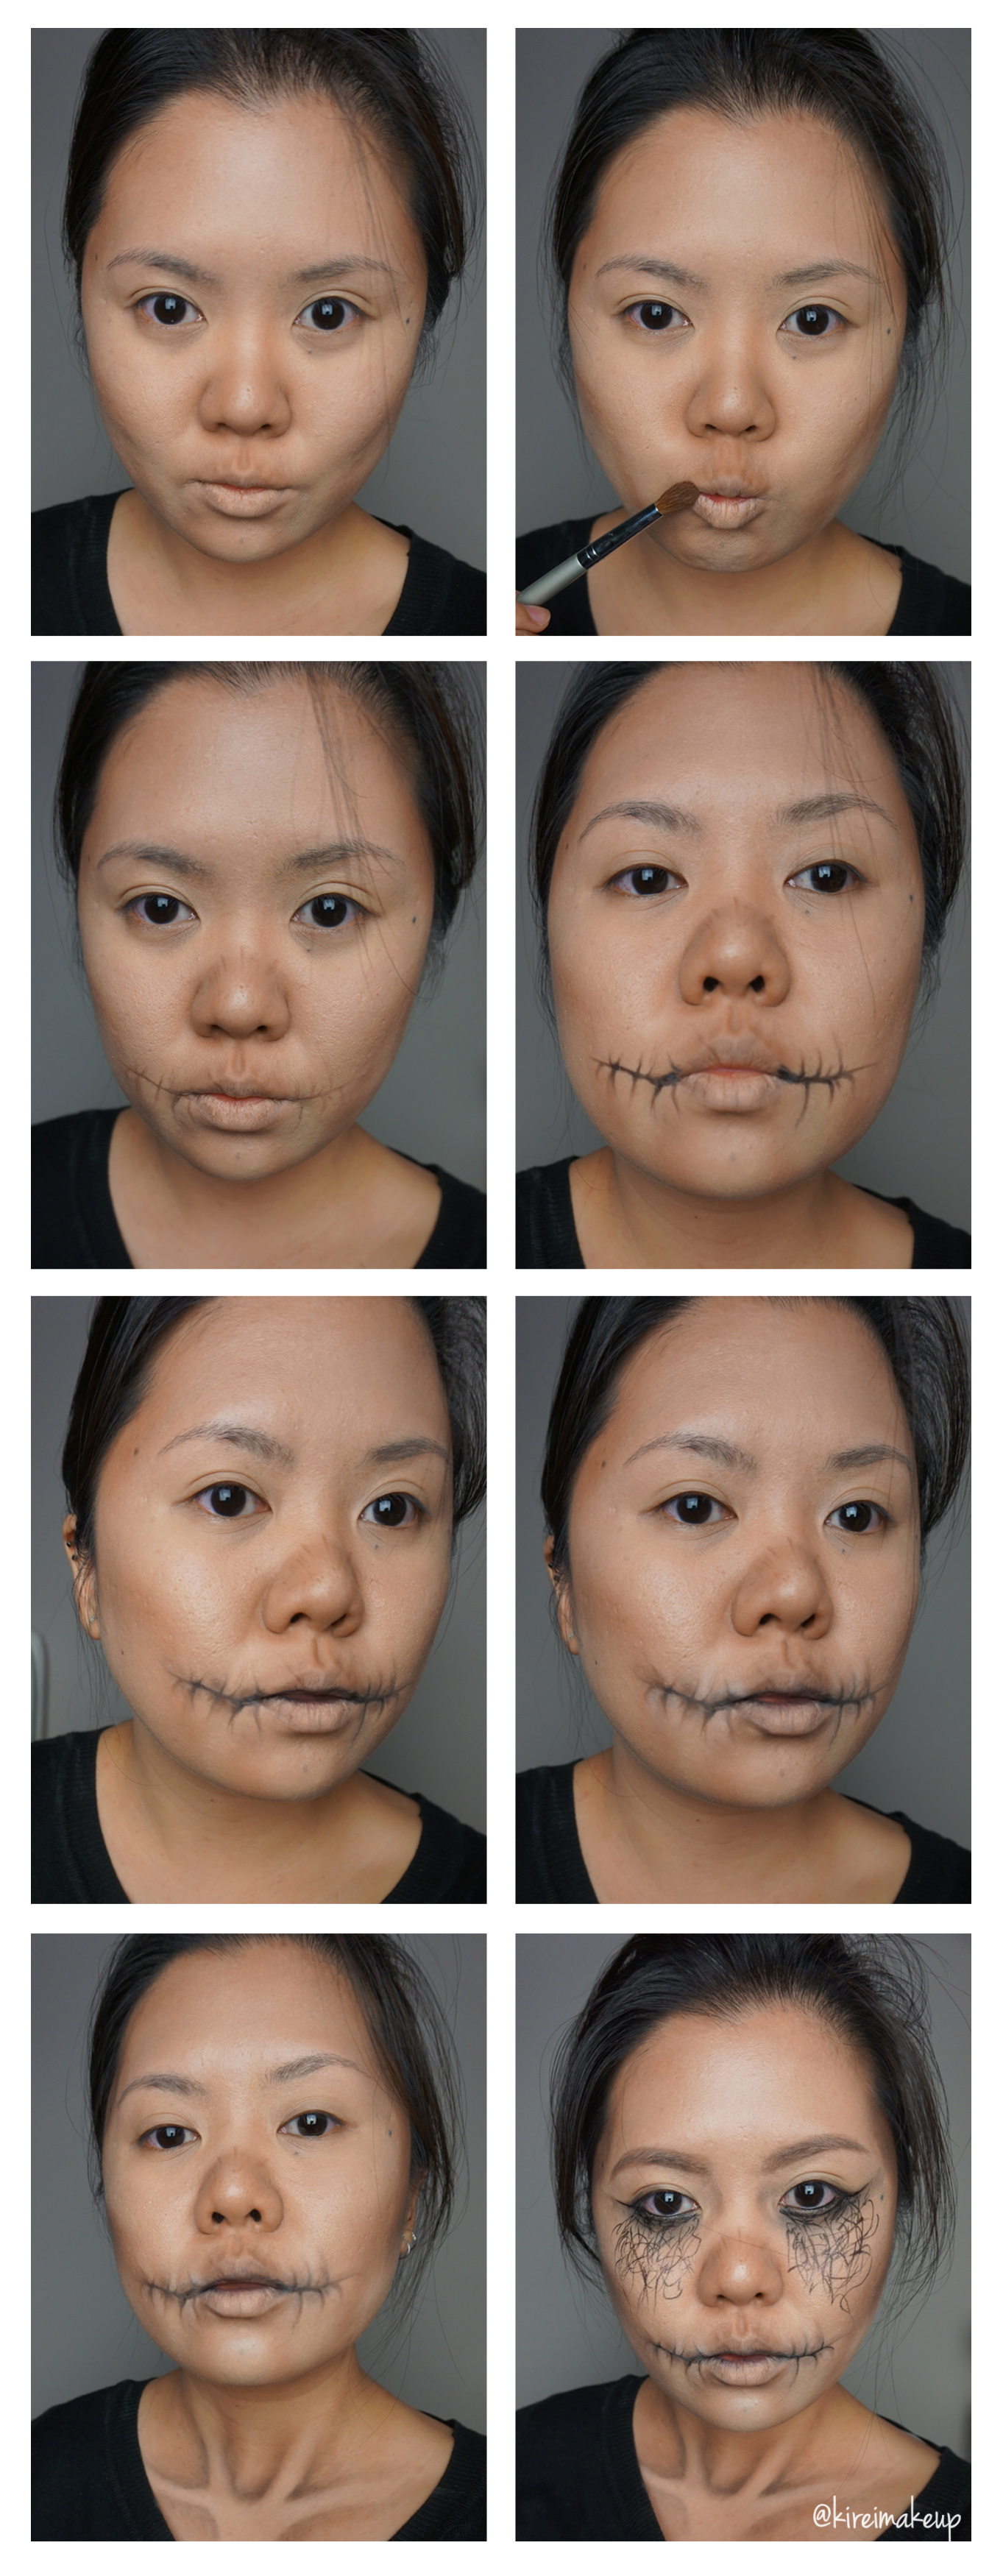
How-to:
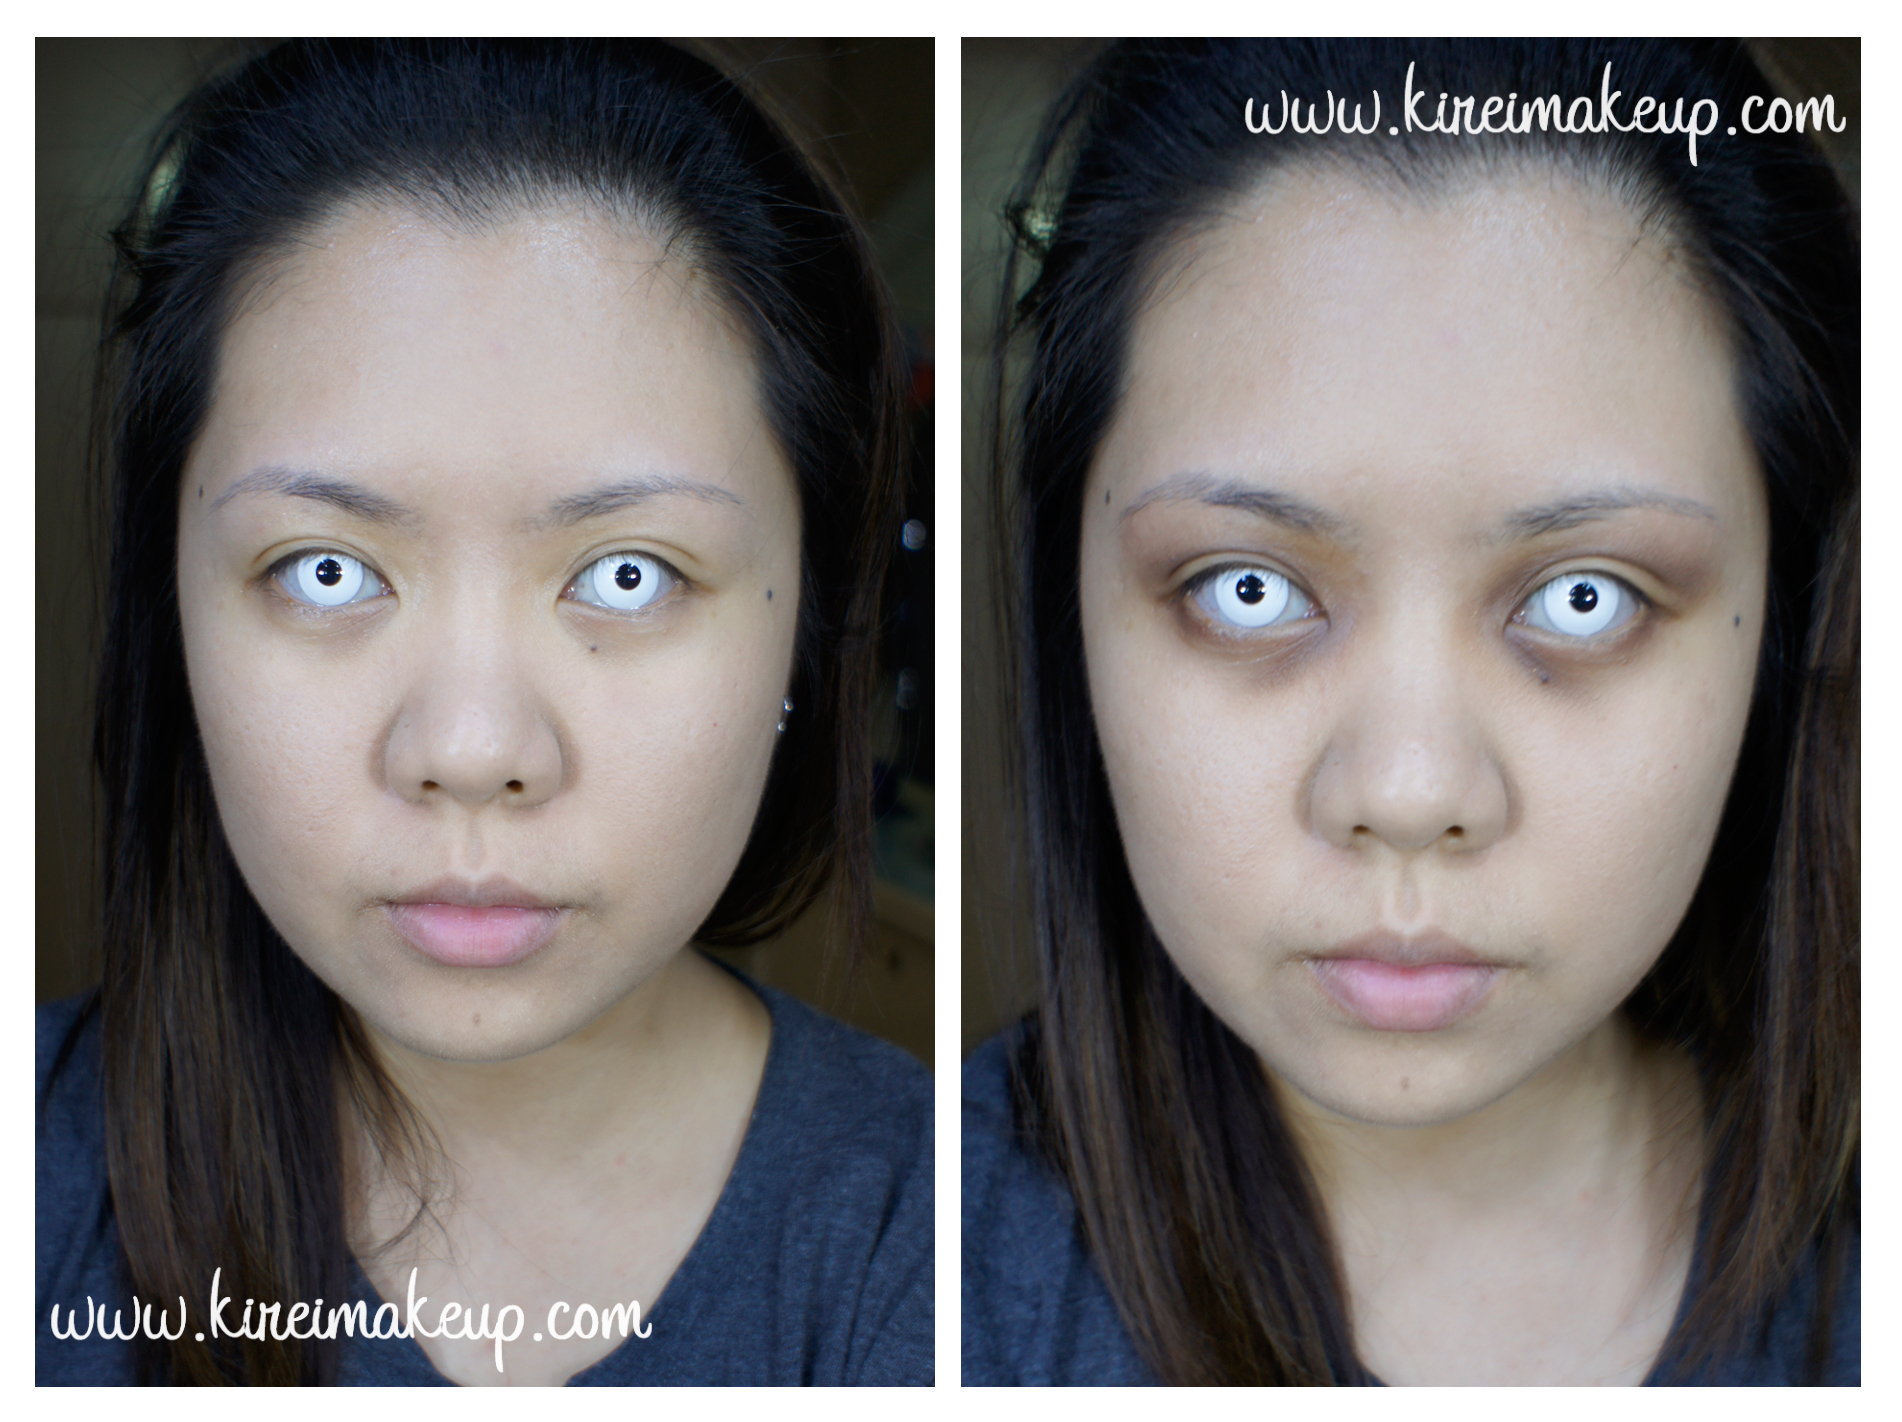
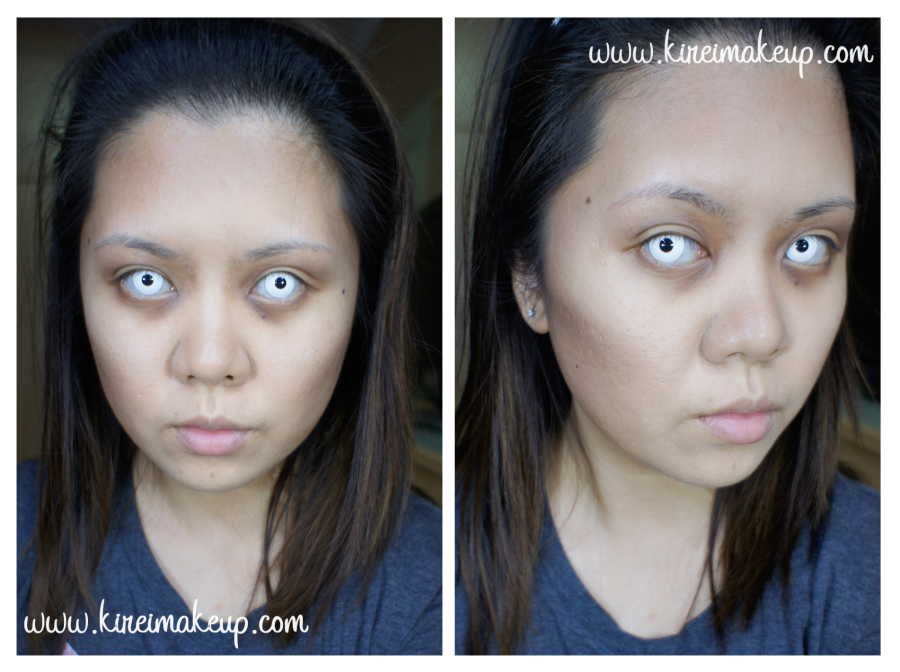
1. I applied a matte foundation all over my face using a Sigma Kabuki Angled brush.
- I used a matte foundation since I want to look very matte and sickly.
- You can even apply a lighter colored foundation if you prefer to look even paler.
2. I set my foundation using a loose transparent powder and a powder brush.
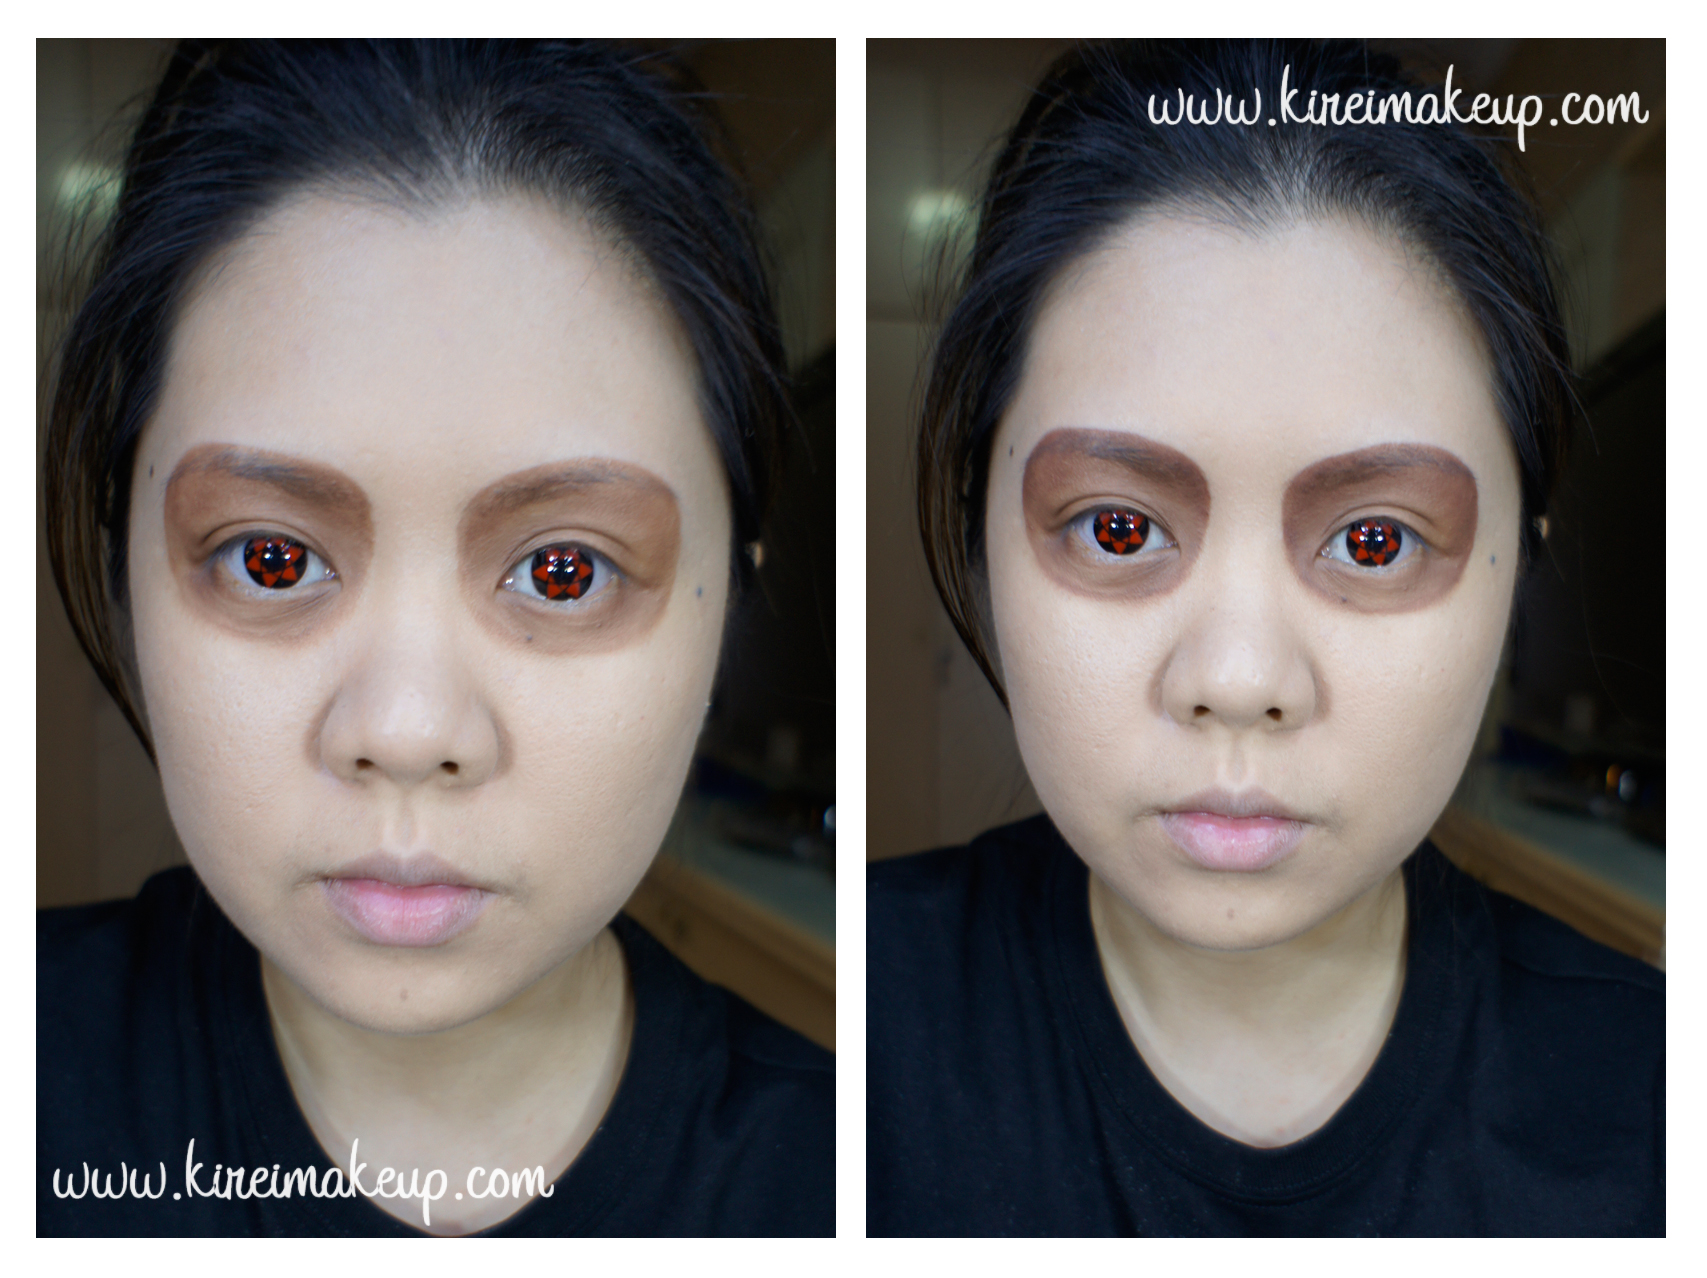
3. Using a blending brush, I mixed light and dark brown eyeshadow and applied it under my eyes, around the inner part of the eye socket, along the lower lash line, and on the crease. The idea is to make the eyes look sunken in since you’re infected with the virus and sick.
4. I added a mix of purple and grey eyeshadow on top of the brown eyeshadow to create more depth.
- The reason why you need a purple and grey eyeshadow is because under your skin you have blood vessels, which aren’t getting enough oxygen due to the virus (or you being sick).
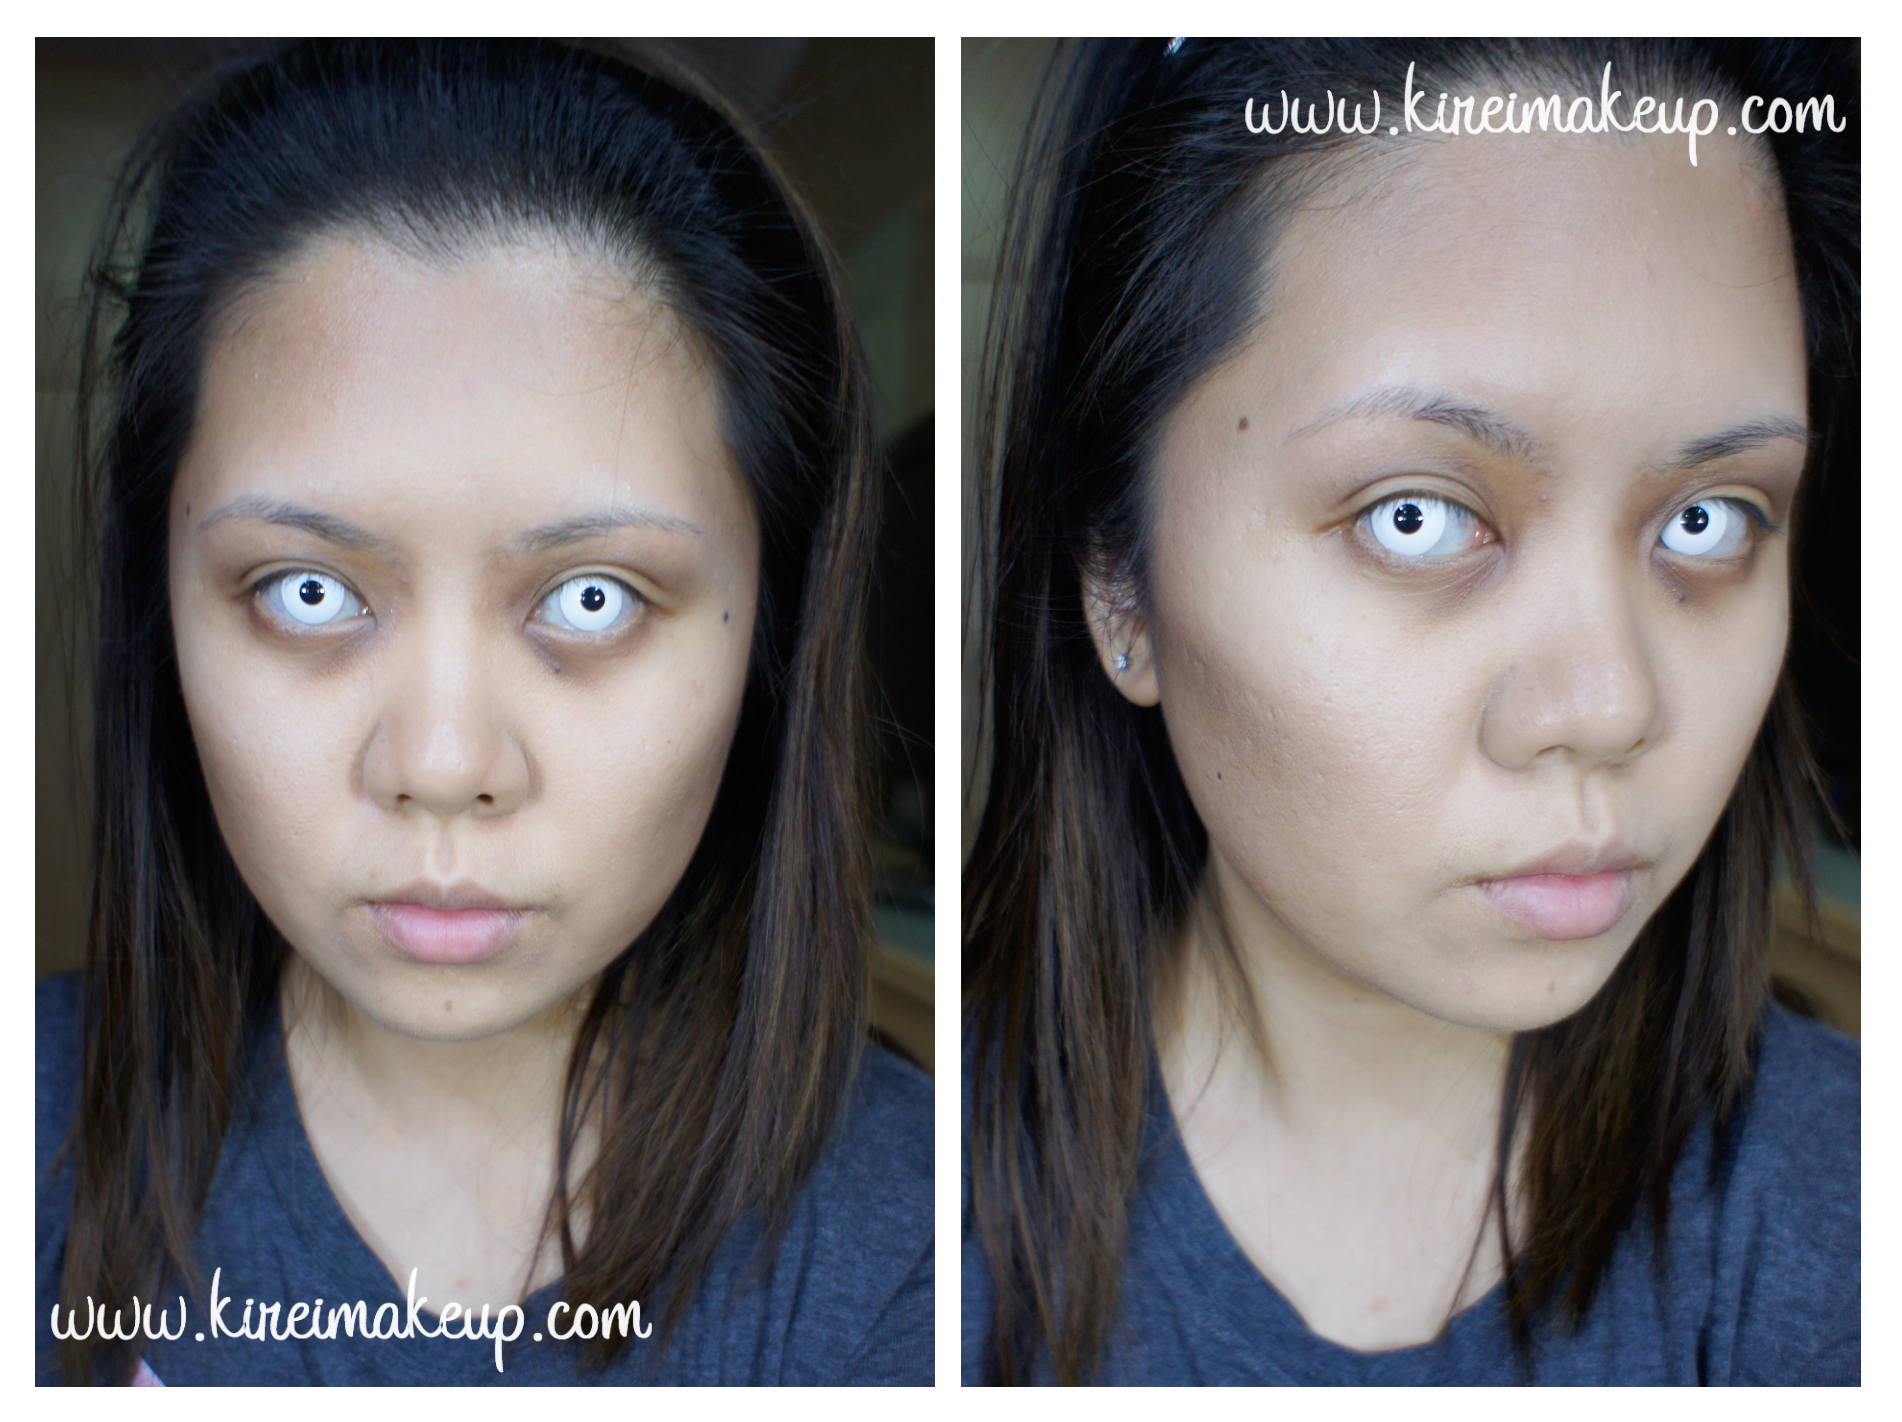
- So, those vessels on my skin will look purplish, while on others they might look more on the blue end.
- How you find out if you have purple or blue vessels? Take a look at your wrist and see if you have a bluish vein or a purplish one.
5. Using an angled face contour brush, I applied a mixture of dark brown and grey eyeshadow on the hollows of my cheeks to make my cheeks look sunken in.
- I blended the contour down to make my cheeks look even more sunken in.
6. I also applied some of the same powder along my temples and sides of my nose.
7. Using a flat eyeshadow brush, I applied a mixture of the light and dark brown eyeshadow on the folds of my cheeks.
- You can skip this step altogether if you don’t feel like doing it.
- I did it because I wanted to create an even more eerie feeling to the whole look.
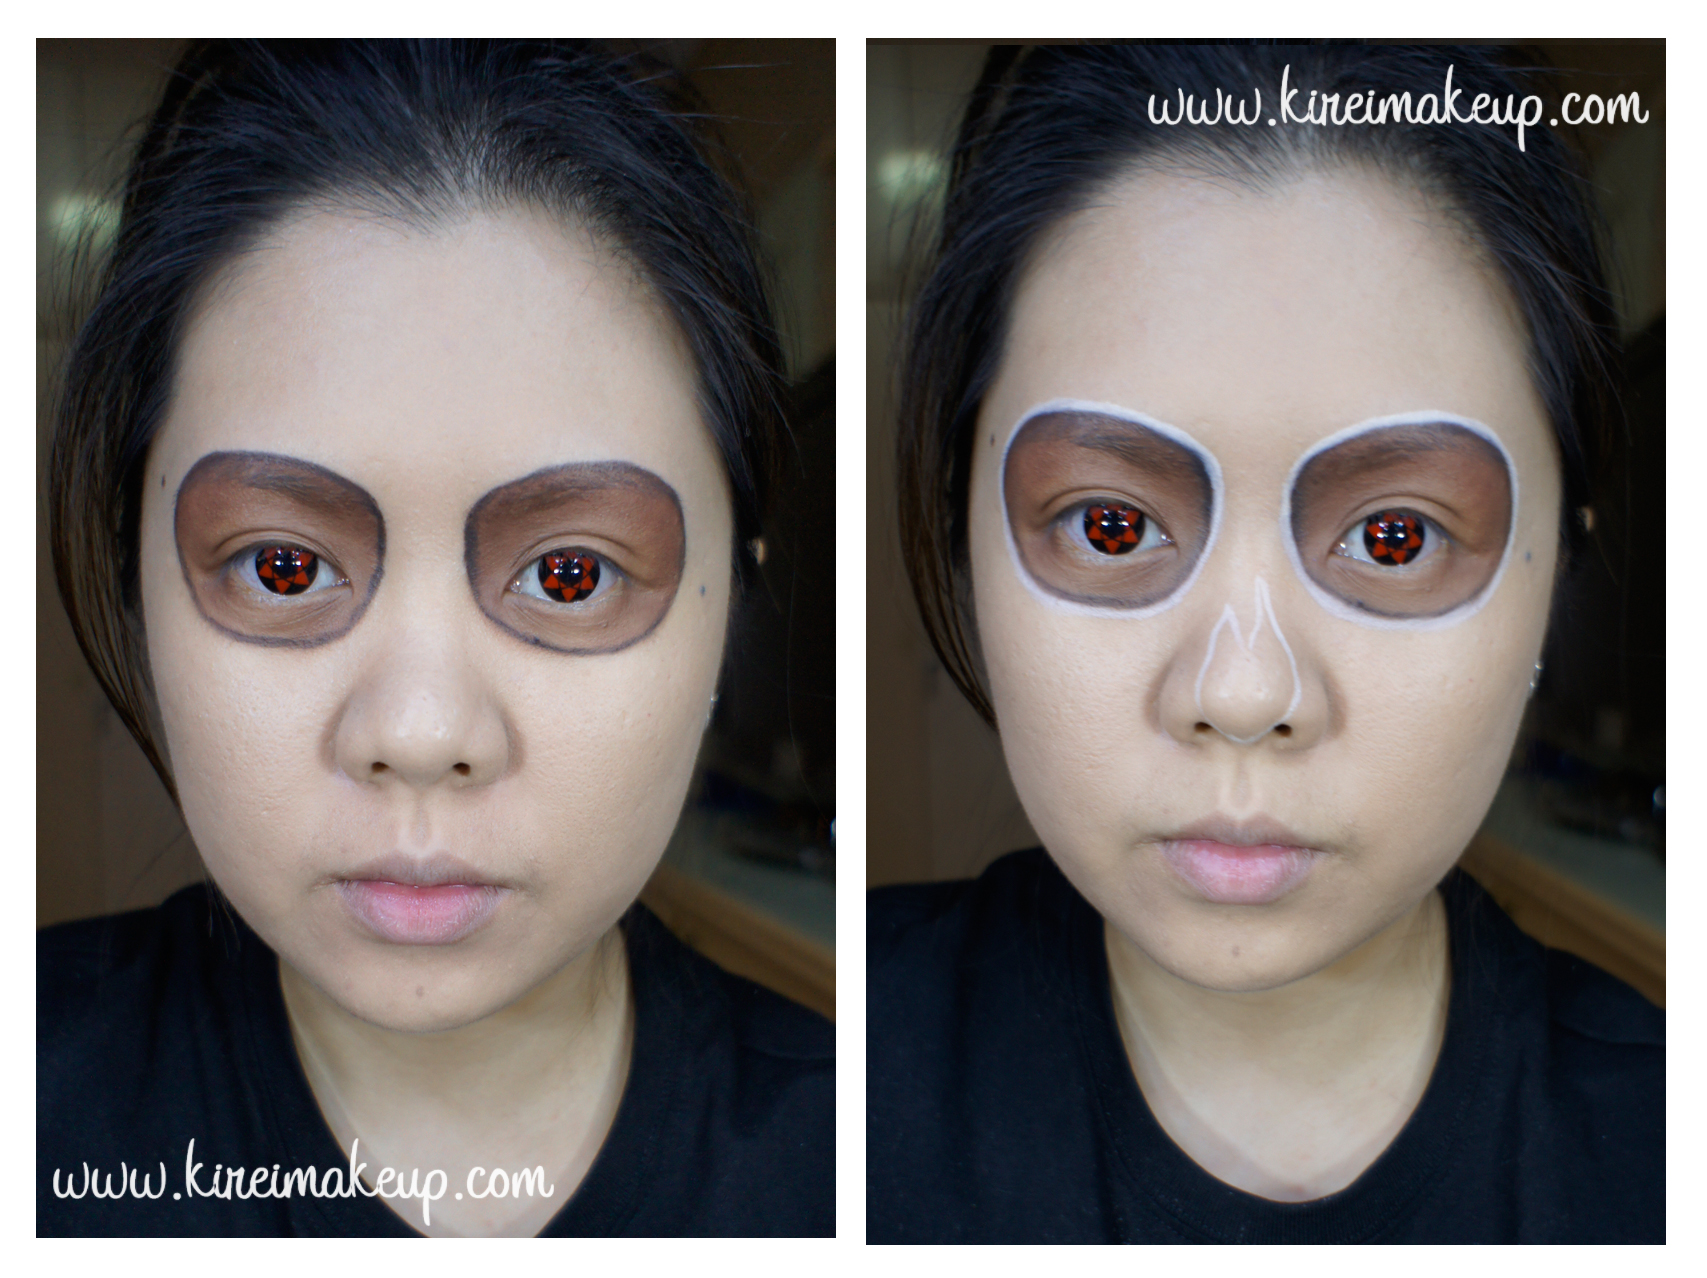
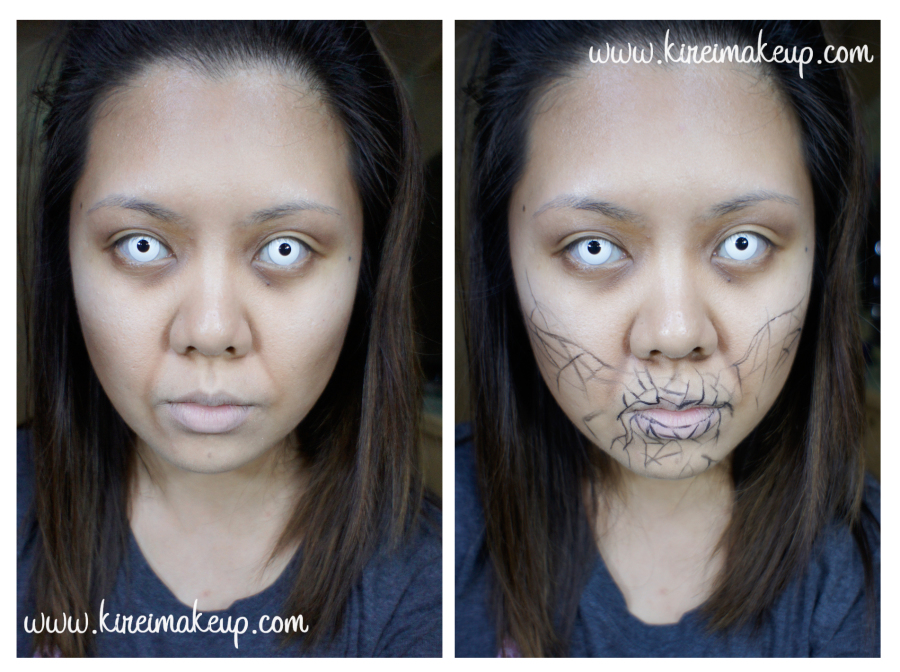
8. Using the pictures I found on the Tardis Wiki and Bleeding Cool, I created the outlines of the cracked skin using a black face paint and eyeliner brush.
9. I filled in my lips with black face paint and a lip brush.
10. I used the same dark brown eyeshadow as I’ve used in the previous steps to darken the edge of the lines.
- While applying the eyeshadow, I keep in mind how to make these lines look deeper and sunken in.
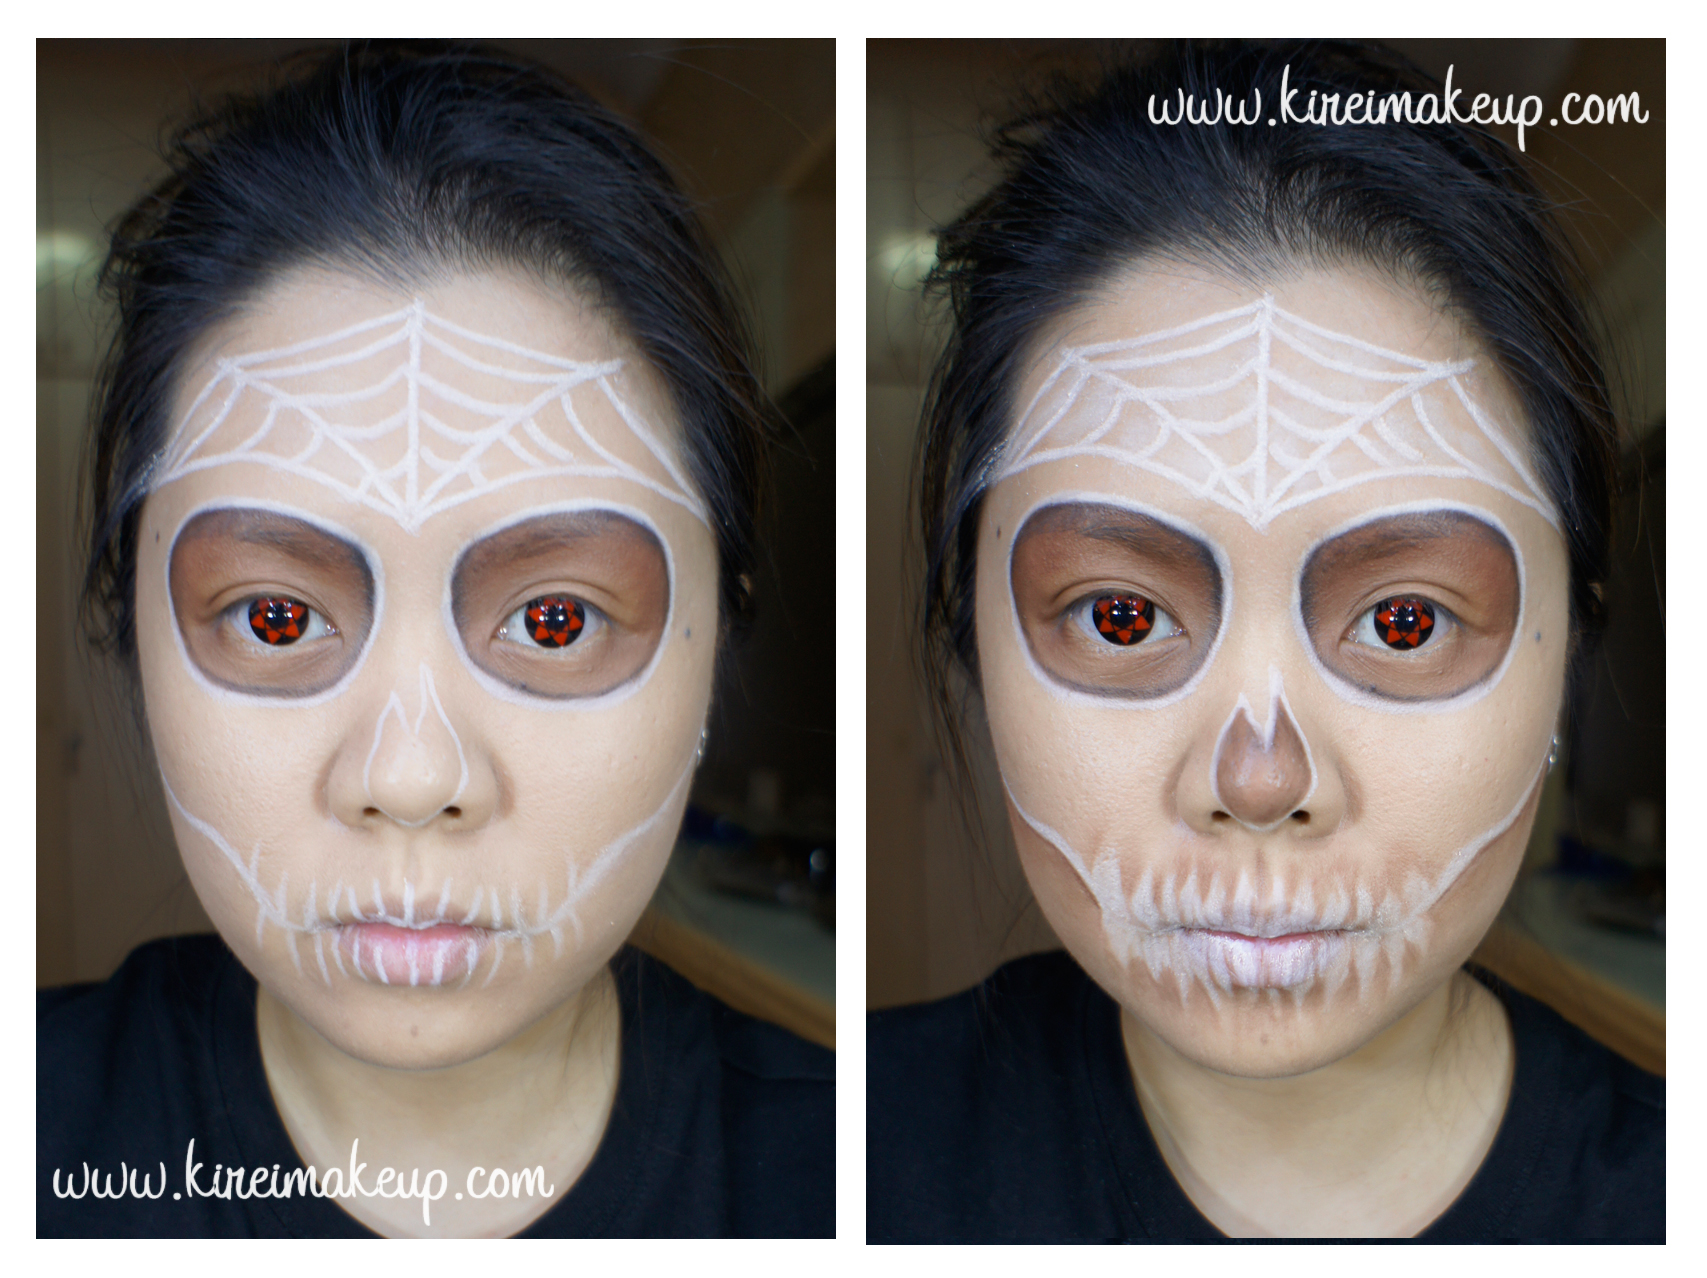
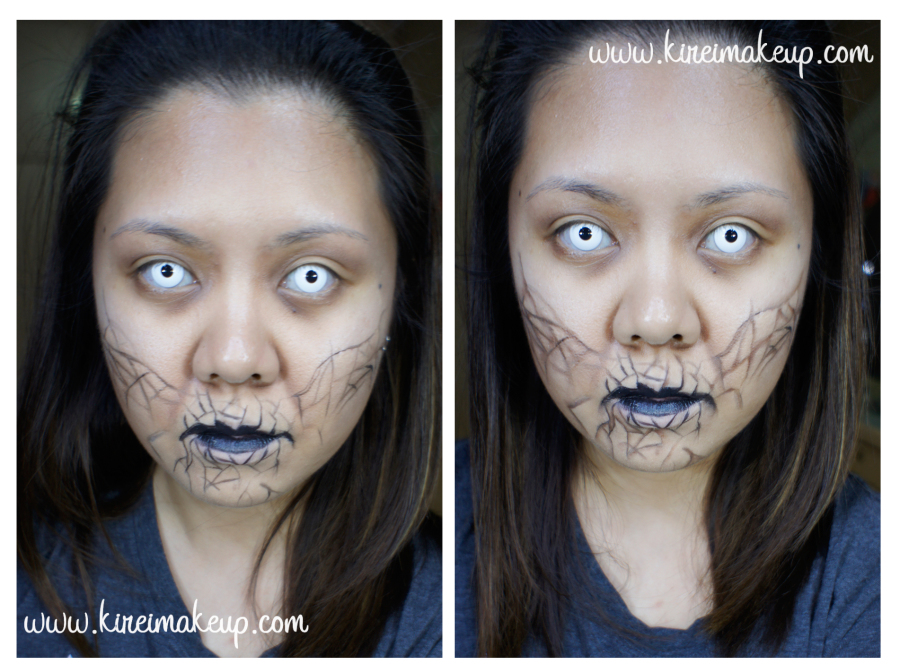
11. Using a liquid eyeliner pen, I deepened the cracks by tracing the lines from step no. 8.
- On some part of the cracks, I even colored some bits and pieces black altogether so I can create an illusion of depth.
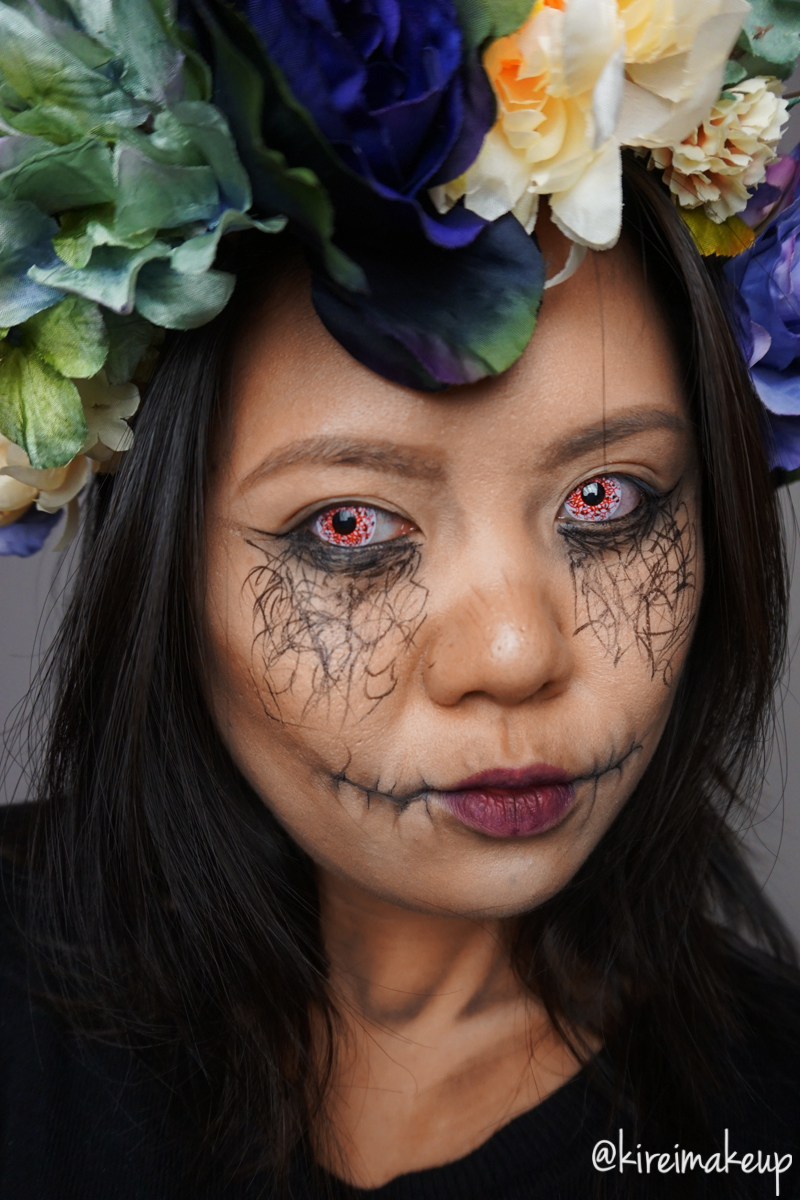
12. Lastly, I highlighted some part of the skin to make it look like it’s popping out from the face, and to make the lines look even deeper.
- I used a light colored cream concealer for this and a pencil brush.
Products used
- Foundation – MUFE HD Foundation.
- Setting powder – Cinema Secret loose powder (transparent)
- Shadows for eyes and face – The Balm Meet Matt(e) Nude palette.
- Light Brown – Matt Rosen
- Dark Brown – Matte Wood
- Purple – Matt Hung
- Grey – Matt Johnson
- Lines – Snazaaro Black Face Paint; Shu Uemura Calligraphy Ink eyeliner pen.
- Highlight – Motives Sculpt Palette in Ice (the lightest shade).
- Lips – Snazaroo black face paint.
*Don’t forget to check out my other Halloween tutorials!*